Installing Your Bed Rail
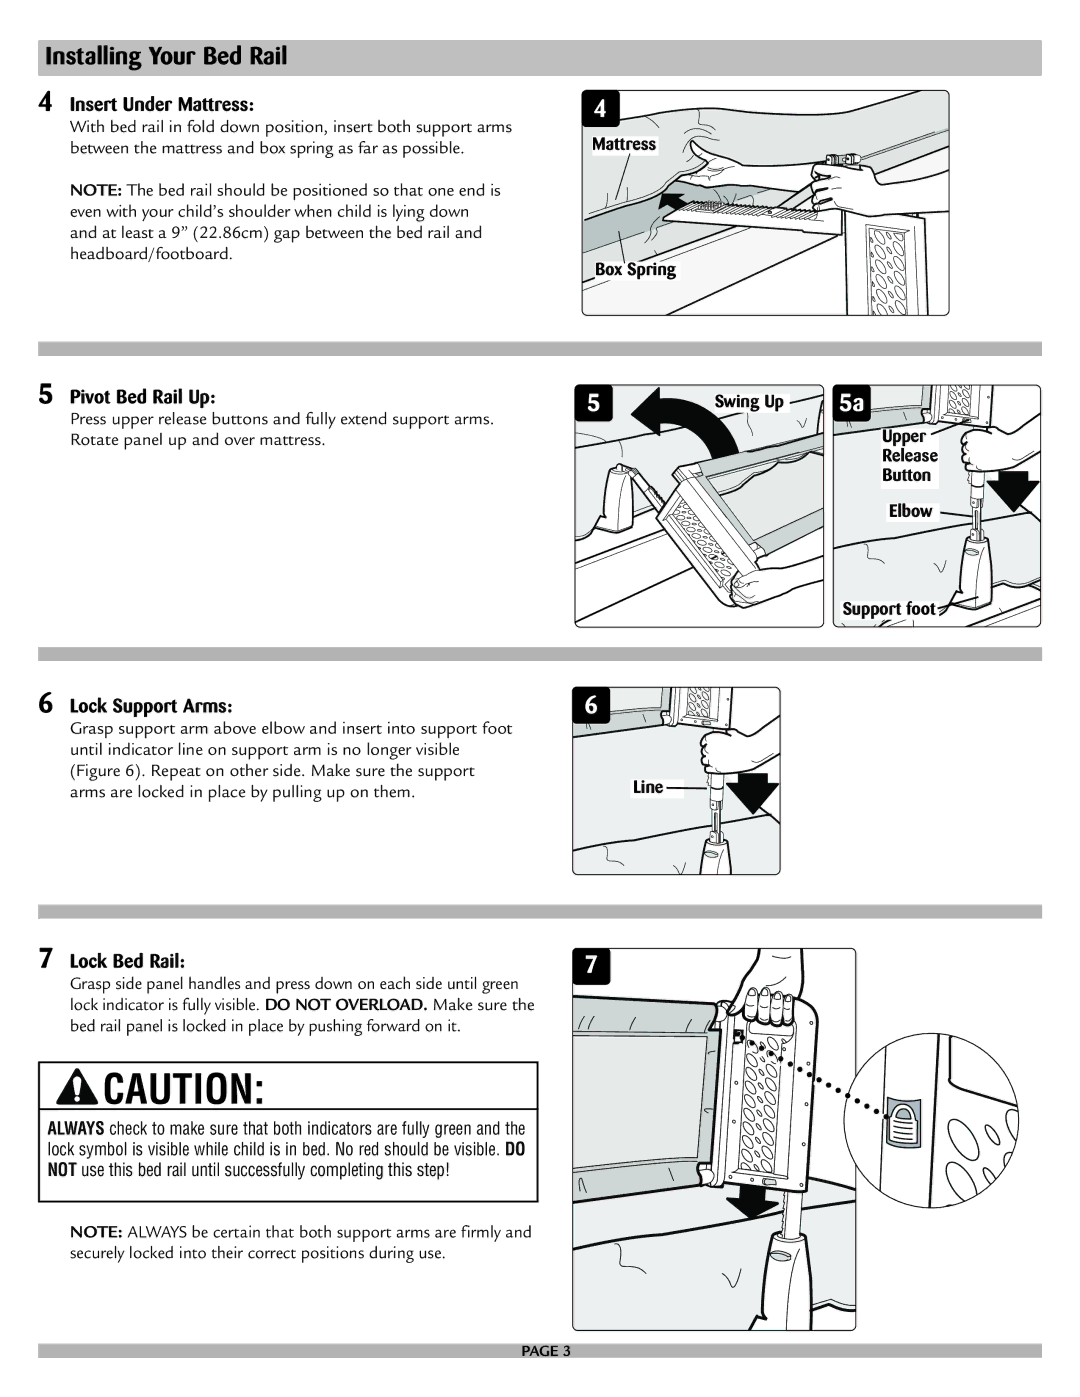
4 Insert Under Mattress:
With bed rail in fold down position, insert both support arms between the mattress and box spring as far as possible.
NOTE: The bed rail should be positioned so that one end is even with your child’s shoulder when child is lying down and at least a 9” (22.86cm) gap between the bed rail and headboard/footboard.
4
Mattress
Box Spring
5 Pivot Bed Rail Up: | 5 | Swing Up | 5a |
Press upper release buttons and fully extend support arms.
Rotate panel up and over mattress.
Upper ![]()
Release
Button
Elbow ![]()
![]()
Support foot ![]()
6 Lock Support Arms: | 6 |
Grasp support arm above elbow and insert into support foot |
|
until indicator line on support arm is no longer visible |
|
(Figure 6). Repeat on other side. Make sure the support | Line |
arms are locked in place by pulling up on them. |
7 Lock Bed Rail: | 7 |
Grasp side panel handles and press down on each side until green lock indicator is fully visible. DO NOT OVERLOAD. Make sure the bed rail panel is locked in place by pushing forward on it.
![]() CAUTION:
CAUTION:
ALWAYS check to make sure that both indicators are fully green and the lock symbol is visible while child is in bed. No red should be visible. DO NOT use this bed rail until successfully completing this step!
NOTE: ALWAYS be certain that both support arms are firmly and securely locked into their correct positions during use.
PAGE 3