Setting Up and Using Your Hartke KM60 and KM100 Keyboard Amplifier
KM200 Basic Operation
Setting up your Hartke KM60 or Km100 Keyboard amplifier is a simple procedure which takes only a few minutes:
1. Remove all packing materials (save them in case of need for future service) and decide where the amplifier is to be physically placed. To avoid potential overheating problems, be sure that the rear panel is unobstructed and that there is good ventilation around the entire unit.
2. Connect the
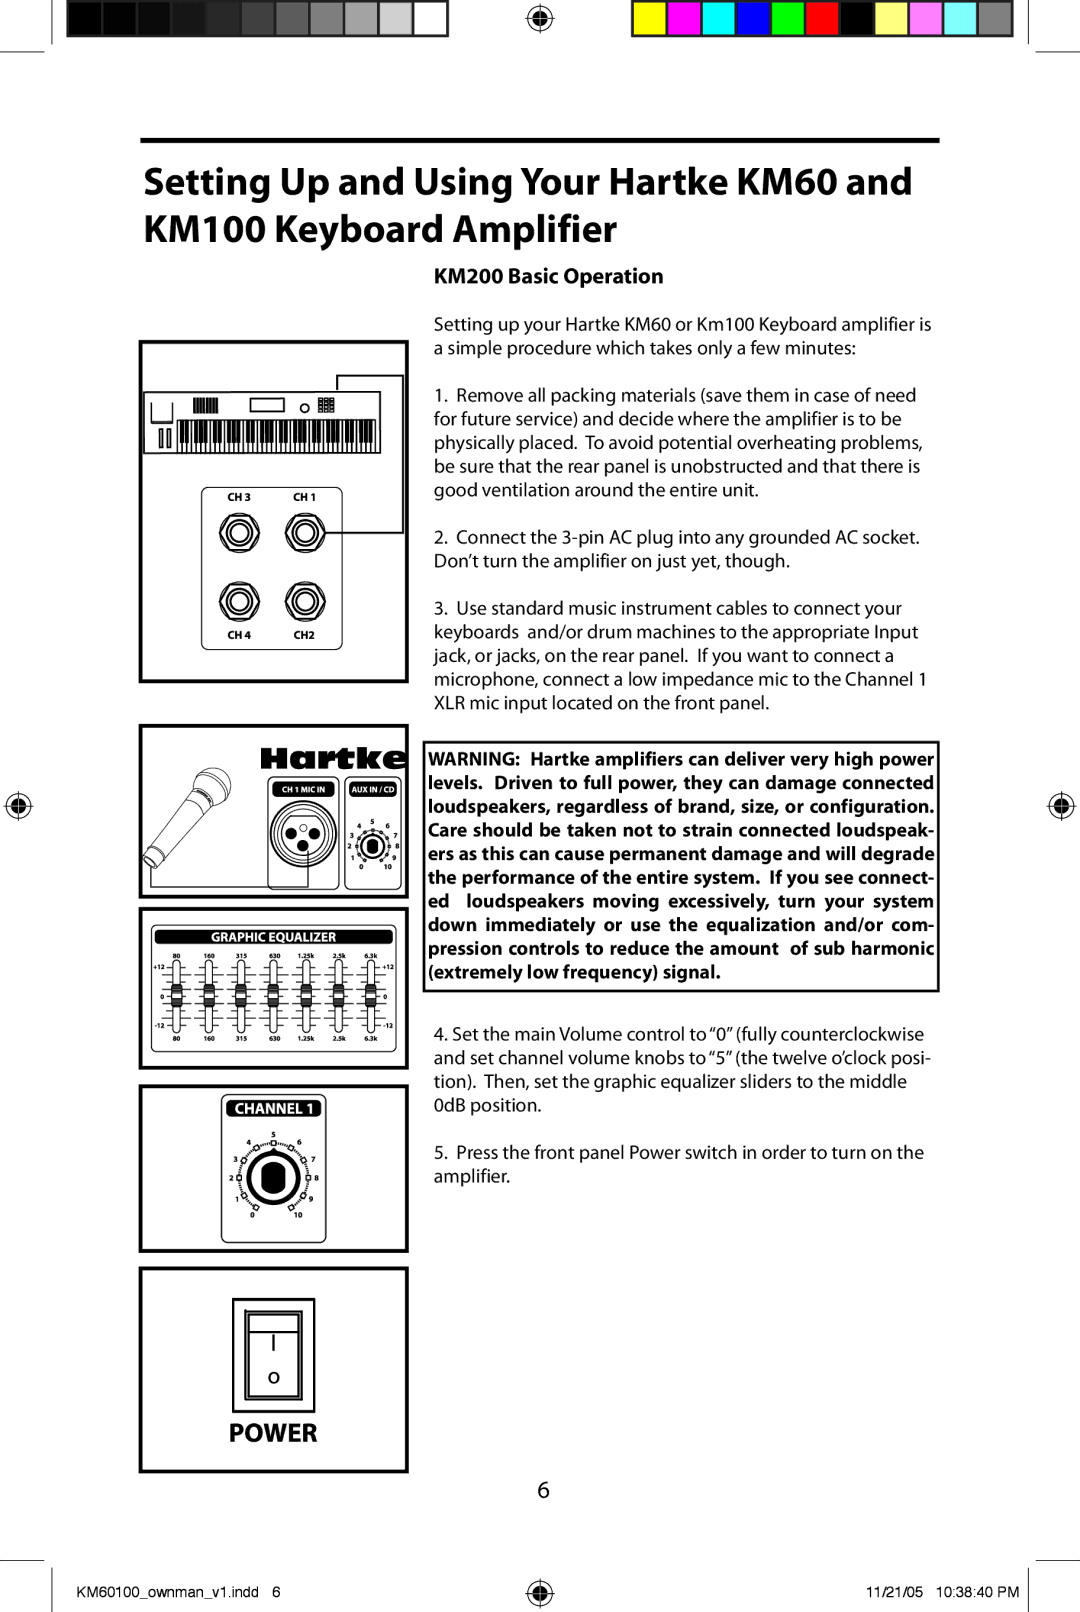
3. Use standard music instrument cables to connect your keyboards and/or drum machines to the appropriate Input jack, or jacks, on the rear panel. If you want to connect a microphone, connect a low impedance mic to the Channel 1 XLR mic input located on the front panel.
WARNING: Hartke amplifiers can deliver very high power levels. Driven to full power, they can damage connected loudspeakers, regardless of brand, size, or configuration. Care should be taken not to strain connected loudspeak- ers as this can cause permanent damage and will degrade the performance of the entire system. If you see connect- ed loudspeakers moving excessively, turn your system down immediately or use the equalization and/or com- pression controls to reduce the amount of sub harmonic (extremely low frequency) signal.
4. Set the main Volume control to “0” (fully counterclockwise and set channel volume knobs to “5” (the twelve o’clock posi- tion). Then, set the graphic equalizer sliders to the middle 0dB position.
5. Press the front panel Power switch in order to turn on the amplifier.
6
KM60100_ownman_v1.indd 6
11/21/05 10:38:40 PM ![]()
