QUICK START GUIDE
Welcome to your new Smart TV!
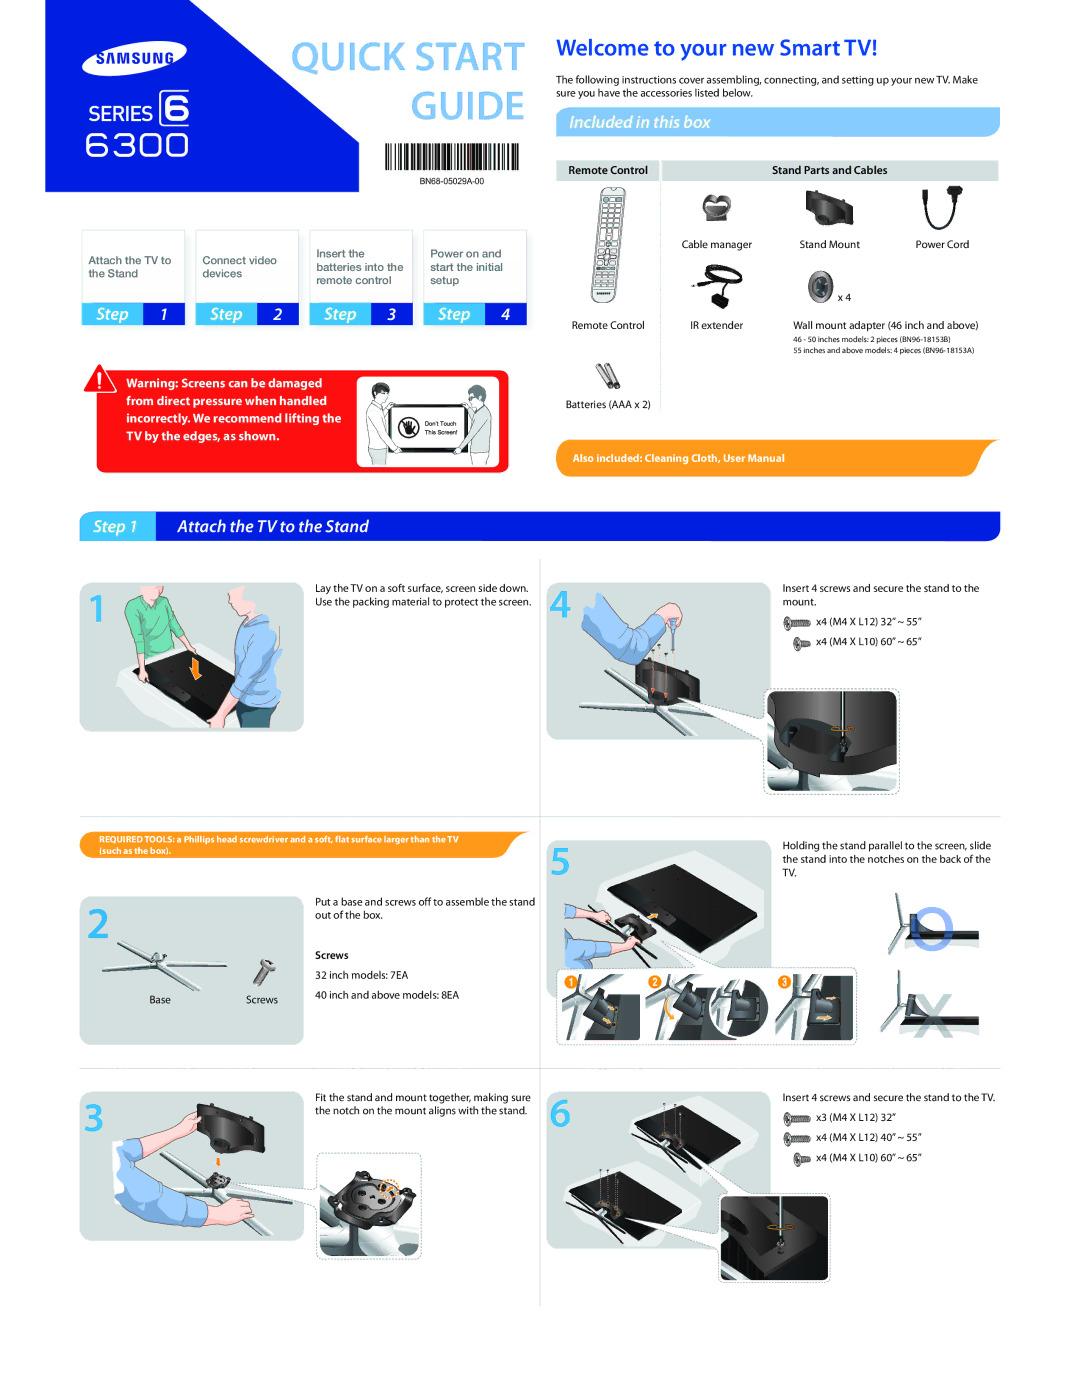
The following instructions cover assembling, connecting, and setting up your new TV. Make sure you have the accessories listed below.
Included in this box
Remote Control
|
|
| ||
Attach the TV to | Connect video | Insert the | Power on and | |
batteries into the | start the initial | |||
the Stand | devices | |||
remote control | setup | |||
|
|
Step 1 Step 2 Step 3 Step 4
Remote Control
Stand Parts and Cables
Cable manager | Stand Mount | Power Cord |
| x 4 |
|
IR extender | Wall mount adapter (46 inch and above) | |
| 46 - 50 inches models: 2 pieces | |
| 55 inches and above models: 4 pieces | |
Warning: Screens can be damaged from direct pressure when handled incorrectly. We recommend lifting the TV by the edges, as shown.
Batteries (AAA x 2)
Also included: Cleaning Cloth, User Manual
Step 1 | Attach the TV to the Stand |
|
|
|
1 | Lay the TV on a soft surface, screen side down. | 4 | Insert 4 screws and secure the stand to the | |
Use the packing material to protect the screen. | mount.x4 | (M4 X L12) 32” ~ 55” | ||
|
|
| x4 | (M4 X L10) 60” ~ 65” |
REQUIRED TOOLS: a Phillips head screwdriver and a soft, flat surface larger than the TV
(such as the box).5Holding the stand parallel to the screen, slide the stand into the notches on the back of the
TV.
Put a base and screws off to assemble the stand
2 | out of the box. |
|
|
| Screws |
|
| 32 inch models: 7EA |
Base | Screws | 40 inch and above models: 8EA |
|
Fit the stand and mount together, making sure
3 | the notch on the mount aligns with the stand. |
|
1 | 2 | 3 |
6 | Insert 4 screws and secure the stand to the TV. | |||
x3 | (M4 X L12) | 32” | ||
| ||||
| x4 | (M4 X L12) | 40” ~ 55” | |
| x4 | (M4 X L10) | 60” ~ 65” | |