•Make sure the indoor unit is in upright position when you pour water to check for leakage.
Make sure that the water does not overflow onto the electrical part.
Installing and connecting the drain hose of the outdoor unit
While heating, ice may accumulate. During the process of defrosting, check if condensation draining is adequate. For adequate draining, do the following:
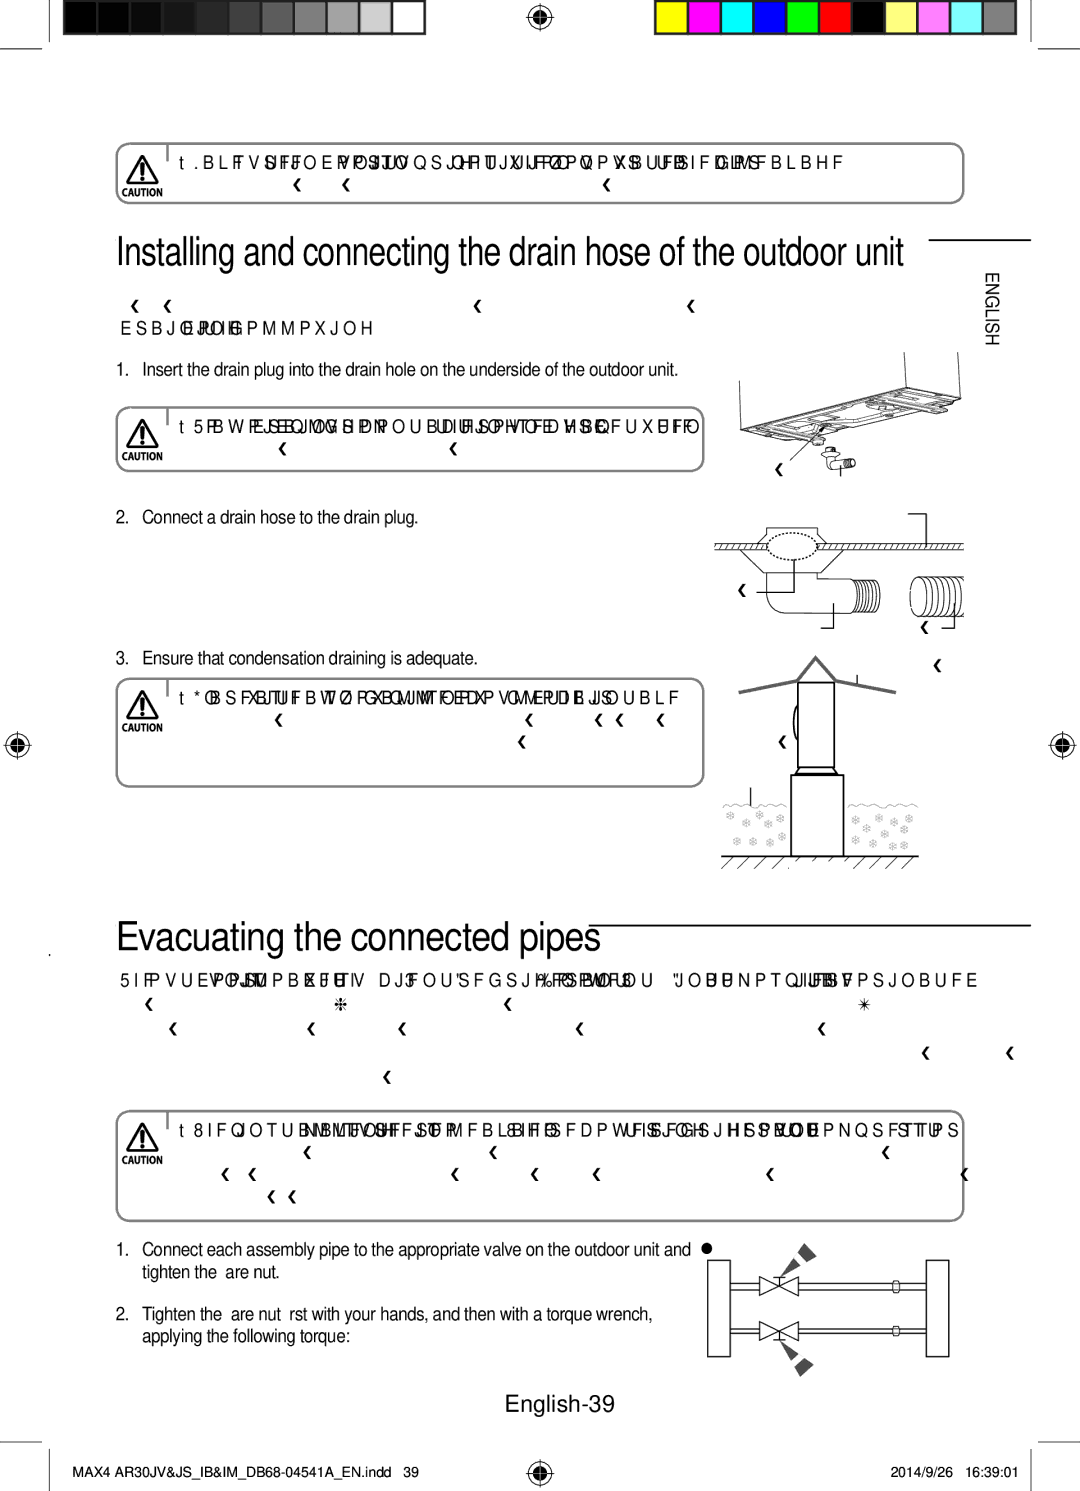
1. Insert the drain plug into the drain hole on the underside of the outdoor unit.
• To avoid drain plug from contacting the ground, secure gap between the ground and the bottom surface of the outdoor unit.
| Drain hole | Drain plug | |
|
| ||
2. Connect a drain hose to the drain plug. | Bottom surface of outdoor unit | ||
| Drain hole |
| |
| Drain plug | Drain hose | |
3. Ensure that condensation draining is adequate. |
| ||
|
| ||
• In areas with heavy snow fall, piled snow could block the air intake. |
|
| |
To avoid this incident, install a frame that is higher than estimated snow |
|
| |
fall. In addition, install a |
| ||
outdoor unit. | Estimated |
| |
snow fall Frame | |||
| |||
| Ground | ||
Evacuating the connected pipes
The outdoor unit is loaded with sufficient
greenhouse gas, covered by Kyoto Protocol, with a Global Warming Potential (GWP) = 1975.
You should evacuate the air in the indoor unit and in the pipe. If air remains in the refrigerant pipes, it affects the compressor. It may cause reduction of cooling capacity and malfunction. Refrigerant for air evacuating is not charged in the outdoor unit. Use Vacuum Pump as seen in the picture.
• When installing, make sure there is no leakage. When recovering the refrigerant, ground the compressor first before removing the connection pipe. If the refrigerant pipe is not properly connected and the compressor works with the service valve open, the pipe inhales the air and it makes the pressure inside of the refrigerant cycle abnormally high. It may cause explosion and injury.
1. | Connect each assembly pipe to the appropriate valve on the outdoor unit and Outdoor unit | Indoor unit | |||||||||
| tighten the flare nut. |
|
|
|
|
|
| Gas pipe side |
|
| |
2. | Tighten the flare nut first with your hands, and then with a torque wrench, |
|
|
|
|
|
|
|
|
|
|
|
|
|
|
|
| Liquid pipe side |
|
| |||
| applying the following torque: |
|
|
|
|
|
|
|
|
|
|
|
|
|
|
|
|
|
|
|
|
| |
|
|
|
|
|
|
|
|
|
|
|
|
ENGLISH
English-39
MAX4 AR30JV&JS_IB&IM_DB68-04541A_EN.indd 39
2014/9/26 16:39:01