S56A_UI_ENG_EU 8/30/03 10:47 AM Page 18
Skipping Unwanted Channels
ENG
|
|
|
|
|
|
|
| Channel |
|
| Auto Store | √ |
| |
| Manual Store | √ |
| |
| Name |
| √ |
|
| Add/Erase | √ |
| |
| Fine Tune | √ |
| |
| Sort |
| √ |
|
|
|
|
|
|
|
|
|
| |
| Select | Enter | Exit |
|
|
|
|
|
|
|
|
|
| |
|
|
|
| |
|
|
| Channel |
|
| Add/Erase |
|
| |
| P 0 : Added |
|
| |
| P 1 : Added |
|
| |
| P 2 : Added |
|
| |
| P 3 : Added |
|
| |
|
|
|
|
|
|
|
|
| |
| Select | Adjust | Exit |
|
|
|
|
|
|
|
|
|
| |
|
|
|
|
|
|
|
| Channel |
|
|
|
|
|
|
Add/Erase
P 0 : Erased
P 1 : Added
P 2 : Added
P 3 : Added
Select | Adjust | Exit |
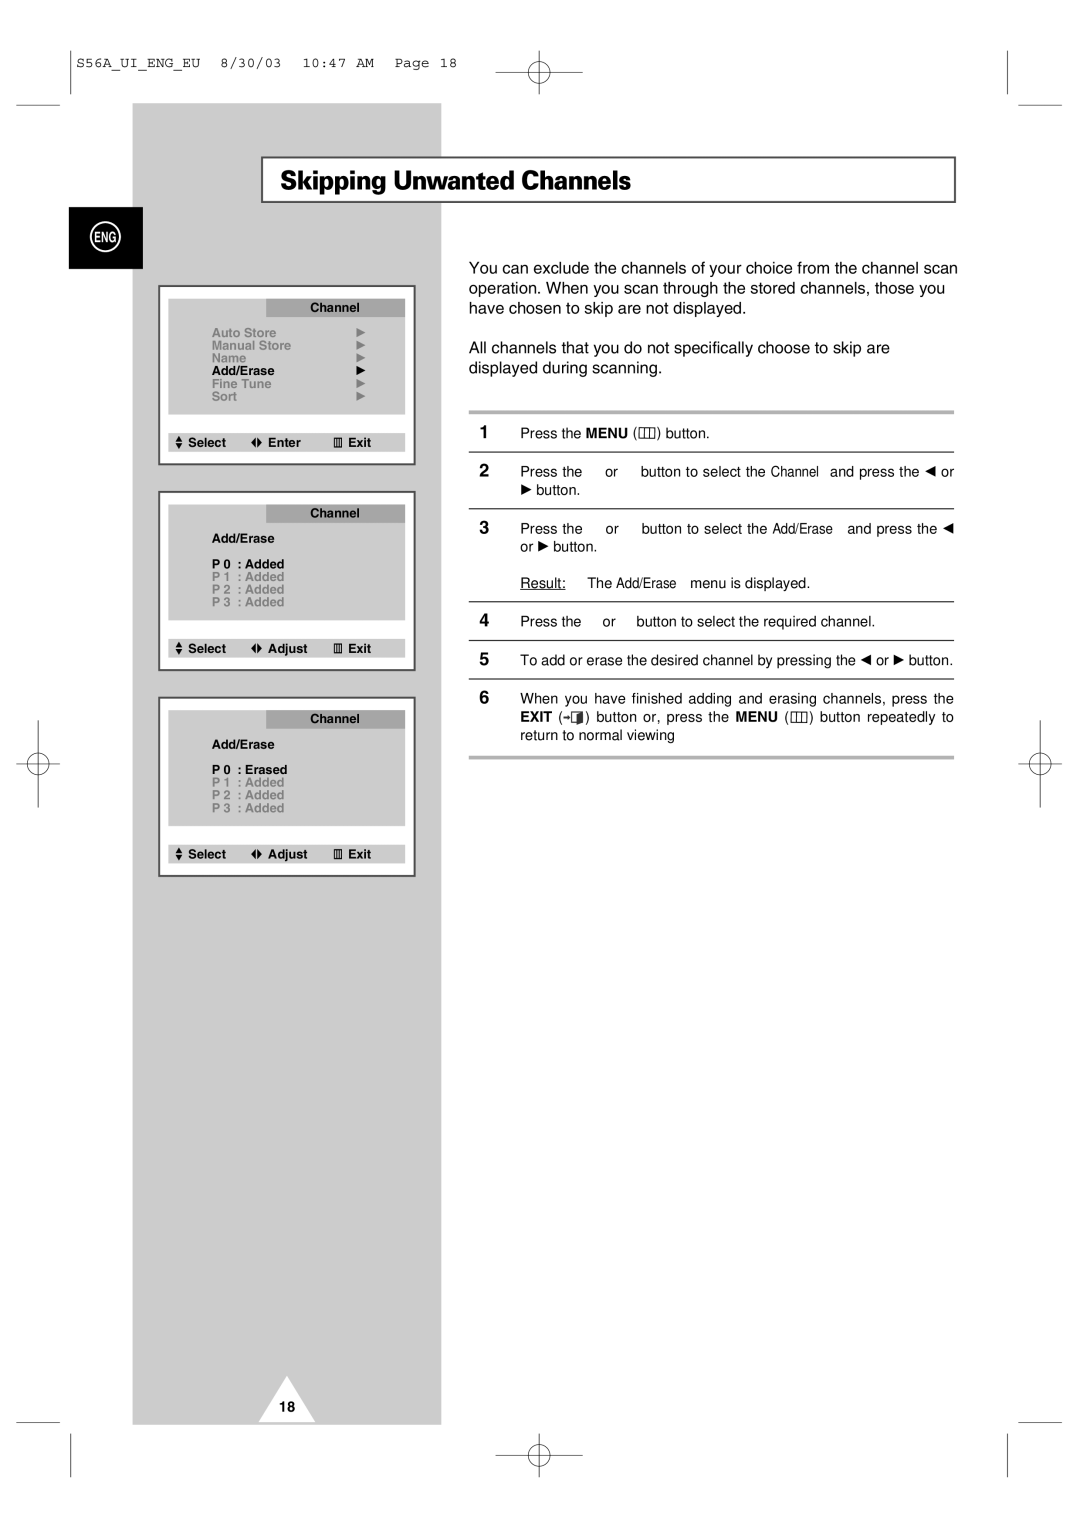
You can exclude the channels of your choice from the channel scan operation. When you scan through the stored channels, those you have chosen to skip are not displayed.
All channels that you do not specifically choose to skip are displayed during scanning.
1Press the MENU (![]() ) button.
) button.
2Press the ▲ or ▼ button to select the Channel and press the œ or √ button.
3Press the ▲ or ▼ button to select the Add/Erase and press the œ or √ button.
Result: The Add/Erase menu is displayed.
4Press the ▲ or ▼ button to select the required channel.
5To add or erase the desired channel by pressing the œ or √ button.
6When you have finished adding and erasing channels, press the
EXIT (![]()
![]() ) button or, press the MENU (
) button or, press the MENU (![]() ) button repeatedly to return to normal viewing
) button repeatedly to return to normal viewing
18
