To connect the Wireless Audio with Dock through a JBC (JukeBox Connect) Connection
1.Press the ![]() button on the top panel of the Wireless Audio with Dock repeatedly until the
button on the top panel of the Wireless Audio with Dock repeatedly until the ![]() or
or
![]() icon appears in the display.
icon appears in the display.
•Each time you press the button, the selection changes as follows :
![]() ;
;![]() ;
; ![]() ;
;![]() ;
;![]() ;
;![]() ; AUX (LED Off) The indicator changes from white to red and blinks.
; AUX (LED Off) The indicator changes from white to red and blinks.
2.Press and hold the WPS/RESET button on the back panel with a pen tip or similar item for more than 5 seconds. The indicator blinks in white once. Wait until the indicator blinks in white twice more, and then release the WPS/RESET button.
•The indicator blinks in red, and then stops blinking and glows in red when the unit accesses the Network Setting mode.
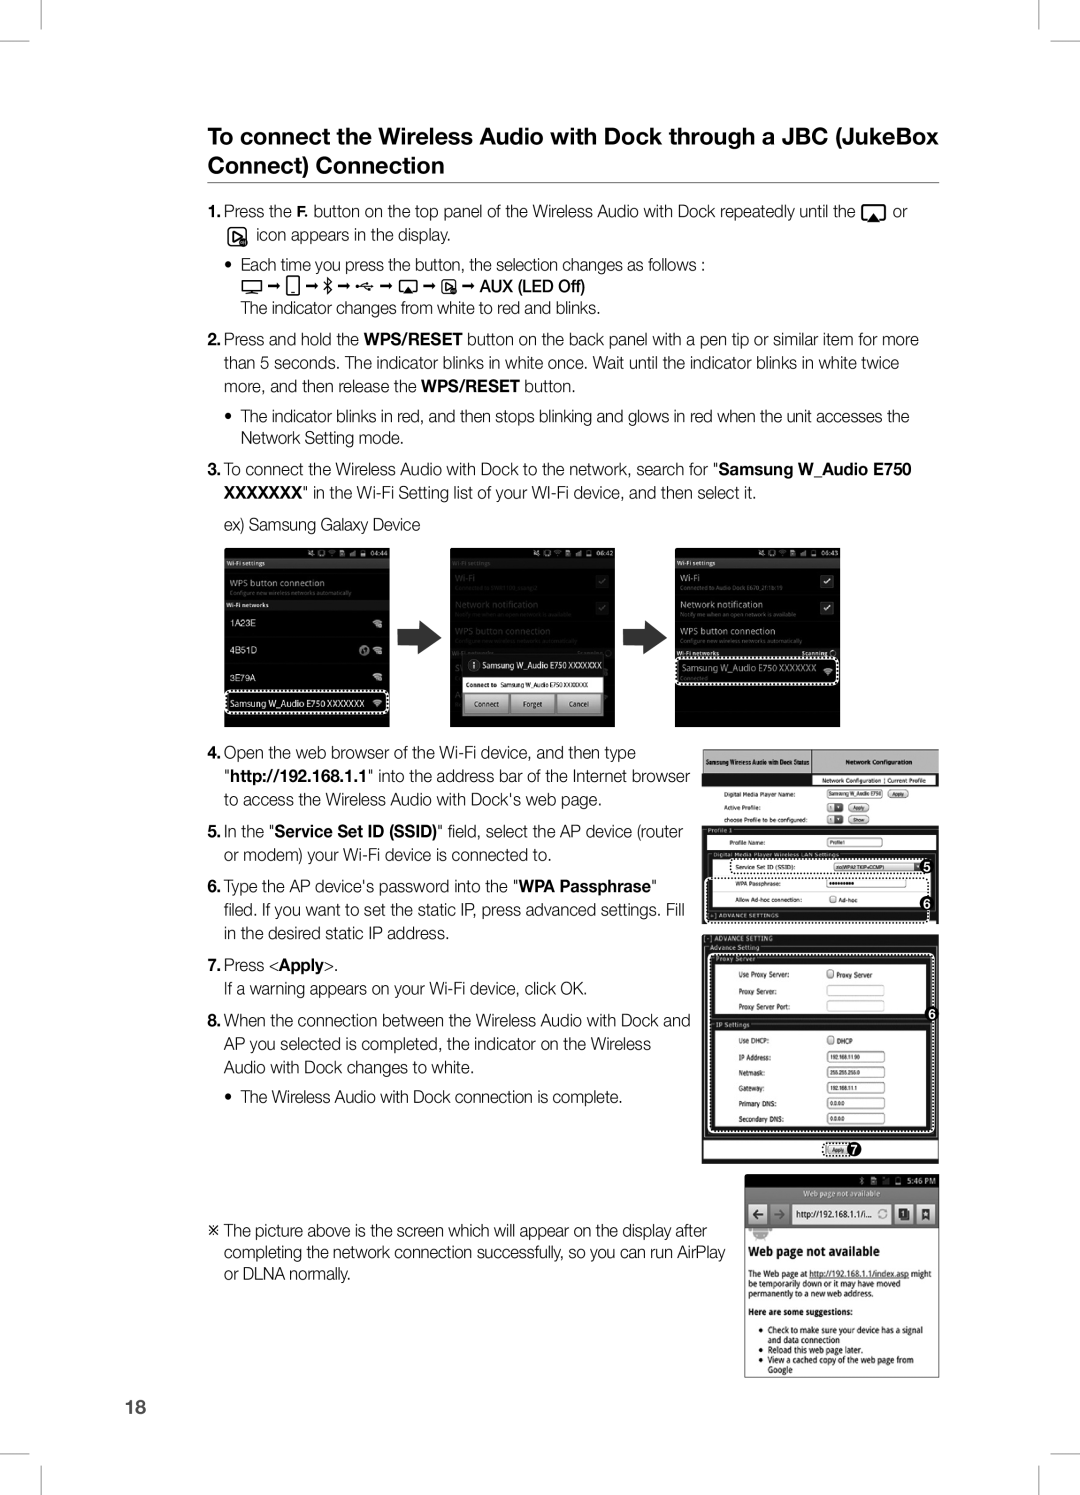
3.To connect the Wireless Audio with Dock to the network, search for "Samsung W_Audio E750 XXXXXXX" in the
ex) Samsung Galaxy Device
4.Open the web browser of the
"http://192.168.1.1" into the address bar of the Internet browser to access the Wireless Audio with Dock's web page.
5.In the "Service Set ID (SSID)" field, select the AP device (router or modem) your
6.Type the AP device's password into the "WPA Passphrase" filed. If you want to set the static IP, press advanced settings. Fill in the desired static IP address.
7.Press <Apply>.
If a warning appears on your
8.When the connection between the Wireless Audio with Dock and AP you selected is completed, the indicator on the Wireless Audio with Dock changes to white.
• The Wireless Audio with Dock connection is complete.
![]()
![]() 7
7
The picture above is the screen which will appear on the display after completing the network connection successfully, so you can run AirPlay or DLNA normally.
5
6
6
18
