DSB-4700F
CONNECTING YOUR “STB”
1. LOCATION OF THE RECEIVER
CONNECTING YOUR "STB"
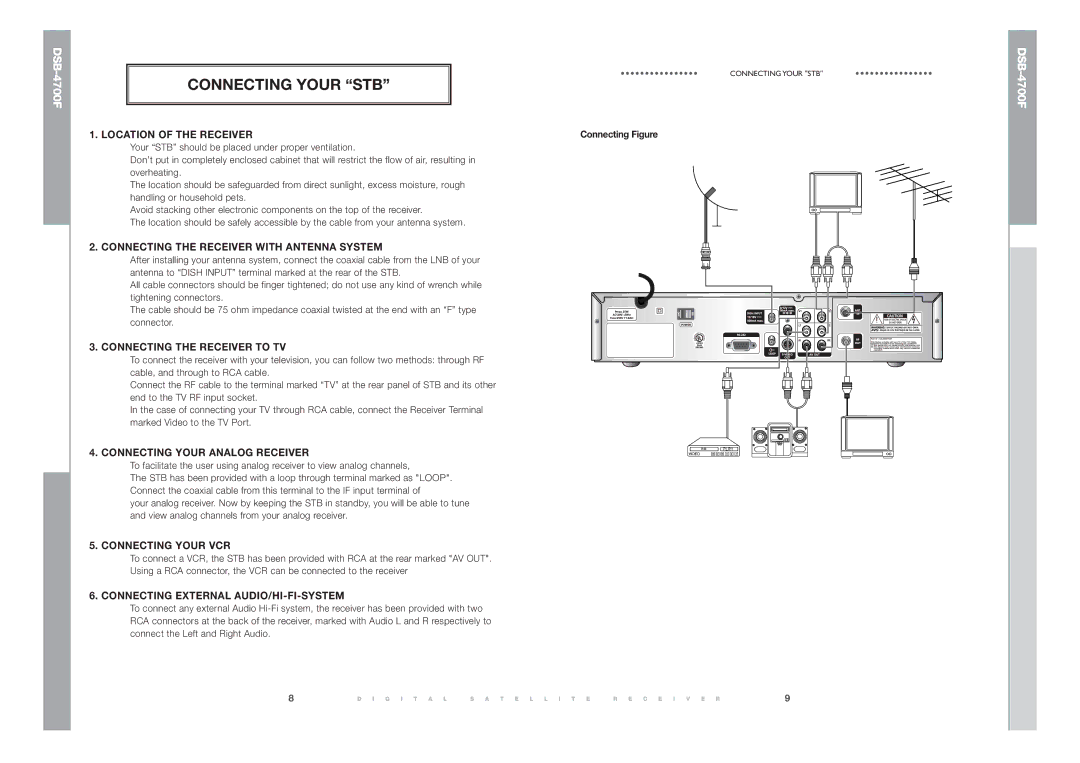
Connecting Figure
DSB-4700F
Your “STB” should be placed under proper ventilation.
Don’t put in completely enclosed cabinet that will restrict the flow of air, resulting in overheating.
The location should be safeguarded from direct sunlight, excess moisture, rough handling or household pets.
Avoid stacking other electronic components on the top of the receiver.
The location should be safely accessible by the cable from your antenna system.
2. CONNECTING THE RECEIVER WITH ANTENNA SYSTEM
After installing your antenna system, connect the coaxial cable from the LNB of your antenna to “DISH INPUT” terminal marked at the rear of the STB.
All cable connectors should be finger tightened; do not use any kind of wrench while tightening connectors.
The cable should be 75 ohm impedance coaxial twisted at the end with an “F” type connector.
3. CONNECTING THE RECEIVER TO TV
To connect the receiver with your television, you can follow two methods: through RF cable, and through to RCA cable.
Connect the RF cable to the terminal marked “TV” at the rear panel of STB and its other end to the TV RF input socket.
In the case of connecting your TV through RCA cable, connect the Receiver Terminal marked Video to the TV Port.
4. CONNECTING YOUR ANALOG RECEIVER
To facilitate the user using analog receiver to view analog channels,
The STB has been provided with a loop through terminal marked as "LOOP". Connect the coaxial cable from this terminal to the IF input terminal of
your analog receiver. Now by keeping the STB in standby, you will be able to tune and view analog channels from your analog receiver.
5. CONNECTING YOUR VCR
To connect a VCR, the STB has been provided with RCA at the rear marked "AV OUT".
Using a RCA connector, the VCR can be connected to the receiver
6. CONNECTING EXTERNAL AUDIO/HI-FI-SYSTEM
To connect any external Audio
8 | D I G I T A L | S A T E L L I T E | R E C E I V E R | 9 |