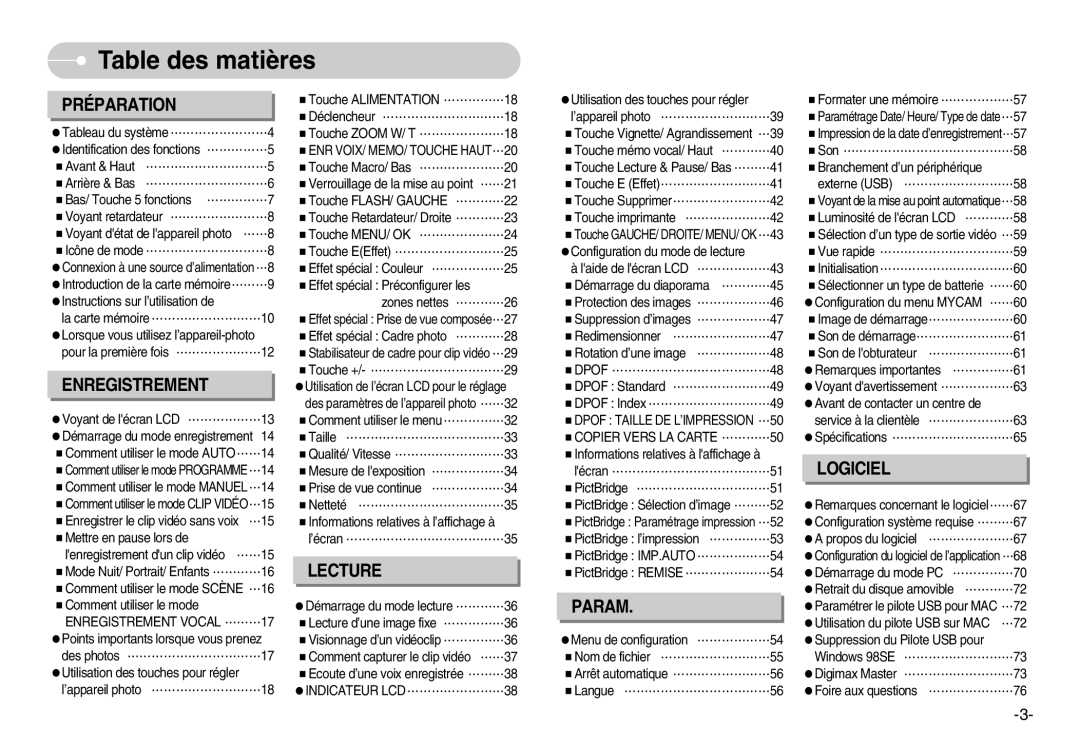
Table des matières

PRÉPARATION

Tableau du système……………………4

Identification des fonctions ……………5

Avant & Haut …………………………5

Arrière & Bas …………………………6

Bas/ Touche 5 fonctions ……………7

Voyant retardateur ……………………8

Voyant d'état de l'appareil photo ……8

Icône de mode …………………………8

Connexion à une source d’alimentation 8 Introduction de la carte mémoire………9

Instructions sur l’utilisation de

la carte mémoire………………………10

Lorsque vous utilisez l’appareil-photo pour la première fois …………………12

ENREGISTREMENT

Voyant de l'écran LCD ………………13

Démarrage du mode enregistrement 14 Comment utiliser le mode AUTO……14

Comment utiliser le mode PROGRAMME14 Comment utiliser le mode MANUEL14 Comment utiliser le mode CLIP VIDÉO15 Enregistrer le clip vidéo sans voix 15 Mettre en pause lors de

l'enregistrement d'un clip vidéo ……15

Mode Nuit/ Portrait/ Enfants …………16

Comment utiliser le mode SCÈNE 16 Comment utiliser le mode

ENREGISTREMENT VOCAL ………17

Points importants lorsque vous prenez des photos ……………………………17

Utilisation des touches pour régler l’appareil photo ………………………18

Touche ALIMENTATION ……………18

Déclencheur …………………………18

Touche ZOOM W/ T …………………18

ENR VOIX/ MEMO/ TOUCHE HAUT20 Touche Macro/ Bas …………………20

Verrouillage de la mise au point ……21

Touche FLASH/ GAUCHE …………22

Touche Retardateur/ Droite …………23

Touche MENU/ OK …………………24

Touche E(Effet) ………………………25

Effet spécial : Couleur ………………25

Effet spécial : Préconfigurer les zones nettes …………26

Effet spécial : Prise de vue composée27

Effet spécial : Cadre photo …………28

Stabilisateur de cadre pour clip vidéo 29 Touche +/- ……………………………29

Utilisation de l’écran LCD pour le réglage des paramètres de l’appareil photo ……32

Comment utiliser le menu……………32

Taille …………………………………33

Qualité/ Vitesse ………………………33

Mesure de l'exposition ………………34

Prise de vue continue ………………34

Netteté ………………………………35

Informations relatives à l’affichage à l’écran …………………………………35

LECTURE

Démarrage du mode lecture …………36

Lecture d’une image fixe ……………36

Visionnage d’un vidéoclip ……………36

Comment capturer le clip vidéo ……37

Ecoute d’une voix enregistrée ………38

INDICATEUR LCD……………………38

Utilisation des touches pour régler l’appareil photo ………………………39

Touche Vignette/ Agrandissement 39 Touche mémo vocal/ Haut …………40

Touche Lecture & Pause/ Bas ………41

Touche E (Effet)………………………41

Touche Supprimer……………………42

Touche imprimante …………………42

Touche GAUCHE/ DROITE/ MENU/ OK 43 Configuration du mode de lecture

à l'aide de l'écran LCD ………………43

Démarrage du diaporama …………45

Protection des images ………………46

Suppression d’images ………………47

Redimensionner ……………………47

Rotation d’une image ………………48

DPOF …………………………………48

DPOF : Standard ……………………49

DPOF : Index …………………………49

DPOF : TAILLE DE L’IMPRESSION 50 COPIER VERS LA CARTE …………50

Informations relatives à l'affichage à l'écran …………………………………51

PictBridge ……………………………51

PictBridge : Sélection d’image ………52

PictBridge : Paramétrage impression 52

PictBridge : l’impression ……………53

PictBridge : IMP.AUTO ………………54

PictBridge : REMISE…………………54

PARAM.

Menu de configuration ………………54

Nom de fichier ………………………55

Arrêt automatique ……………………56

Langue ………………………………56

Formater une mémoire ………………57

Paramétrage Date/ Heure/ Type de date57 Impression de la date d’enregistrement57 Son ……………………………………58

Branchement d’un périphérique externe (USB) ………………………58

Voyant de la mise au point automatique58 Luminosité de l'écran LCD …………58

Sélection d’un type de sortie vidéo 59 Vue rapide ……………………………59

Initialisation……………………………60

Sélectionner un type de batterie ……60

Configuration du menu MYCAM ……60

Image de démarrage…………………60

Son de démarrage……………………61

Son de l'obturateur …………………61

Remarques importantes ……………61

Voyant d'avertissement ………………63

Avant de contacter un centre de service à la clientèle …………………63

Spécifications …………………………65

LOGICIEL

Remarques concernant le logiciel……67

Configuration système requise ………67

A propos du logiciel …………………67

Configuration du logiciel de l’application 68 Démarrage du mode PC ……………70

Retrait du disque amovible …………72

Paramétrer le pilote USB pour MAC 72 Utilisation du pilote USB sur MAC 72 Suppression du Pilote USB pour

Windows 98SE ………………………73

Digimax Master ………………………73

Foire aux questions …………………76

-3-

Page 4
Image 4
Samsung EC-S1030SBA/E1, EC-S1030SBA/FR manual Table des matières, Enregistrement Vocal ………17, Indicateur LCD……………………38

EC-S1030SBA/FI, EC-S1030BBA/FR, EC-S1030SBB/E2, EC-S1030SBA/E1, EC-S1030BDC/DE specifications

The Samsung EC-S1030 series, which includes models EC-S1030SDC/DE, EC-S1030BDC/DE, EC-S1030SBA/E1, EC-S1030SBB/E2, and EC-S1030SBA/IT, represents a robust entry into the compact digital camera market. Designed for users who prioritize ease of use without compromising on quality, these models embody Samsung's commitment to innovation and user-friendly technology.

One of the standout features of the EC-S1030 series is its sleek and compact design, making it highly portable for everyday use. The slim profile allows for easy storage in pockets or small bags, making it an excellent travel companion. Despite its compact size, the cameras are equipped with a powerful 10.2-megapixel sensor, ensuring sharp and detailed photos. Users can expect high-resolution images suitable for both online sharing and larger print formats.

The EC-S1030 cameras also feature a 3x optical zoom lens that enhances versatility, allowing users to capture a range of subjects from distant landscapes to close-up portraits. The lens is complemented by Samsung's Advanced Shake Reduction technology, which helps minimize blurriness caused by camera movement, especially in low-light situations. This makes it easier to capture high-quality images without needing a tripod.

In terms of usability, the EC-S1030 series boasts an intuitive interface along with an easy-to-read 2.7-inch LCD screen. This display features a clear menu system, enabling users to navigate functions swiftly and effortlessly. The camera also incorporates several scene modes, allowing users to adapt settings to various shooting environments, from scenic landscapes to dimly lit venues.

Samsung's Smart Face Recognition technology enhances user experience by automatically detecting and focusing on faces within the frame. This feature is particularly useful for group shots or when capturing candid moments. The cameras also offer various creative filters and effects, empowering users to add a personal touch to their photography.

The EC-S1030 series supports a range of shooting modes, including panorama and video recording capabilities, which further expand creative opportunities. With these features, users can effortlessly capture not just still images but also dynamic moments in motion.

In summary, the Samsung EC-S1030 digital camera series is ideal for beginners and casual photographers looking for a portable, easy-to-use camera that delivers high-quality results. With its combination of impressive specifications, innovative features, and user-friendly design, it stands out as a compelling option in the compact camera segment. Whether traveling, attending events, or simply capturing everyday moments, these cameras offer the performance and flexibility needed to create lasting memories.