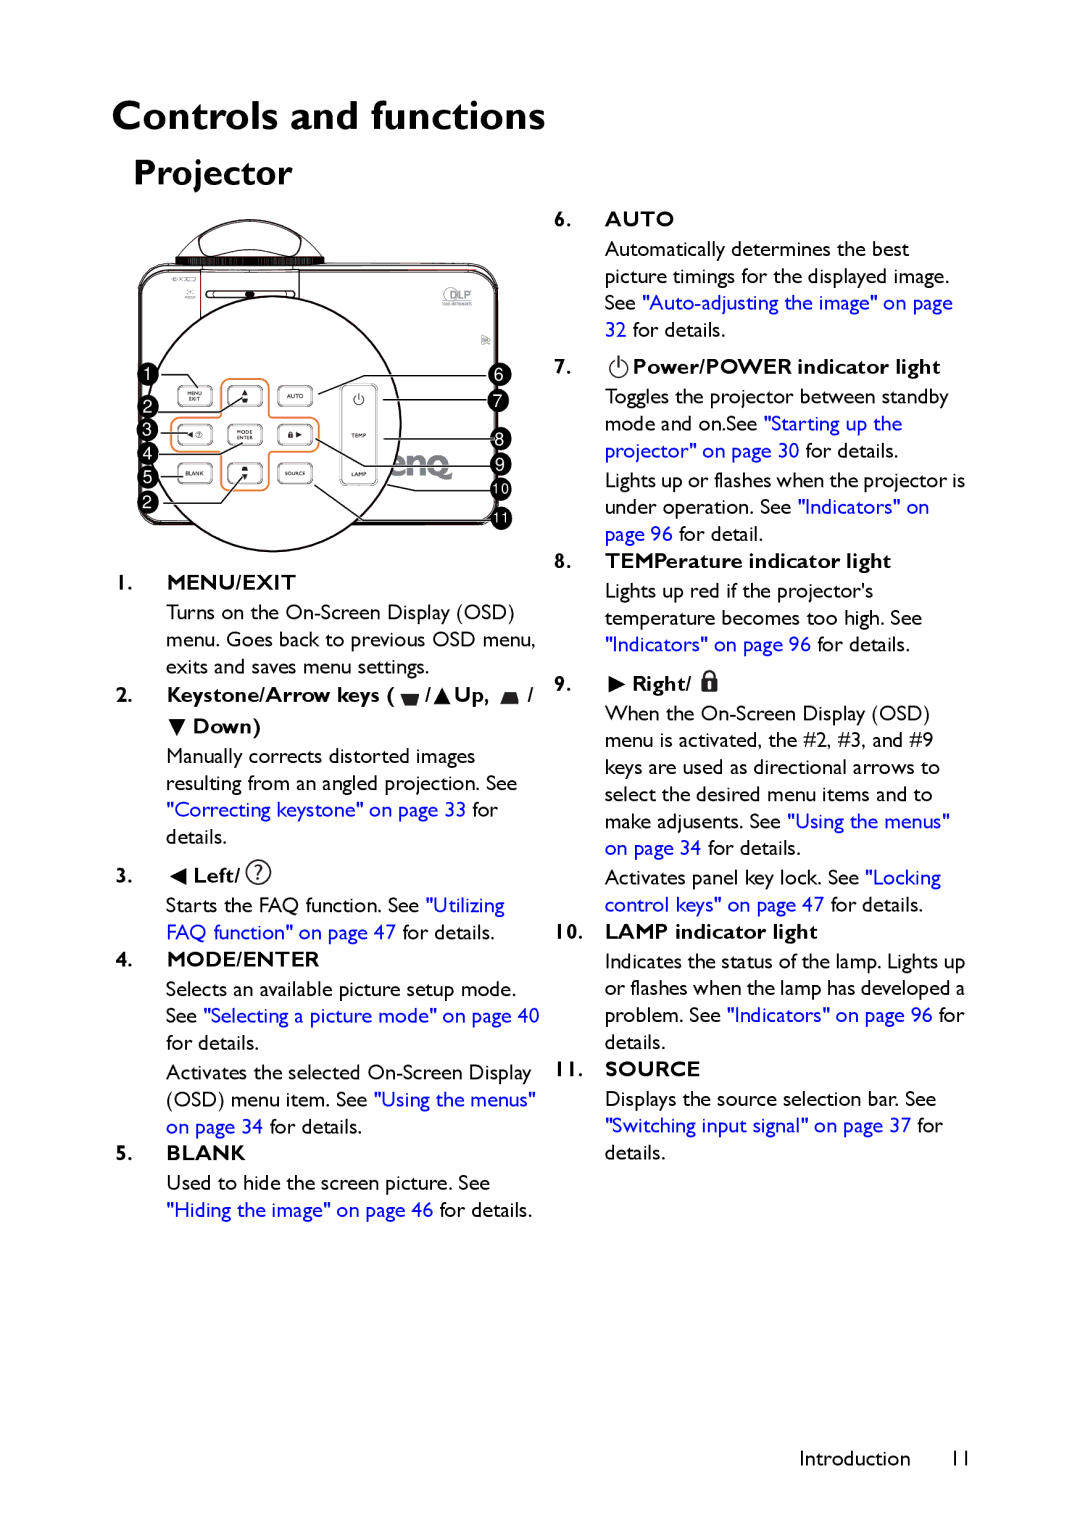
MW860USTi, MP780 ST+ specifications
The BenQ MP780 ST+ and MW860USTi are cutting-edge projectors that cater to diverse audience needs, boasting a unique blend of features, technologies, and characteristics that enhance the viewing experience in both educational and corporate environments.The BenQ MP780 ST+ is a short-throw projector designed to be positioned close to the screen, making it perfect for smaller spaces. It delivers a bright projection of up to 3,000 lumens, ensuring vivid and clear imagery even in well-lit rooms. The MP780 ST+ features a 1280 x 800 WXGA resolution, allowing it to display intricate details accurately. This model supports a 100-inch image from just a few feet away, eliminating the shadows that often accompany standard projectors.
One standout feature of the MP780 ST+ is its Smart Eco Technology, which adjusts the projector's brightness based on the ambient light, optimizing lamp life while maintaining image quality. Additionally, the projector is equipped with an interactive pen, transforming traditional presentations into engaging, hands-on learning experiences. This interactivity is further enhanced by the projector's support for multi-screen collaboration, enabling multiple users to contribute and share their materials seamlessly.
On the other hand, the BenQ MW860USTi takes short-throw projection to the next level, offering a higher resolution of 1280 x 800 WXGA. With 3,500 lumens brightness, this projector is ideal for larger classrooms or meeting rooms with various lighting conditions. It can create a 100-inch image from as little as 0.65 meters away, making it incredibly flexible for tight spaces.
The MW860USTi also incorporates advanced features like the Auto Vertical Keystone Correction, which helps in achieving a perfectly rectangular image even when the projector is slightly misaligned. This projector supports a range of connectivity options including HDMI, USB, and VGA, ensuring compatibility with various devices. Plus, its built-in speakers offer robust audio output, reducing the need for additional sound equipment during presentations.
Both models come equipped with BenQ's DLP technology, known for its reliability and sharpness. They also feature long-lasting lamp life, ensuring reduced maintenance costs. These projectors are energy-efficient, which aligns with modern sustainability goals, making them a responsible choice for institutions and companies alike.
In summary, the BenQ MP780 ST+ and MW860USTi projectors provide superb performance with their strong brightness, short-throw capabilities, and interactive features. They are designed to enhance engagement in collaborative settings, making them invaluable tools in both educational and corporate landscapes.