English
Instructions
Use this camera in the following order
Contents
Rotating an image Specifications
InitializationRESET ALL LCD button
Delete button Setting up the Mycam menu
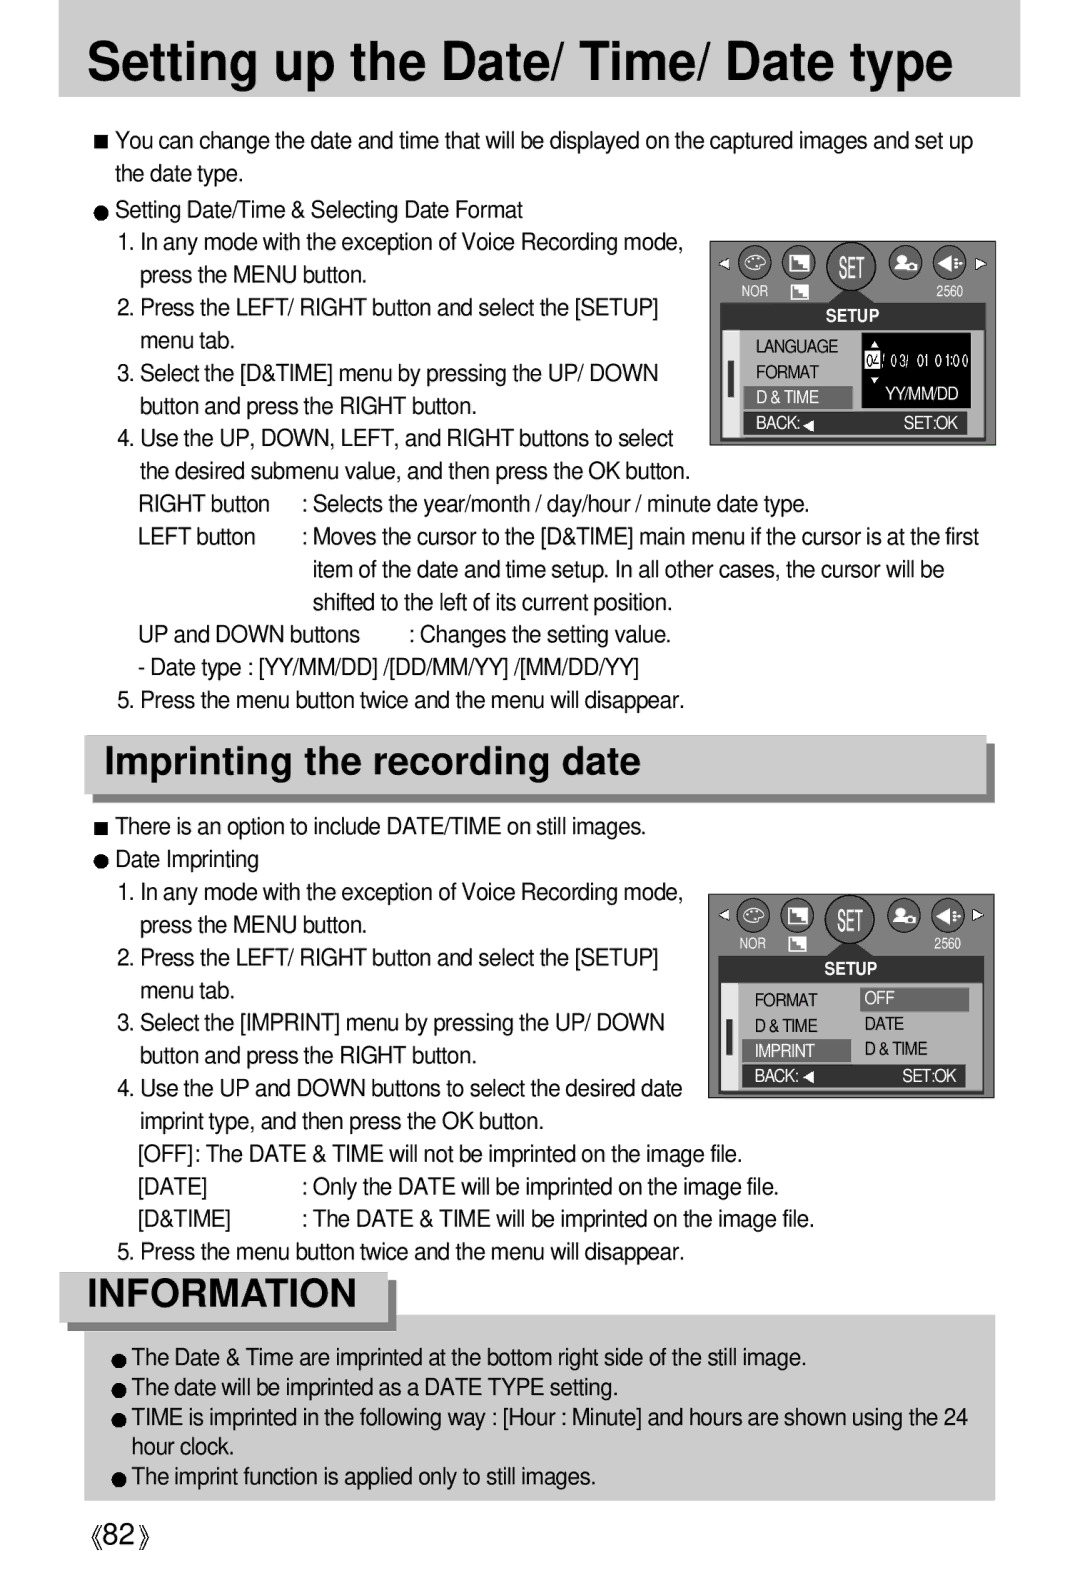
Setting up the Date/ Time/ Date type
Getting to know your camera
About the icons
Page
An FCC warning
Viewing images on a TV. refer to
This digital camera can be used for
Editing images on a PC Refer to
This digital camera can be used for
Manufacturers contents
Front & Top
Identification of features
Back & Bottom
Mode dial
Side/ 5-function button
Image size
Flash indicator lamp
Auto focus indicator lamp
PC Mode Transmitting Data
PC Mode When the USB cable is inserted
Important information about battery usage
Connecting to a Power Source
Non rechargeable batteries
Arrow
Using the batteries
Polarity+
Insert the batteries taking note of the polarity +
Instructions on how to use the memory card
Mode
Inserting the memory card
Removing the memory card
LCD monitor indicator
Icons
Select the Auto mode by rotating the mode dial
Starting the recording mode
Press the shutter button to capture an image
Starting the recording mode
How to use the MySET mode
Image by using either the viewfinder or LCD monitor
As the available recording time
Scene mode
Things to Watch Out for When Taking Pictures
Power switch
Zoom W/T button
Zoom W/T button
Voice memo / UP button
Voice memo / UP button
Take a picture with the desired macro mode
Macro / Super Macro button
Normal Macro Super Macro Range W0.3~0.8 T0.3~0.8
Types of focus modes and focus ranges W WIDE, T Tele Unit m
Auto O O O O O O O O
Focus lock
Flash / Left button
Description
Flash mode indicator
Available flash mode, by recording mode
Automatically
SELF-TIMER / Remote button
Self-timer/ remote mode definition Icon Mode
M, MySET Off 2s self-timer 10s self-timer Remote
Self-timer/ remote mode setting Mode dial
Off Remote
MENU/ OK button
Memu button
MF button
MySET
Part of the MF bar Photography range
MF button
Sub menu
+/- button
Exposure compensation ~0.0~+2.00.5EV steps
+/- button
White paper
Fast Slow
Small Press left button
Shutter Speed
LCD button
Using the LCD monitor to adjust the camera settings
Camera working mode
Menu tab Main menu Sub menu
Menus are subject to change without prior notice
Size
How to use the menu
Use the UP and Down buttons to select a sub menu
Jpeg
Still Image mode
Quality
Avi
Metering
Continuous shot
Continuous shot
Effect
Edges of the image are softened. This effect is suitable
Sharpness
Sub menu Icon
For editing images on your PC Edges of the image are sharp
Scene
Starting play mode
Play & pause button again
Press the play & pause button To play back a
Movie clip file
Pressing the play & pause button again will cause
Image
Steps from 1-2 are the same as those to play back a still
Flash is used
2560X1920 Size F2.7 Aperture value Shutter speed
ISO sensitivity
2004/03/01 Recording date
Using the camera buttons to adjust the camera
Thumbnail / Enlargement button
Save it separately
Enlargement button
Voice memo
Displayed as shown alongside
Button again
Pause mode Resumes playback
Play & Pause button
Temporarily stops playback
LCD button
Delete button
Setting up the play back function using the LCD monitor
~ p
Menu tab Main menu Sub menu Secondary menu
Menus are subject to change without prior notice
Starting the slide show
Protecting images
Protecting images
Deleting images
Resize sub menu 1280X960, 800X600, Logo
Resize
Button and press the OK button
Image Resize Types Size 1280X960 800X600
Rotating an image
Dpof
Format
ALL Pics Configure number of prints for all pictures
Press the LEFT/ Right button and select the Dpof menu tab
If YES is selected
Setting the Print Size
Dpof Size secondary menu CANCEL, 3X5, 4X6, 5X7
PictBridge
Images menu will appear
PictBridge Picture Selection
Printer.See p.86
Use the UP and Down buttons to select the desired
Automatically changed No Custom SET values are kept
PictBridge Print Setting
Menus you can set up are as follows Function Sub menu
AUTO, FULL, 1, 2, 4, 6
PictBridge Printing
Use the Left and Right buttons to select the Dpof
Reset
PictBridge Reset
If no is selected Settings will not be reset
Setup menu
File name
3SEC
Auto power off
File name
Language
Formatting a memory card
Setting up the Date/ Time/ Date type
Imprinting the recording date
LCD brightness
Operation status Setting Operation Sounds
Sound
Select the Sound menu by pressing the UP/ Down
Selecting Video out type
InitializationRESET ALL
Quick view
Select this if you want to connect the camera to your PC
Connecting an External Device USB
Printer
Turned on Setting a Startup Image
Setting up the Mycam menu
Start up image
Start up sound
Shutter sound
Important notes
Important notes
Format the memory card p.81
Places Photography mode USB sub menu
Insert the memory card again
Insert a new memory card
Before contacting a service center
Mode Unclear
Symptom Causes Remedy
Macro shot mode
Clean the lens
No image on
When using
Check the connection cables
Camera External monitor
Specifications
World Unique 9 Different Power Sources
Dimensions WxHxD
Digimax Viewer, ArcSoft PhotoImpression
Software Notes
System Requirements
About the software
Setting up the application software
Refer to page 98 for more information
About the application program
Click the OK button
Select Components window will appear. Click Next button
103
104
Starting PC Mode
Button and press the Right button
Cut
107
Removing the USB Driver for Windows 98SE
Important information whilst using the Removable Disk
Removable Disk
Removing the removable disk
Setting up the USB Driver for MAC
Using the USB Driver for MAC
Using PhotoImpression
Digimax Viewer
Digimax Viewer
Specification
Use a USB cable with the correct specification
Property
Device Manager Universal serial bus controller
Manager Install the camera driver correctly
USB interface Case When using the USB hub
Win XP Trace Start
Settings Control
Hardware Device
Windows Media Player
Memo
119
6806-1970