GT-P1000CWADBT, GT-P1000CWDVIA, GT-P1000CWDVD2, GT-P1000CWAVIA, GT-P1000CWAATO specifications
The Samsung GT-P1000 series represents a notable entry into the tablet market, showcasing an innovative blend of design, functionality, and user-friendly features. The various models within this series, including the GT-P1000CWDDBT, GT-P1000CWAEPL, GT-P1000CWDDTM, GT-P1000MSAVIA, and GT-P1000ZKDDBT, share a common foundation while offering distinct characteristics that cater to diverse user preferences.All models come equipped with a 7-inch TFT display, delivering a resolution of 1024 x 600 pixels. This compact size enhances portability, making it an ideal companion for users on the go. The vivid colors and sharp clarity of the screen allow for an enjoyable reading experience, whether browsing the web or consuming media content.
Powering the devices is a 1GHz ARM Cortex-A8 processor, ensuring smooth performance while handling applications. Coupled with 512MB of RAM, multitasking becomes efficient, allowing users to switch between apps seamlessly. The tablets run on Android 2.2 Froyo, providing access to a wide range of applications via the Google Play Store, although updates to newer Android versions might be limited due to hardware constraints.
The GT-P1000 series stands out with its range of connectivity options, including Wi-Fi, Bluetooth, and optional 3G capabilities. This enables users to stay connected, whether at home, in a café, or on the move. Additionally, with a microSD slot supporting up to 32GB of expandable storage, users can easily store and manage their data.
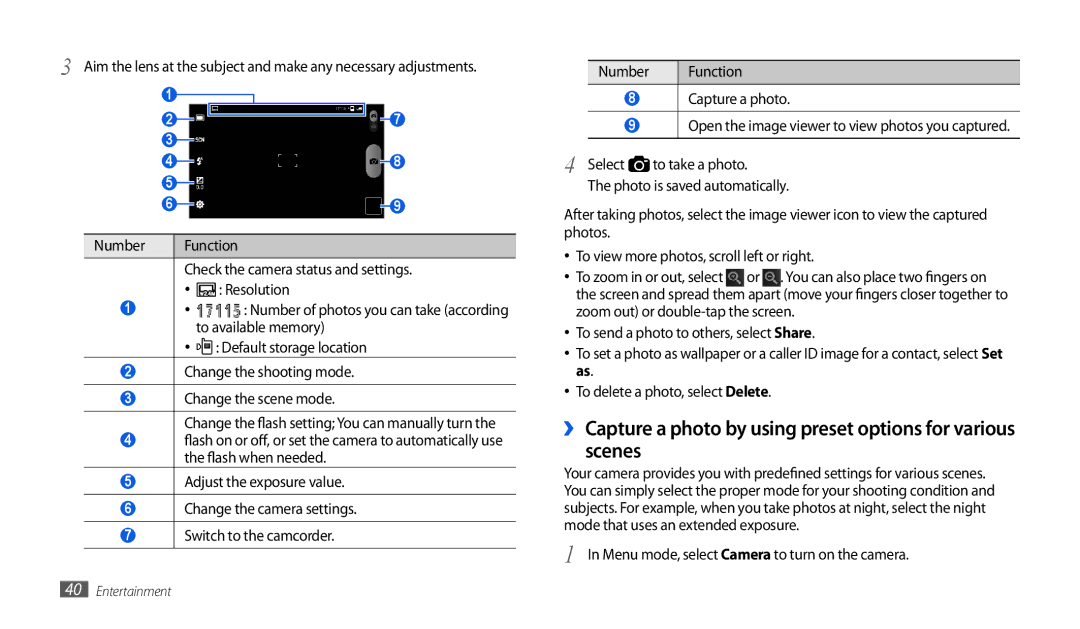
Multimedia capabilities are robust, featuring a 3MP rear camera for basic photography and a front-facing VGA camera for video calls. The built-in speakers offer decent sound quality for media playback, enhancing entertainment value.
Battery life is another key highlight, with a Li-Ion 4000 mAh battery that provides up to 13 hours of usage on a single charge, catering to users’ needs for extended periods of usage without frequent recharging.
In conclusion, the Samsung GT-P1000 series, with its range of models, presents a well-rounded tablet solution. Ideal for casual users looking for functionality, entertainment, and portability, these tablets embody Samsung's commitment to innovation and user satisfaction.

