connections

This section involves various methods of connecting the Digital Home Cinema to other external components. Before moving or installing the product, be sure to turn off the power and disconnect the power cord.

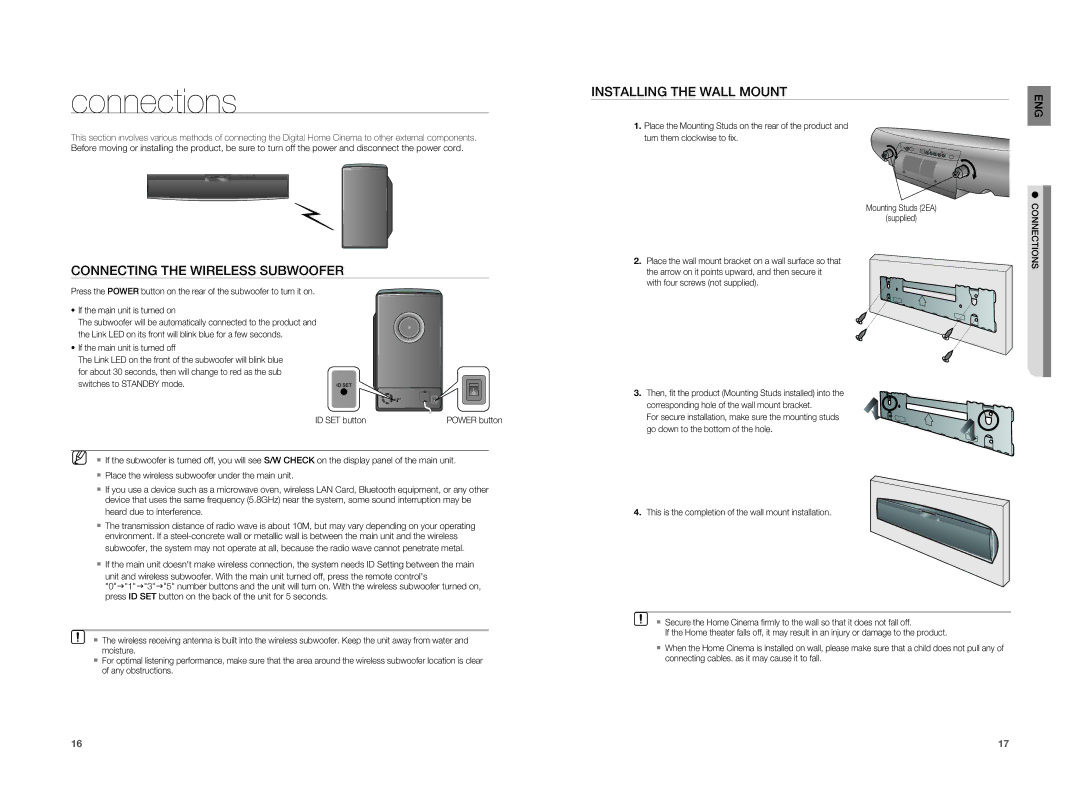
CONNECTING THE WIRELESS SUBWOOFER

Press the POWER button on the rear of the subwoofer to turn it on.

If the main unit is turned on

The subwoofer will be automatically connected to the product and the Link LED on its front will blink blue for a few seconds.

If the main unit is turned off

The Link LED on the front of the subwoofer will blink blue for about 30 seconds, then will change to red as the sub switches to STANDBY mode.

ID SET button

POWER button

MIf the subwoofer is turned off, you will see S/W CHECK on the display panel of the main unit.

Place the wireless subwoofer under the main unit.

If you use a device such as a microwave oven, wireless LAN Card, Bluetooth equipment, or any other device that uses the same frequency (5.8GHz) near the system, some sound interruption may be

heard due to interference.

The transmission distance of radio wave is about 10M, but may vary depending on your operating environment. If a steel-concrete wall or metallic wall is between the main unit and the wireless

subwoofer, the system may not operate at all, because the radio wave cannot penetrate metal.

If the main unit doesn't make wireless connection, the system needs ID Setting between the main

unit and wireless subwoofer. With the main unit turned off, press the remote control's

"0"J"1"J"3"J"5" number buttons and the unit will turn on. With the wireless subwoofer turned on, press ID SET button on the back of the unit for 5 seconds.

The wireless receiving antenna is built into the wireless subwoofer. Keep the unit away from water and moisture.

For optimal listening performance, make sure that the area around the wireless subwoofer location is clear of any obstructions.

INSTALLING THE WALL MOUNT

1.Place the Mounting Studs on the rear of the product and turn them clockwise to fi x.

Mounting Studs (2EA)

(supplied)

2.Place the wall mount bracket on a wall surface so that the arrow on it points upward, and then secure it

with four screws (not supplied).

3.Then, fi t the product (Mounting Studs installed) into the corresponding hole of the wall mount bracket.

For secure installation, make sure the mounting studs go down to the bottom of the hole.

4. This is the completion of the wall mount installation.

Secure the Home Cinema fi rmly to the wall so that it does not fall off.

If the Home theater falls off, it may result in an injury or damage to the product.

When the Home Cinema is installed on wall, please make sure that a child does not pull any of connecting cables. as it may cause it to fall.

ENG

● CONNECTIONS

16

17

Page 9
Image 9
Samsung HT-X810T/ADL, HT-X810R/XEF, HT-X810R/EDC Connections, Connecting the Wireless Subwoofer, Installing the Wall Mount

HT-X810T/XSV, HT-X810T/SAM, HT-X810T/XME, HT-X810T/ADL, HT-X810R/EDC specifications

The Samsung HT-X810 home theater system is a remarkable blend of audio clarity, design innovation, and user-friendly technology, tailored for an immersive home entertainment experience. The series includes models such as the HT-X810T/XSP, HT-X810R/XEF, HT-X810R/EDC, HT-X810T/ADL, and HT-X810T/XME, each offering exceptional features and specifications.

At the core of the HT-X810 series is its advanced audio technology. The system is equipped with a powerful 5.1 channel surround sound configuration, delivering a cinematic experience directly to your living room. With a total output power ranging around 1000 watts, this home theater system provides dynamic sound quality that enhances movies, music, and gaming alike.

One of the standout features of the HT-X810 is its ability to play various media formats, including DVD, CD, and digital music files. It is compatible with MP3, WMA, and more, ensuring that users have a wide range of content to enjoy. The system also features built-in Bluetooth technology, enabling seamless wireless music streaming from smartphones and tablets, adding convenience and flexibility for users.

In terms of connectivity, the HT-X810 series comes with multiple HDMI inputs and optical ports, making it easy to connect to other devices such as gaming consoles, Blu-ray players, and televisions. This broad connectivity ensures that the home theater system can integrate smoothly into existing entertainment setups.

The design of the HT-X810 is sleek and modern, featuring an attractive finish that can complement a variety of interior decors. Its compact form factor makes it easy to fit into entertainment consoles or wall-mounted setups without taking up too much space.

Additionally, the Samsung HT-X810 models often come equipped with features like a built-in FM tuner and customizable sound modes, allowing users to tailor their audio experience based on their preferences. The user interface is intuitive, making navigation effortless for anyone who wants to enjoy their media without unnecessary hassle.

In summary, the Samsung HT-X810 home theater system is a versatile and powerful audio solution that stands out for its surround sound capabilities, connectivity options, and stylish design, catering to the entertainment needs of families and individuals alike. Whether watching movies, listening to music, or gaming, the HT-X810 delivers a rich and immersive experience that enhances every moment.