LCD TV
Model Serial No
Precautions When Displaying a Still Image
Still image may cause permanent damage to the TV screen
Contents
Setting up Your PC Software
Scanning and Switching between
Troubleshooting Before Contacting
Symbol
List of Parts
Installing the Wall Mount Kit
Power Cord Cover-Bottom Cleaning Cloth
Power Indicator
Remote Control Sensor
Speakers Power
Viewing the Control Panel
Viewing the Connection Panel
EXT 1, EXT
PC in PC/AUDIO
Viewing the Remote Control
STB, CABLE, VCR
Installing Batteries in the Remote Control
Switching On and Off
Placing Your Television in Standby Mode
Mains lead is attached to the rear of your set
Plug & Play
Settings are available
Signals are broadcasted. Please confirm with your local
Message Start Plug & Play is displayed Refer to
If you want to reset this feature
Storing Channels Automatically
Channel mode
Storing Channels Manually
Colour System Auto/PAL/SECAM/NTSC4.43
Sound System BG/DK/I/L
Adding / Locking Channels
Adding channels
Locking channels
ENTER/OK button
Sorting the Stored Channels
Assigning Channels Names
Then
Move on the next letter Press the button
Fine Tuning Channel Reception
LNA Low Noise Amplifier
To select the desired picture effect, follow
Adjusting the Custom Picture
Changing the Picture Standard
Changing the Colour Tone
Activating Backlight
Configuring Detailed Settings on the Picture
Zoom Select by pressing the or button
Selecting the Screen Mode
Changing the Picture Size
Resetting the Picture Settings to the Factory Defaults
Digital NR / Active Colour / DNIe / 100Hz Motion Plus
Digital NR Off/Low/Medium/High/Auto
Active Colour Off/On
Viewing the Picture In Picture PIP
Freezing the Current Picture
Sound Features
Setting and Displaying the Current Time
Connecting Headphones
Selecting the Sound Mode
Setting the Sleep Timer
Switching the Television On and Off Automatically
Auto Power Off
You must set the clock first
Press the Menu button to display the on-screen menu
Choosing Your Language
Upgrading the Software
Blue Screen Off/On
Melody Off/Low/Medium/High
Light Effect Off/In Standby/In Watching TV/Always
Energy Saving Off/Low/Medium/High/Auto
When no external device is connected to your
When they are connected to your set
Selecting the Source
Editing the Input Source Names
Previewing the DTV Menu System
You can update the channel list when the broadcaster
Adds new Services or if you move the TV to a new
Updating the Channel List Automatically
Updating the Channel List Manually
Editing Your Favourite Channels
Delete
Renumber depending on the country
Preview
Selecting Channel List
Displaying Programme Information
Viewing the EPG Electronic Programme Guide Information
All Channels
You can preset the default guide style
Using the Scheduled List
Setting the Default Guide
You can set the Transparency of the menu
Adjusting the Menu Transparency
Viewing All Channels and Favourite Channels
Change PIN
Setting up the Parental Lock
Power Off, MUTE, 8, 2, 4, Power On
Setting the Subtitle
Setting the Subtitle Mode
Selecting the Audio Format
You can activate and deactivate the subtitles
Select the time zone where locate
Selecting the Digital Text
Selecting the Time Zone Spain only
Viewing Product Information
Checking the Signal Information
You can get information about the signal status
Viewing Common Interface
Selecting the CI Common Interface Menu
Resetting
This menu consists of 6 sub-menus
Preference
Teletext Decoder
Displaying the Teletext Information
Selecting a Specific Teletext
Using Fastext to Select a Teletext
Setting Up Your Remote Control
Remote Control Codes
VCR
Cable BOX
Samsung SET-TOP BOX
Setting up Your PC Software Based on Windows XP
Interlace mode is not supported
Display Modes
HDMI/DVI Input
Setting the PC
Reduce picture noise
Setting the Home Theatre PC
Wiselink jack USB jack on the side of the TV
Using the Wiselink Function
MSC device
Using the Wiselink Menu
Remote control
Memory Device, then press the ENTER/OK button
Memory Device connected to TV
Viewing a Slide Show
Using the Photo Jpeg List
Moving to a photo may take a few seconds to load the file
Folder icon Photo icon
Using the Menu during a Slide Show
Slide Show Speed Select to control the slide show speed
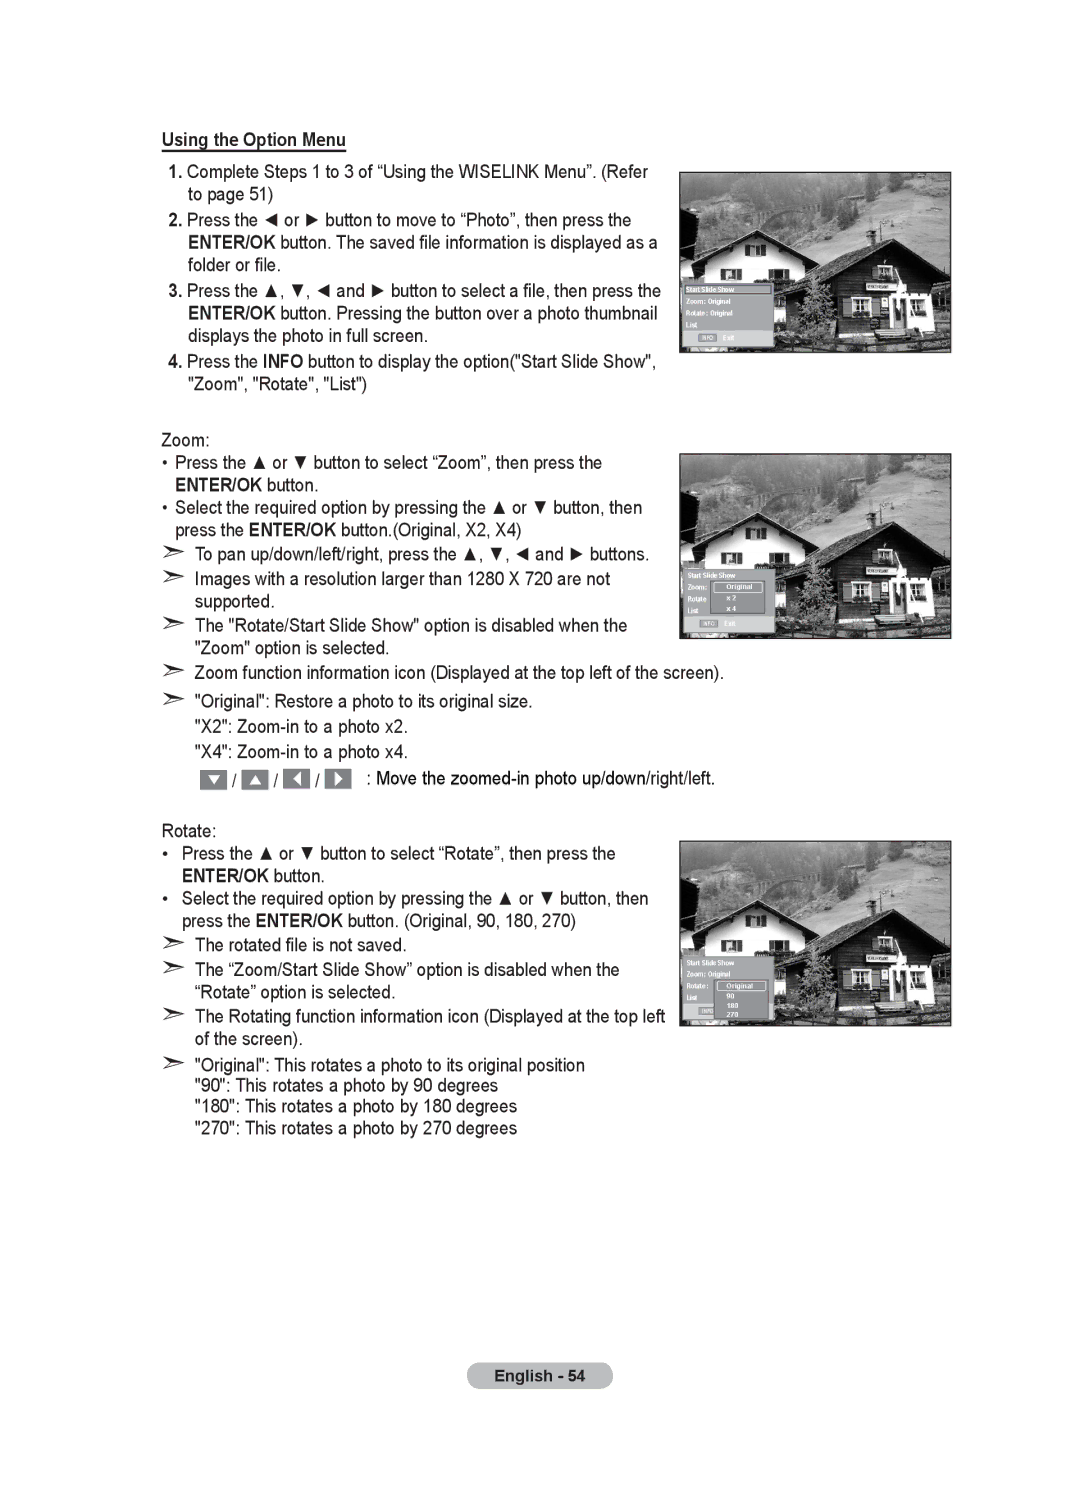
Using the Option Menu
To pan up/down/left/right, press the , , and buttons
Using the MP3 List
Remote control Music icon
Folder stage icon
Play
Using the Setup Menu
Setup
To connect to Home Theater
What is Anynet+?
Connecting Anynet+ Devices
Setting Up Anynet+
Scanning and Switching between Anynet+ Devices
Recording
Check Points before Requesting Service
Symptom Solution
Listening through a Receiver
Press the Anynet+ button
Wall-Mount Adjustment Sold separately
Using the Remote Control Buttons
Troubleshooting Before Contacting Service Personnel
Optional
Technical and Environmental Specifications
Dimensions WxDxH
RISK OF ELECTRIC SHOCK DO NOT OPEN
United Kingdom
This page is intentionally Left blank