LH32EDDPLGC/EN, LH55EDDPLGC/EN, LH40EDDPLGC/EN, LH46EDDPLGC/EN specifications
Samsung's digital signage solutions have made a significant impact on the way businesses communicate and engage with their audiences. Models such as the LH40EDDPLGC/XY, LH46EDDPLGC/EN, LH55EDDPLGC/XY, LH40EDDPLGC/EN, and LH55EDDPLGC/EN represent some of the latest advancements in this technology, offering cutting-edge features and unparalleled performance.One of the standout features of these models is their high-quality display technology. With LED backlighting, they provide vibrant colors and sharp contrasts, delivering dynamic visuals that capture attention. The Full HD resolution ensures that images and videos are displayed with incredible clarity, resulting in a truly immersive viewing experience.
These Samsung displays are designed with commercial use in mind. They come with a robust build quality that allows for 24/7 operation, making them well-suited for businesses that require constant functioning, such as retail environments, transportation hubs, and corporate settings. The screens are also equipped with advanced cooling mechanisms to manage heat effectively, ensuring longevity even in demanding situations.
Another significant characteristic of these models is their adaptability. With various screen sizes ranging from 40 inches to 55 inches, businesses can choose the display that best fits their specific needs and available space. Additionally, Samsung has incorporated ultra-narrow bezels into these designs, allowing for seamless multi-display setups that create an uninterrupted visual experience.
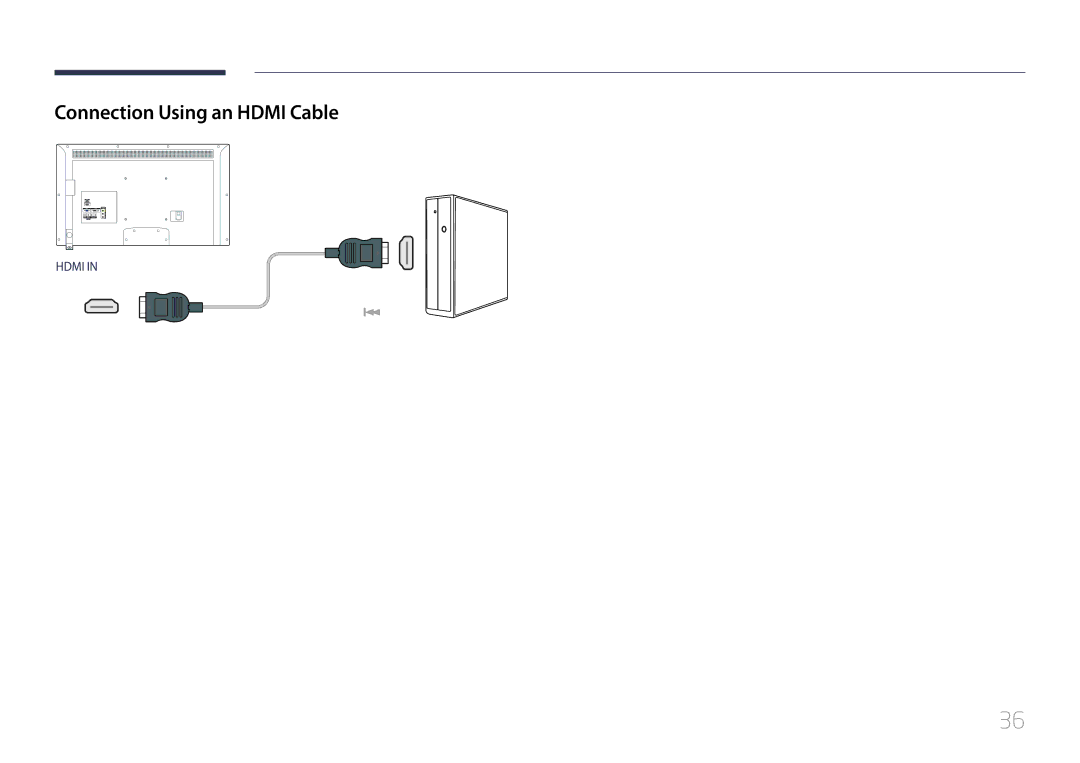
Connectivity is another strong point of these models. They come equipped with multiple HDMI and USB ports, enabling easy integration with various devices and content sources. The displays are compatible with Samsung's MagicINFO software, which allows users to create, manage, and schedule content easily. This feature simplifies content management and helps businesses communicate effectively with their target audiences.
Furthermore, the LH series displays utilize HDR technology, enhancing the color range and delivering images with astounding realism. This feature is especially beneficial for applications that rely on detailed imagery, such as advertising and presentations.
In conclusion, Samsung's LH40EDDPLGC/XY, LH46EDDPLGC/EN, LH55EDDPLGC/XY, LH40EDDPLGC/EN, and LH55EDDPLGC/EN displays stand out for their impressive visual quality, robust design, adaptability, and extensive connectivity options. These characteristics make them ideal for a wide range of commercial applications, underscoring Samsung's commitment to delivering innovative digital signage solutions that help businesses thrive in a competitive landscape.