
LH55UDEBLBB/CH, LH46UDECLBB/NG, LH55UDEBLBB/NG, LH55UDEBLBB/XY, LH55UDEHLBB/XV specifications
Samsung has long been at the forefront of display technology, and its lineup of professional displays, including the LH55UDEBLBB/XL, LH55UDEBLBB/XV, LH46UDEBLBB/XL, LH46UDECLBB/XY, and LH46UDECLBB/XV, exemplifies this commitment to quality and innovation. These models are specifically designed for commercial use, offering superior performance for a variety of applications from retail environments to corporate settings.Starting with the key features, these displays boast stunning Ultra HD resolution of 3840 x 2160 pixels, ensuring that content is presented with exceptional clarity and detail. The large screen sizes—55 inches and 46 inches, respectively—make them ideal for capturing attention in any venue. This high resolution combined with ample display area ensures that visuals are vibrant, making these screens perfect for showcasing marketing material, videos, or presentations.
One of the standout technologies incorporated into these displays is HDR (High Dynamic Range). HDR enhances contrast, brightness, and color accuracy, allowing content to deliver a more immersive viewing experience. This feature is particularly beneficial in environments with varying lighting conditions where color fidelity and visual impact are crucial.
Additionally, these Samsung models utilize advanced LED backlighting technology which contributes to improved brightness and energy efficiency. The displays not only have a slim and sleek design that saves space but also come equipped with a robust chassis suitable for continuous operation, making them reliable for 24/7 usage.
Another crucial characteristic of these displays is their connectivity options. They come with multiple HDMI and DisplayPort inputs, enabling seamless integration into existing systems and allowing for the easy connection of various devices. This flexibility is crucial in commercial settings where a range of content sources may be used.
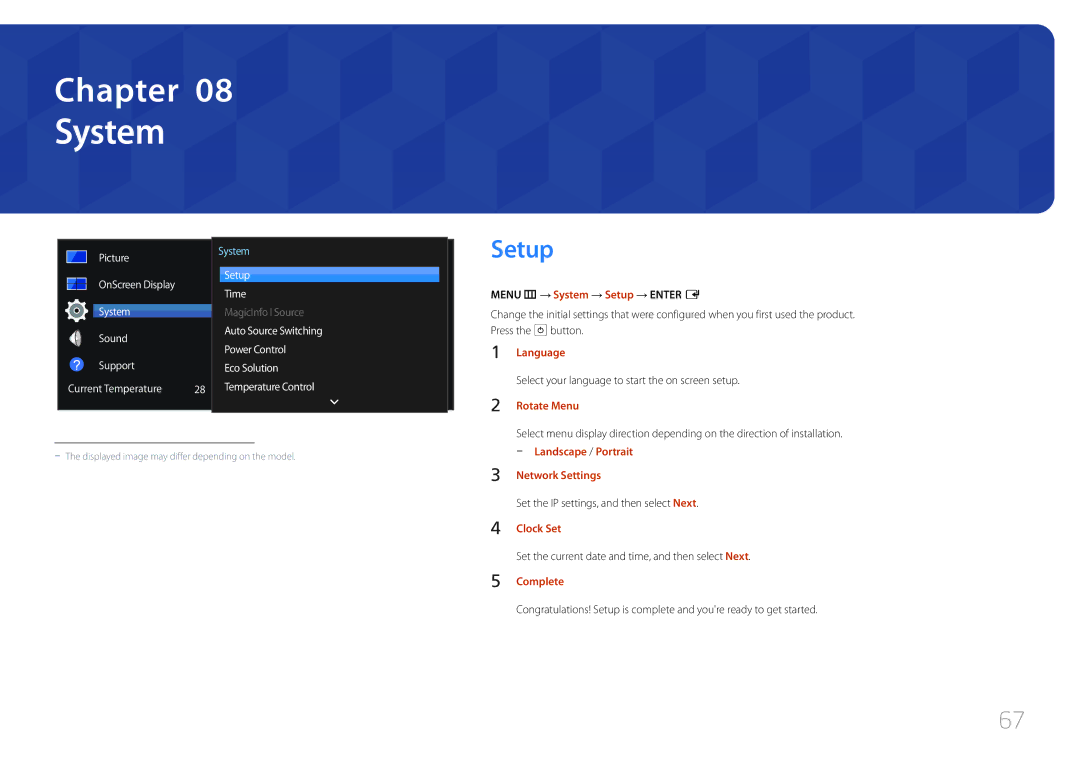
The installation and management of these displays are made easy through Samsung’s MagicINFO software, allowing users to monitor, control, and schedule content remotely. This functionality enhances convenience for businesses, removing the need for on-site management of display content.
In summary, the Samsung LH55UDEBLBB/XL, LH55UDEBLBB/XV, LH46UDEBLBB/XL, LH46UDECLBB/XY, and LH46UDECLBB/XV displays are engineered for excellence. With remarkable 4K resolution, HDR technology, extensive connectivity options, and a design built for durability, these displays are perfect for businesses looking to enhance their visual communication and create impactful experiences for their audiences.