|
|
|
| MENU |
|
|
| DESCRIPTION |
| |
|
|
|
|
|
|
|
|
|
| |
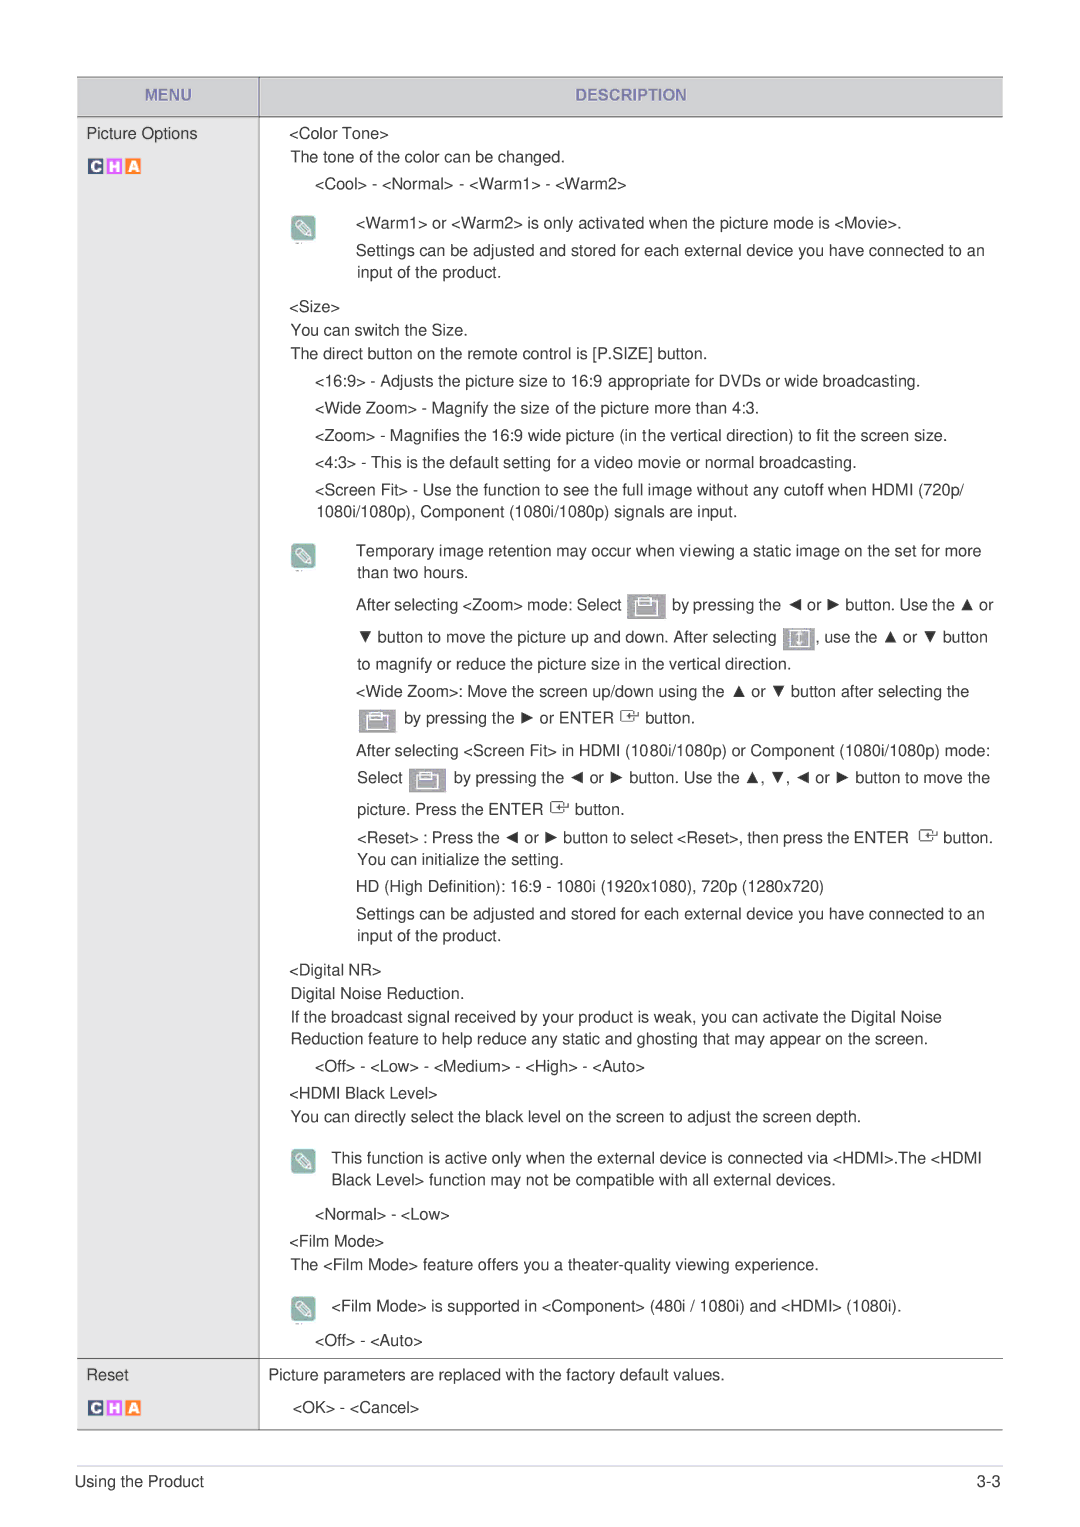
Picture Options | • | <Color Tone> |
|
|
| |||||
|
|
|
|
|
| The tone of the color can be changed. |
|
| ||
|
|
|
|
|
|
|
| |||
|
|
|
|
|
| • | <Cool> - <Normal> - <Warm1> - <Warm2> |
|
| |
|
|
|
|
|
|
|
| |||
|
|
|
|
|
|
| • <Warm1> or <Warm2> is only activated when the picture mode is <Movie>. | |||
|
|
|
|
|
|
| • Settings can be adjusted and stored for each external device you have connected to an | |||
|
|
|
|
|
|
| input of the product. |
|
| |
|
|
|
|
| • | <Size> |
|
|
| |
|
|
|
|
|
| You can switch the Size. |
|
| ||
|
|
|
|
|
| The direct button on the remote control is [P.SIZE] button. |
| |||
|
|
|
|
|
| • <16:9> - Adjusts the picture size to 16:9 appropriate for DVDs or wide broadcasting. | ||||
|
|
|
|
|
| • <Wide Zoom> - Magnify the size of the picture more than 4:3. |
| |||
|
|
|
|
|
| • <Zoom> - Magnifies the 16:9 wide picture (in the vertical direction) to fit the screen size. | ||||
|
|
|
|
|
| • <4:3> - This is the default setting for a video movie or normal broadcasting. | ||||
|
|
|
|
|
| • <Screen Fit> - Use the function to see the full image without any cutoff when HDMI (720p/ | ||||
|
|
|
|
|
|
| 1080i/1080p), Component (1080i/1080p) signals are input. |
| ||
|
|
|
|
|
|
| • Temporary image retention may occur when viewing a static image on the set for more | |||
|
|
|
|
|
|
| than two hours. |
|
| |
|
|
|
|
|
|
| • After selecting <Zoom> mode: Select | by pressing the ◄ or ► button. Use the ▲ or | ||
|
|
|
|
|
|
| ▼ button to move the picture up and down. After selecting | , use the ▲ or ▼ button | ||
|
|
|
|
|
|
| to magnify or reduce the picture size in the vertical direction. |
| ||
|
|
|
|
|
|
| • <Wide Zoom>: Move the screen up/down using the ▲ or ▼ button after selecting the | |||
|
|
|
|
|
|
| by pressing the ► or ENTER | button. |
| |
|
|
|
|
|
|
| • After selecting <Screen Fit> in HDMI (1080i/1080p) or Component (1080i/1080p) mode: | |||
|
|
|
|
|
|
| Select | by pressing the ◄ or ► button. Use the ▲, ▼, ◄ or ► button to move the | ||
|
|
|
|
|
|
| picture. Press the ENTER button. |
|
| |
|
|
|
|
|
|
| <Reset> : Press the ◄ or ► button to select <Reset>, then press the ENTER button. | |||
|
|
|
|
|
|
| You can initialize the setting. |
|
| |
|
|
|
|
|
|
| • HD (High Definition): 16:9 - 1080i (1920x1080), 720p (1280x720) | |||
|
|
|
|
|
|
| • Settings can be adjusted and stored for each external device you have connected to an | |||
|
|
|
|
|
|
| input of the product. |
|
| |
|
|
|
|
| • | <Digital NR> |
|
|
| |
|
|
|
|
|
| Digital Noise Reduction. |
|
| ||
|
|
|
|
|
| If the broadcast signal received by your product is weak, you can activate the Digital Noise | ||||
|
|
|
|
|
| Reduction feature to help reduce any static and ghosting that may appear on the screen. | ||||
|
|
|
|
|
| • <Off> - <Low> - <Medium> - <High> - <Auto> |
| |||
|
|
|
|
| • | <HDMI Black Level> |
|
|
| |
|
|
|
|
|
| You can directly select the black level on the screen to adjust the screen depth. | ||||
|
|
|
|
|
|
| This function is active only when the external device is connected via <HDMI>.The <HDMI | |||
|
|
|
|
|
|
| Black Level> function may not be compatible with all external devices. | |||
|
|
|
|
|
| • | <Normal> - <Low> |
|
|
|
|
|
|
|
| • | <Film Mode> |
|
|
| |
|
|
|
|
|
| The <Film Mode> feature offers you a | ||||
|
|
|
|
|
|
| <Film Mode> is supported in <Component> (480i / 1080i) and <HDMI> (1080i). | |||
|
|
|
|
|
| • | <Off> - <Auto> |
|
|
|
|
|
|
|
|
|
| ||||
Reset | Picture parameters are replaced with the factory default values. |
| ||||||||
|
|
|
|
| • | <OK> - <Cancel> |
|
|
| |
|
|
|
|
|
|
|
| |||
|
|
|
|
|
|
|
|
|
|
|
Using the Product |
