This Appliance is Manufactured by
DVD Karaoke Mini Component System
Safety Warnings
Class 1 Laser Product
Precautions
Preparation
Features
Copy Protection
Contents
Description
Display Window
Accessories
Rear Panel
Remote Control
Range of Operation of the Remote Control
Insert Remote Batteries
Connecting the Speakers
Selecting the Listening Position
Connecting to a TV
Connect S-Video Out to S-Video In on your TV
Connecting to a TV Con’t
Use this method if your TV have Pr,Pb andY jacks
What is Progressive or Non-Interlaced Scanning?
Selecting the Video Format
Connecting External Components
Connecting an External Analog Component
Connecting the FM, AM Antennas
Setting the Clock
When the correct
Press TIMER/CLOCK
Twice
To stop playback Press Stop during playback
Disc Playback
Selecting a DVD-OKin the Disc changer
DivX Playback
During playback, press the button
Press and hold button
Pressbutton.ZOOM
During playback, press the , button
Press the Subtitle button
Press the Remain button
Displaying Disc Information
Press Info button
Press Slow button
Fast/Slow Playback
Press and hold
Skipping Scenes/Songs
Briefly press
Playing Frame by Frame DVD
Press Step button
Angle display
Angle Function
Press Cursor
Repeat Playback
Press Repeat button
Zoom Function
Press Zoom
Button
Press EZ View button
Press Cursor 3button or numeric
Press Info button twice
Press Info button Press Cursor Button to move to Twice
Press the numeric
Press Cursor
Press to skip to the next slide
Press Slide Mode button
Jpeg File Playback Jpeg
Want to repeat
Press Cursor , , , buttons during playback
Press REP. a ↔ B
Press Enter button
Using Disc Menu
Press Menu button
Using the Title Menu
Press Menu button to exit the setup screen
Button to move to
‘Title Menu’
Setting the Language
Setup
Press Enter
Setting TV Screen type
Press Enter button
43PS
Adjusting the TV Aspect Ratio Screen Size
43LB
‘Setup’ and then
Enter the password
Press Cursor , button
Press Cursor Button to move to
Setting the Password
Enter button
Setting the Wallpaper Jpeg DVD
During playback, press
Press Menu Press Cursor Button Button to move to
Press to select Press Menu
Then press
Button to exit
Setting the DRC Dynamic Range Compression
Press Cursor , to adjust the ‘DRC’
AV Sync Setup
Press the Menu button Press Cursor , buttons
Playing DVD-OK Discs
Use the Numeric
Press
To Clear Incorrectly Entered Song Numeric
Connecting Microphone
Press the Echo button
Enter the numeric Press
To Cancel the Reservation
Reserve button
DVD-OK Repeat Play
Want to play back
Press the Repeat button
Stop mode, press
Favorite Song button
Favorite Song Function
Saving Favorite Song
Singing Favorite Song
Press , button To select the song you want
Press the Enter
To Exit Favorite Song Screen
Search Song Function
Structure of Song Search
Search by Language
Song you want
Press button to
To Exit Search Song Screen
Searching Duet Song
Press , button 3to select the song you want
Press button to move
Searching by Genre
Genre you want
Searching by Hits Songs
Hits song
Key Control
Tempo Control
During the playback, press
KEY Control buttons
Femalemale button
Male -Female Key Control
Male-Female Key Control
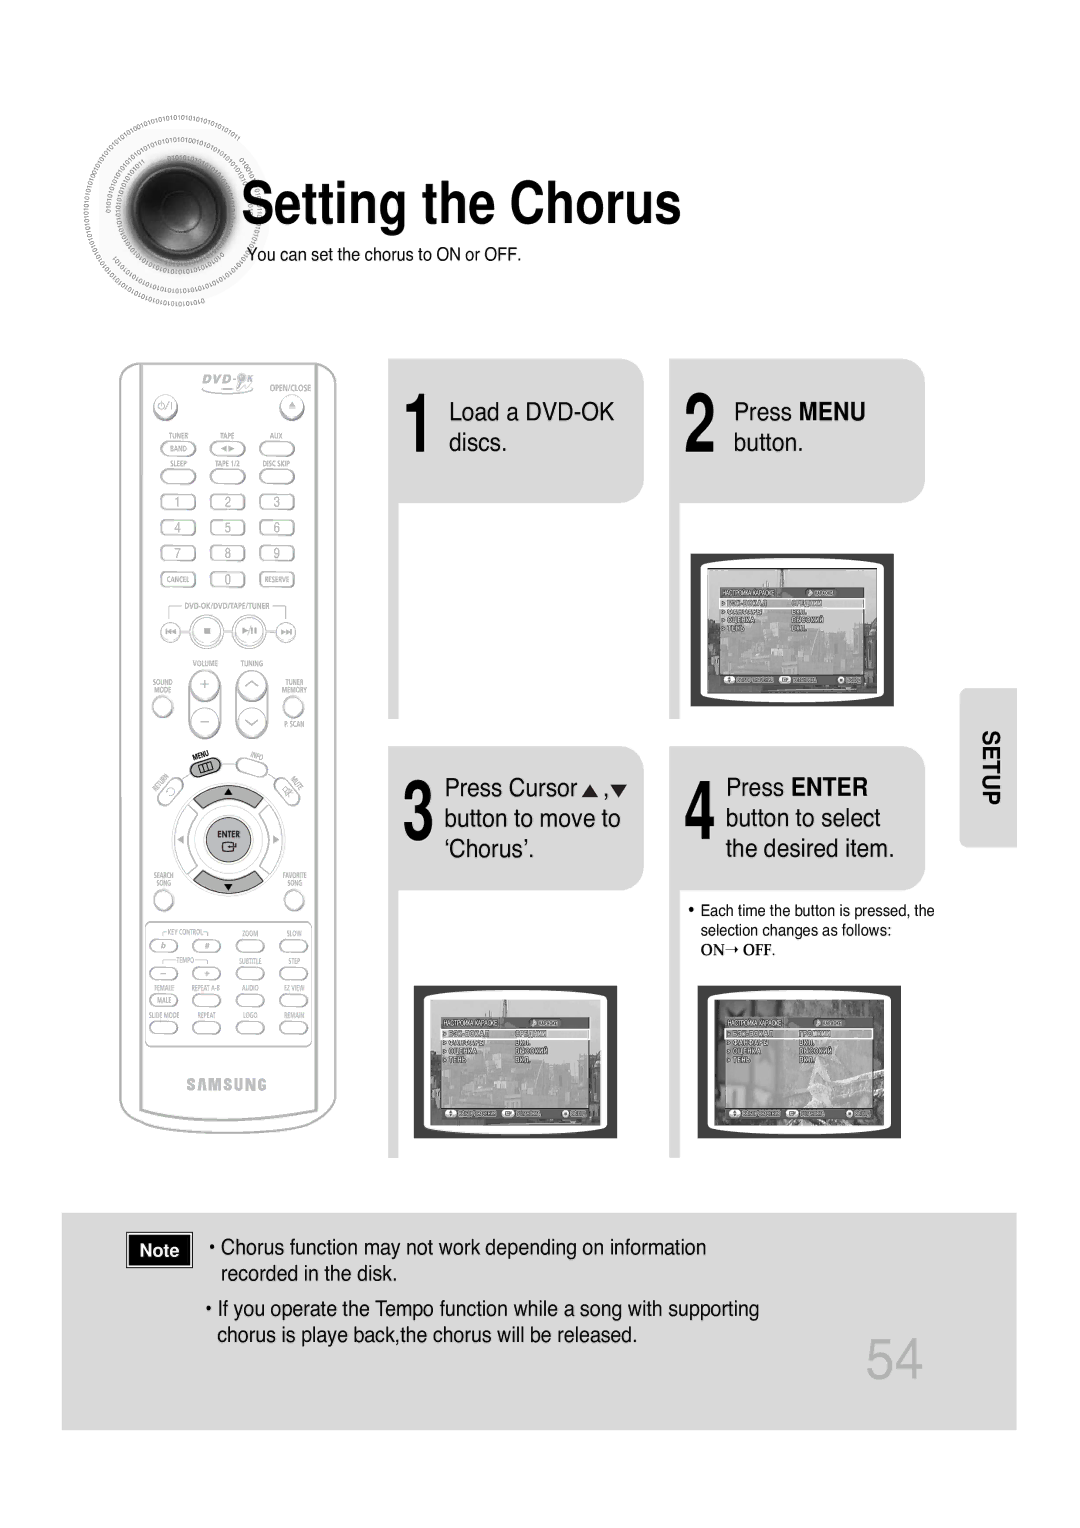
Setting the Chorus
Load a DVD-OK
Discs Button Press Cursor Press Enter Button to move to
‘Chorus’
Setting the Fanfare
Discs Button
Setting the Average Score
Setting the Shadow
‘Shadow’
Main Unit
Remote Control Unit
Listening to Radio
Presetting Stations
Number
Steps 2 to
Press
Listening to a Cassette
Selecting the Cassette Playback Mode
Tape Counter
Coping a CassetteDubbing
Press Dubbing
Insert a blank
Press Stop button
You can use CD/SYNCHRO button only in CD Playback Mode
Recording a Compact Disc
Synchronised recording
Load a compact disc
Direct recording
REC/button.PAUSE
Recording a Radio Program
Select the radio
Down or UP/ button
Insert a blank
Timer Function
Set the timer
Press the Enter button
Press STANDBY/ON
Canceling the Timer
To resume the timer, press Timer ON/OFF again
SOUND/SURROUND / Sound Mode Function
Press the P.SOUND/SURROUND button on the front panel
Mute Function
Sleep Timer / Mute Function
Sleep Timer Function
Press DEMO/DIMMER button
Demo / Dimmer Function
Demo Function
2You can select the level of low tones you desire
Bass Level
Turn Bass knob on the front
Connecting Headphones
Connect the headphones to the Phones jack on the front panel
Handling and Storing Discs
Precautions When Using Audio Cassettes
Handling discs
Before Calling for Service
Password for rating
Tape does not start
DVD player is not
Level has been forgotten
Disc Recording Format
Angle
Specifications
Compact Disc Player

 Setting
 the Chorus