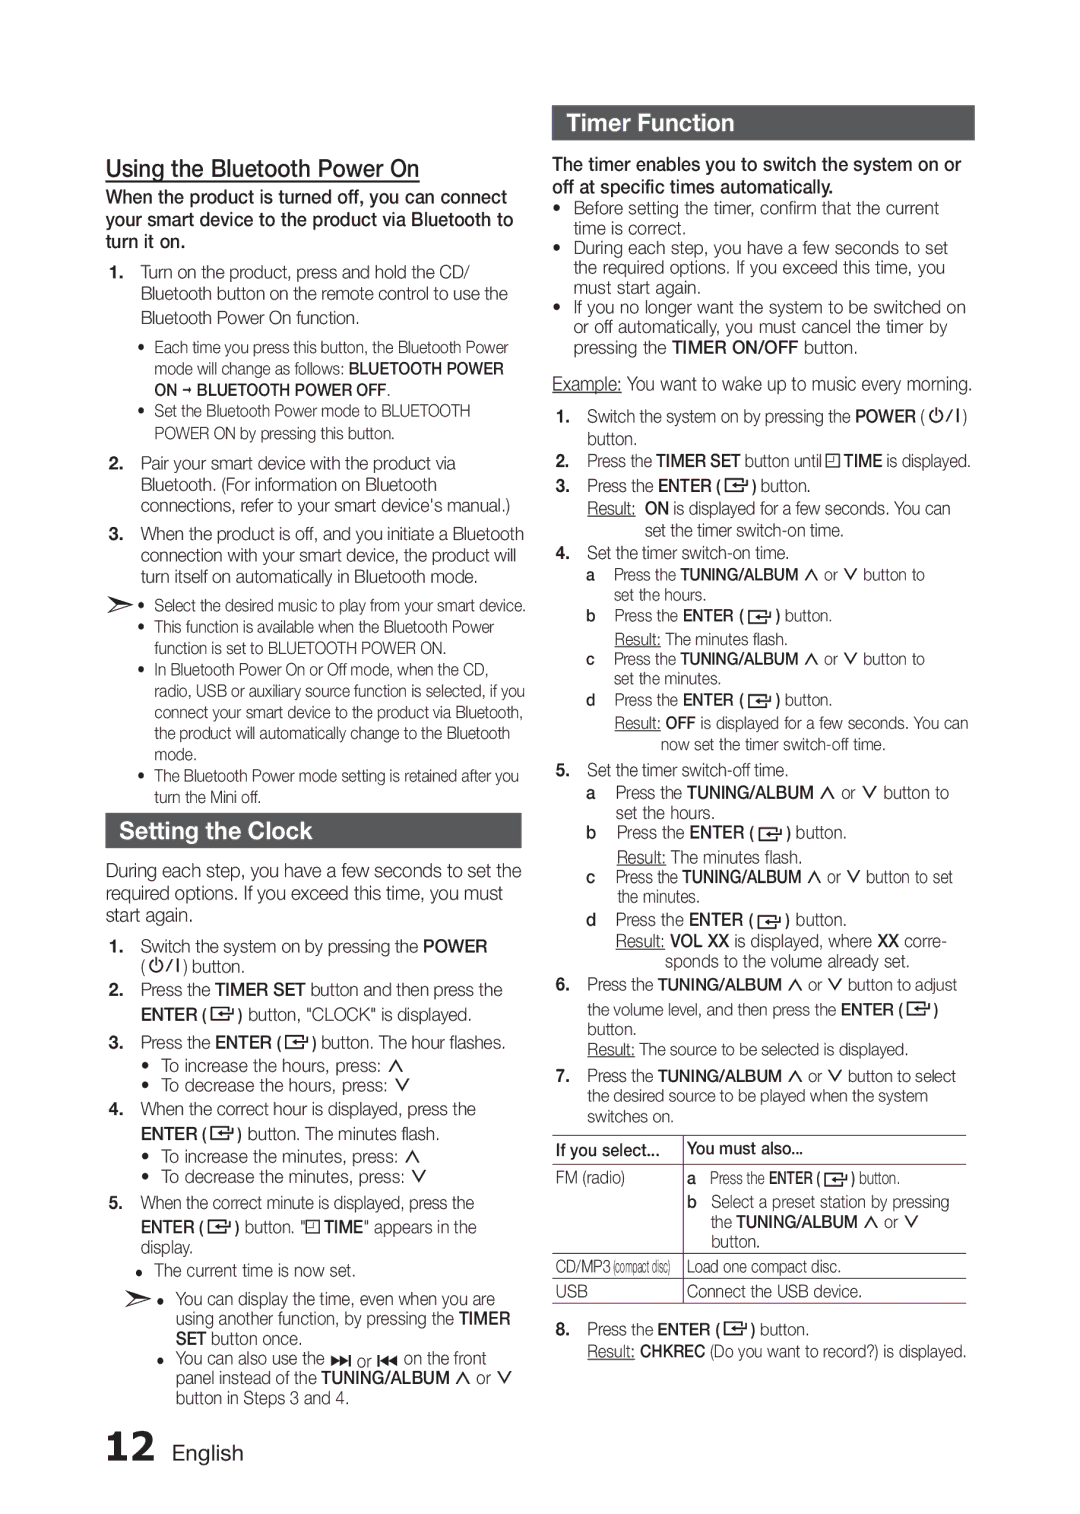
Samsung MX-H630/EN, MX-H630/ZF, MX-H730/EN, MX-H730/XN, MX-H630/XN Setting the Clock, Timer Function

Models: MX-H730/XE MX-H730/XN MX-H730/EN MX-H630/XN MX-H630/ZF MX-H630/EN

1 18
Download 18 pages 38.02 Kb
Page 12
Image 12

Using the Bluetooth Power On

When the product is turned off, you can connect your smart device to the product via Bluetooth to turn it on.

1.Turn on the product, press and hold the CD/ Bluetooth button on the remote control to use the Bluetooth Power On function.

Each time you press this button, the Bluetooth Power mode will change as follows: BLUETOOTH POWER ON BLUETOOTH POWER OFF.

Set the Bluetooth Power mode to BLUETOOTH POWER ON by pressing this button.

2.Pair your smart device with the product via Bluetooth. (For information on Bluetooth connections, refer to your smart device's manual.)

3.When the product is off, and you initiate a Bluetooth connection with your smart device, the product will turn itself on automatically in Bluetooth mode.

• Select the desired music to play from your smart device.

This function is available when the Bluetooth Power function is set to BLUETOOTH POWER ON.

In Bluetooth Power On or Off mode, when the CD, radio, USB or auxiliary source function is selected, if you connect your smart device to the product via Bluetooth, the product will automatically change to the Bluetooth mode.

The Bluetooth Power mode setting is retained after you turn the Mini off.

Setting the Clock

During each step, you have a few seconds to set the required options. If you exceed this time, you must start again.

1.Switch the system on by pressing the POWER

( ) button.

2.Press the TIMER SET button and then press the

ENTER ( ) button, "CLOCK" is displayed.

3. Press the ENTER ( ) button. The hour flashes.

To increase the hours, press: ,

To decrease the hours, press: .

4.When the correct hour is displayed, press the

ENTER ( ) button. The minutes flash.

To increase the minutes, press: ,

To decrease the minutes, press: .

5.When the correct minute is displayed, press the

ENTER ( ) button. " TIME" appears in the display.

The current time is now set.

• You can display the time, even when you are using another function, by pressing the TIMER SET button once.

You can also use the ] or [ on the front panel instead of the TUNING/ALBUM , or . button in Steps 3 and 4.

Timer Function

The timer enables you to switch the system on or off at specific times automatically.

Before setting the timer, confirm that the current time is correct.

During each step, you have a few seconds to set the required options. If you exceed this time, you must start again.

If you no longer want the system to be switched on or off automatically, you must cancel the timer by pressing the TIMER ON/OFF button.

Example: You want to wake up to music every morning.

1.Switch the system on by pressing the POWER ( ) button.

2.Press the TIMER SET button until TIME is displayed.

3.Press the ENTER ( ) button.

Result: ON is displayed for a few seconds. You can set the timer switch-on time.

4.Set the timer switch-on time.

a Press the TUNING/ALBUM , or . button to set the hours.

b Press the ENTER ( ) button.

Result: The minutes flash.

cPress the TUNING/ALBUM , or . button to set the minutes.

dPress the ENTER ( ) button.

Result: OFF is displayed for a few seconds. You can now set the timer switch-off time.

5.Set the timer switch-off time.

aPress the TUNING/ALBUM , or . button to set the hours.

bPress the ENTER ( ) button. Result: The minutes flash.

cPress the TUNING/ALBUM , or . button to set the minutes.

dPress the ENTER ( ) button.

Result: VOL XX is displayed, where XX corre- sponds to the volume already set.

6.Press the TUNING/ALBUM , or . button to adjust

the volume level, and then press the ENTER ( ) button.

Result: The source to be selected is displayed.

7.Press the TUNING/ALBUM , or . button to select the desired source to be played when the system switches on.

If you select...

You must also...


FM (radio)

a Press the ENTER (

) button.

bSelect a preset station by pressing the TUNING/ALBUM , or . button.

CD/MP3 (compact disc)

Load one compact disc.

USB

Connect the USB device.

8.Press the ENTER ( ) button.

Result: CHKREC (Do you want to record?) is displayed.

12 English

Page 12
Image 12
Samsung MX-H630/EN, MX-H630/ZF manual Setting the Clock, Timer Function, Example You want to wake up to music every morning

MX-H730/XE, MX-H730/XN, MX-H730/EN, MX-H630/XN, MX-H630/ZF specifications

Samsung's MX-H630 and MX-H730 series are remarkable sound systems designed to deliver powerful audio experiences for home entertainment, parties, and more. With their user-friendly features and advanced technologies, these models stand out as excellent choices for music enthusiasts.

The MX-H630 model is equipped with a robust 2000-watt output, which ensures that every beat resonates with clarity and impact. The system incorporates a dual woofer design, enhancing bass response and allowing users to enjoy deep, rich sound. This powerful output makes it ideal for hosting gatherings or simply enjoying music at home.

One of the standout features of the MX-H630 is its Bluetooth connectivity, which allows seamless streaming from smartphones, tablets, and other Bluetooth-enabled devices. This feature enhances the user experience by providing easy access to an extensive library of music, including popular streaming services. Additionally, the system supports USB direct recording, enabling users to convert their favorite CDs into digital files effortlessly.

In terms of audio quality, the MX-H630 and MX-H730 series utilize Samsung's proprietary Sound Alive technology. This feature optimizes sound quality by automatically enhancing various frequencies, resulting in a more immersive audio experience. The presence of a built-in equalizer also allows users to customize sound settings based on personal preferences, ensuring a tailored listening experience.

The MX-H730 model elevates the experience further with additional features like the DJ Beat Effect, which provides users with professional-grade sound effects to elevate any party atmosphere. This model also includes multi-color LED lights that sync with the music, creating an engaging visual display that enhances the overall experience.

Both the MX-H630 and MX-H730 systems come with remote controls for convenient operation, allowing users to adjust settings from a distance. They also offer a built-in CD player, making it easy to enjoy physical media without additional devices.

In summary, the Samsung MX-H630 and MX-H730 series provide powerful audio output, advanced connectivity options, and customizable sound features, making them ideal choices for anyone seeking a high-quality audio system for home use or social gatherings. Their combination of performance and user-friendly features ensures that these models can meet the demands of any music lover.