
MX-H730/XE, MX-H730/XN, MX-H730/EN, MX-H630/XN, MX-H630/ZF specifications
Samsung's MX-H630 and MX-H730 series are remarkable sound systems designed to deliver powerful audio experiences for home entertainment, parties, and more. With their user-friendly features and advanced technologies, these models stand out as excellent choices for music enthusiasts.The MX-H630 model is equipped with a robust 2000-watt output, which ensures that every beat resonates with clarity and impact. The system incorporates a dual woofer design, enhancing bass response and allowing users to enjoy deep, rich sound. This powerful output makes it ideal for hosting gatherings or simply enjoying music at home.
One of the standout features of the MX-H630 is its Bluetooth connectivity, which allows seamless streaming from smartphones, tablets, and other Bluetooth-enabled devices. This feature enhances the user experience by providing easy access to an extensive library of music, including popular streaming services. Additionally, the system supports USB direct recording, enabling users to convert their favorite CDs into digital files effortlessly.
In terms of audio quality, the MX-H630 and MX-H730 series utilize Samsung's proprietary Sound Alive technology. This feature optimizes sound quality by automatically enhancing various frequencies, resulting in a more immersive audio experience. The presence of a built-in equalizer also allows users to customize sound settings based on personal preferences, ensuring a tailored listening experience.
The MX-H730 model elevates the experience further with additional features like the DJ Beat Effect, which provides users with professional-grade sound effects to elevate any party atmosphere. This model also includes multi-color LED lights that sync with the music, creating an engaging visual display that enhances the overall experience.
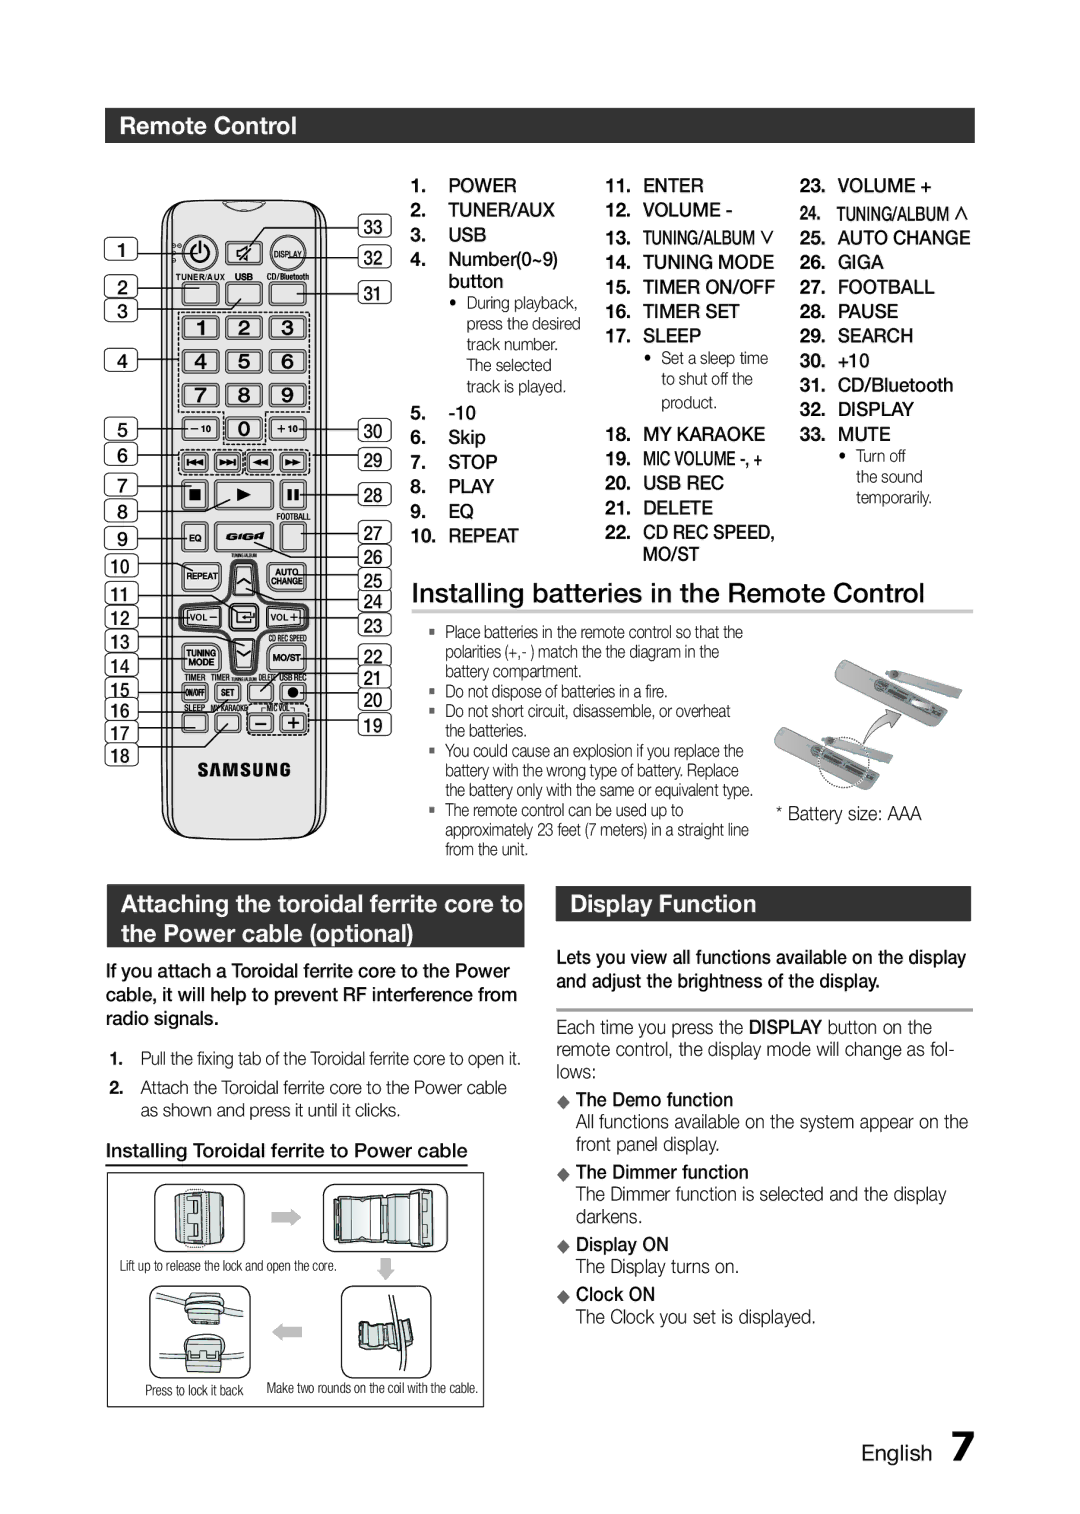
Both the MX-H630 and MX-H730 systems come with remote controls for convenient operation, allowing users to adjust settings from a distance. They also offer a built-in CD player, making it easy to enjoy physical media without additional devices.
In summary, the Samsung MX-H630 and MX-H730 series provide powerful audio output, advanced connectivity options, and customizable sound features, making them ideal choices for anyone seeking a high-quality audio system for home use or social gatherings. Their combination of performance and user-friendly features ensures that these models can meet the demands of any music lover.