PDP-TELEVISION
Checking Parts
User Instructions
Sold Separately
Contents
Symbols
Front or Side Panel
Power button
Power Indicator
Remote Control Sensor
USB Mass Storage Class
Headphones jack
Side Panel
Video or Video / Audio L/R
EXT 1, EXT
Common Interface Slot Input/Output Specification
Connecting CI Common Interface Card
Connecting external Audio Devices
Teletext Functions Refer to
Using the Stand-Base
Viewing the Remote Control depending on the model
Next channel Previous channel Exit the on-screen menu
SwitchingYourTelevision On and Off
Installing Batteries in the Remote Control
Press the Exit button to exit from the menu
This function will automatically cancel five minutes later
Viewing the Menus
Freezing the Current Picture
Press the Menu button to display the menu
Plug & Play Feature
Press the Exit button to exit
Viewing an External Signal Sources
Editing Device Names
You can give a name to the external source
Storing Channels Automatically
Colour System AUTO/PAL/SECAM/NTSC4.43
Storing Channels Manually
Sound System BG/DK/I/L
Adding channels
Adding / Locking Channels
Locking channels
Assigning Names to Channels
Sorting the Stored Channels
LNA Low Noise Amplifier
FineTuning Channel Reception
Available modes Dynamic, Standard, Movie, and Custom
Customizing the Picture Settings
Press the œ or √ button until you reach the optimal setting
Changing the Picture Standard
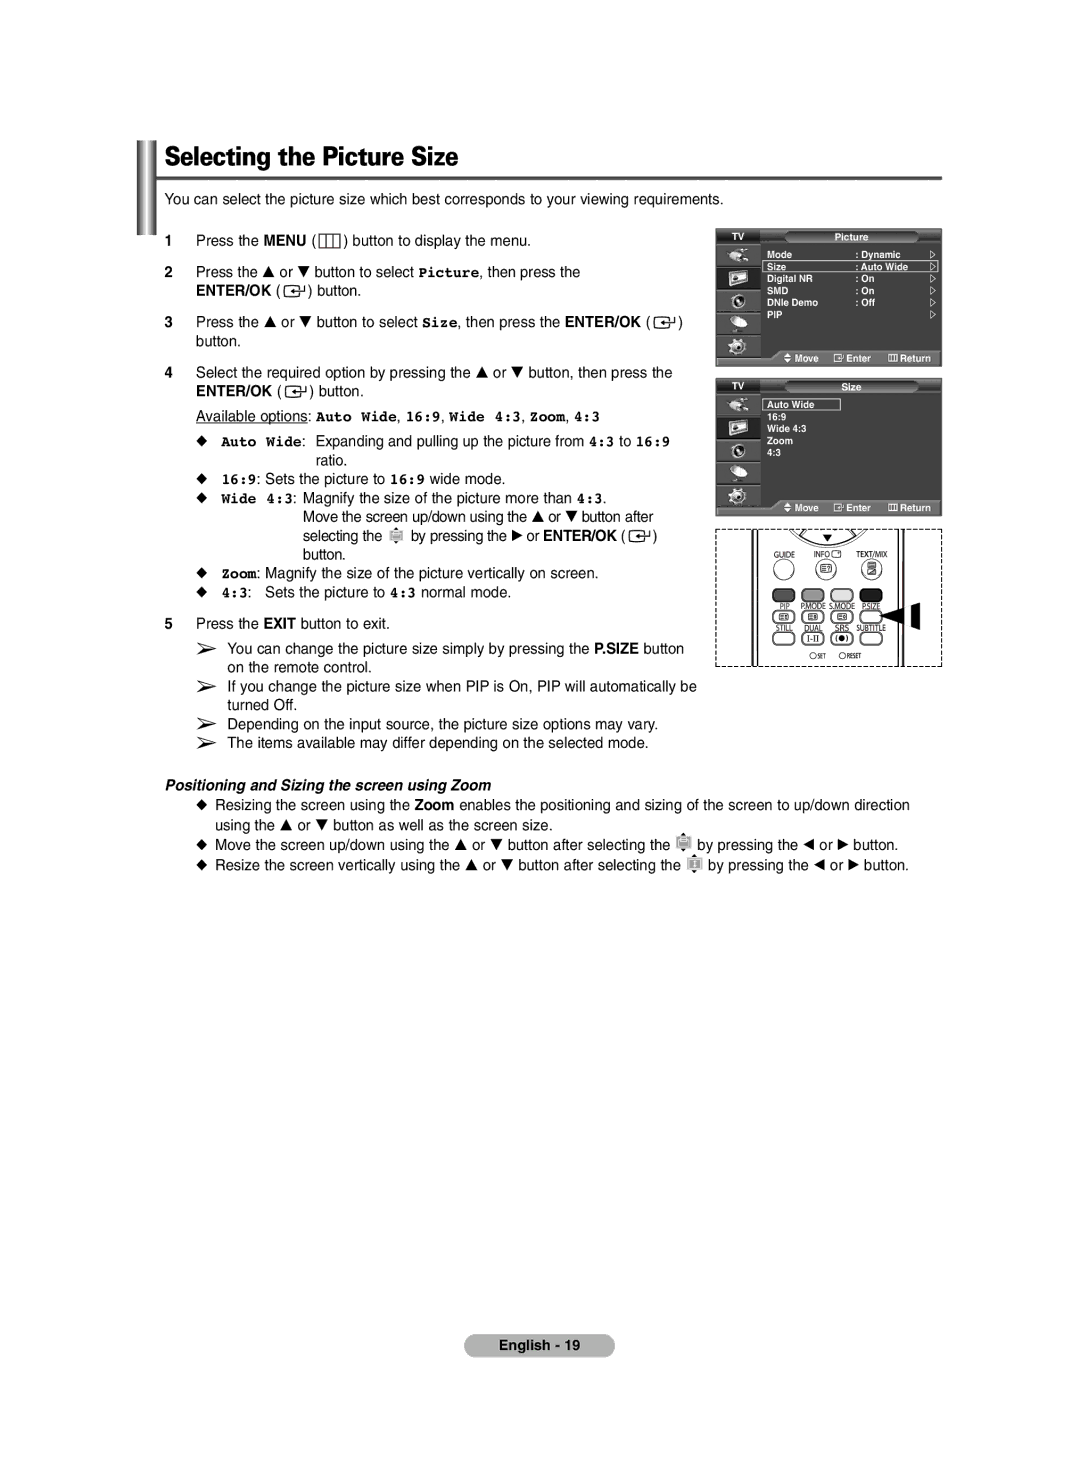
Available options Auto Wide, 169, Wide 43, Zoom
Selecting the Picture Size
DNIe Demo On/Off
Digital NR / SMD / DNIe Demo
Digital NR On/Off
SMDSmooth Motion Driver On/Off
Viewing the Picture in Picture PIP
Table of PIP Settings
If Game Mode is On
Sound Features
Auto Power Off
Time Features
Sleep Timer
On Timer / Off Timer
Language / Blue Screen / Melody / Energy Saving
Using Game Mode
Vertical Line , Time
Setting the Blue Eye
Available options Pixel Shift, All White, Signal Pattern
Screen Burn Protection
Vertical
Setting upYour PC Software Based on Windows XP
Input Mode PC
Screen refresh rate
Image Lock Coarse/Fine
Setting the PC
Auto Adjustment
Image Reset
Supported Memory Cards
Using the Wise Link Function
´ Memory card
Using the Remote Control Button in Wiselink Menu
Using the Wiselink Mode
Button
Using the Photo Jpeg List
Are zoomed-in at 4 times their original size
Using the Options Menu
Viewing a Slide Show
Background Music, Background Music Setting, List
Copy, Copy All Files, Delete, Delete All Files, Print
Background Music
Using the Menu during a Slide Show
Background Music Setting
Speed
Icon Current OSD
Rotating
Zoom, Copy, Delete, Print, List
Button is pressed, the photo rotates
Zoomed-in photo
Zooming-In
Icon Current OSD Function
Button Function
Copying Photo Files
Deleting Photo Files
Deleted files cannot be recovered
Turn your printer’s power on
Turn your printer power off
Printing the Photo Image
Screen
Using the Music MP3 List
Button on the remote control when music
Top of the screen Music Stop
Copy, Copy All Files, Delete, Delete All Files
Copying Music Files
Do RESOURCEyou want to delete the file?
Deleting Music Files
You can experience various types of slide show effect
Using the Setup Menu
Slide Show Speed
Slide Show Effect
Screen Saver
Music Repeat
Previewing the DTV Menu System depending on the model
Press the D.MENU button on your remote control
Updating the Channel Manager Manually
Updating the Channel Manager Automatically
Or Select can be used as the ENTER/OK button
EditingYour Favourite Channels
Add
Preview
Move
Delete
Displaying Programme Information
Viewing Channel Manager
Scrolls backwards quickly
Viewing the EPG Electronic Programme Guide Information
Then
All Channels list
Weekly
Using the Scheduled List
When the favourite channel manager has not been set up
Setting the Default Guide
Viewing All Channels and Favourite Channels
ChoosingYour Language
Adjusting theTranslucency Level
You can set the translucency of the on-screen menu
Setting up the Parental Lock
Checking the Product Information
Using the Preferred Features
Upgrading the Software Option
Checking the Signal Information
Selecting the CI Common Interface Menu
Viewing Common Interface
Resetting
´ sub-page
∏ mode
cancel
Teletext on/mix
How to Install the Wall Mount Bracket
Panel bracket
Instructions on Securing the SET to the Wall Mount Bracket
Connecting External Devices to the PDP
How to Adjust Mounting Angle
Setting UpYour Remote Control
Setting Up the Remote to Operate Your Set Top Box
Setting Up the Remote to Operate Your DVD
VCR
Remote Control Codes
Cable BOX
Samsung DVD
Troubleshooting
This page is intentionally Left blank
Waste Electrical & Electronic Equipment
Correct Disposal of This Product
Country Customer Care Centre Web Site
Contact Samsung WORLD-WIDE