Self-timer ( ✢) / Right button
When the menu is displayed on the LCD monitor, pressing the Right but- ton makes the cursor shift to the right tab.
When the menu is not displayed on the LCD monitor, the RIGHT button operates as the
If you operate the
Use a tripod to prevent the camera from shaking.
In Movie Clip mode, only the 10SEC
Selecting the
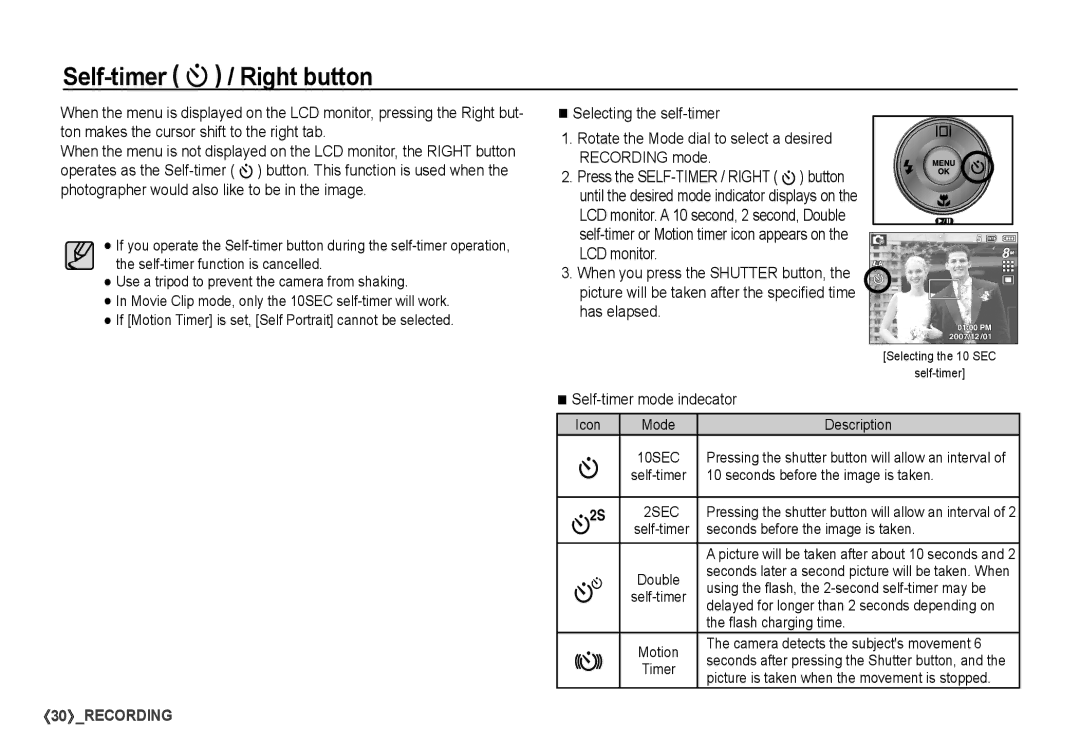
1. Rotate the Mode dial to select a desired RECORDING mode.
2. Press the
3. When you press the SHUTTER button, the picture will be taken after the specified time has elapsed.
|
| [Selecting the 10 SEC | |
|
| ||
| |||
|
|
| |
Icon | Mode | Description | |
✢ | 10SEC | Pressing the shutter button will allow an interval of | |
10 seconds before the image is taken. | |||
|
|
| |
✡ | 2SEC | Pressing the shutter button will allow an interval of 2 | |
| seconds before the image is taken. | ||
|
| A picture will be taken after about 10 seconds and 2 | |
✣ | Double | seconds later a second picture will be taken. When | |
using the flash, the | |||
delayed for longer than 2 seconds depending on | |||
|
| ||
|
| the flash charging time. | |
| Motion | The camera detects the subject's movement 6 | |
| seconds after pressing the Shutter button, and the | ||
| Timer | ||
| picture is taken when the movement is stopped. | ||
|
| ||
![]() 30
30![]() _RECORDING
_RECORDING
