5.When you install the Mount bracket on the ceiling, remove the Ceiling mount opener by pressing it hard to connect the line attached on your camera through the hole in the ceiling. Otherwise, you can use the empty space opposite to the CAMERA FRONT sign for line connection.
6.Now attach the Main body to the Mount bracket by rotating it in the LOCK direction after aligning the Groove mark on the Main body with the wide groove around the CAMERA FRONT inlay.
7.Adjust the camera direction. For more details on the direction control, see “Adjusting the camera direction,” on the same page. When required to adjust the zoom and focus for your camera, see “Connecting cables and changing the settings,” on page 10.
8.Attach the Inner cover to the Main body by pressing it until a “click” sound is heard after aligning two screw holes on the Wing lockers of the Inner cover with two screw holes on the Main body’s left and right sides.
9.Finally attach the Cover dome to the Main body by pressing it until a “click” sound is heard after aligning the bump inside the Cover dome with the Groove mark on the Main body.
❚Adjusting the camera direction
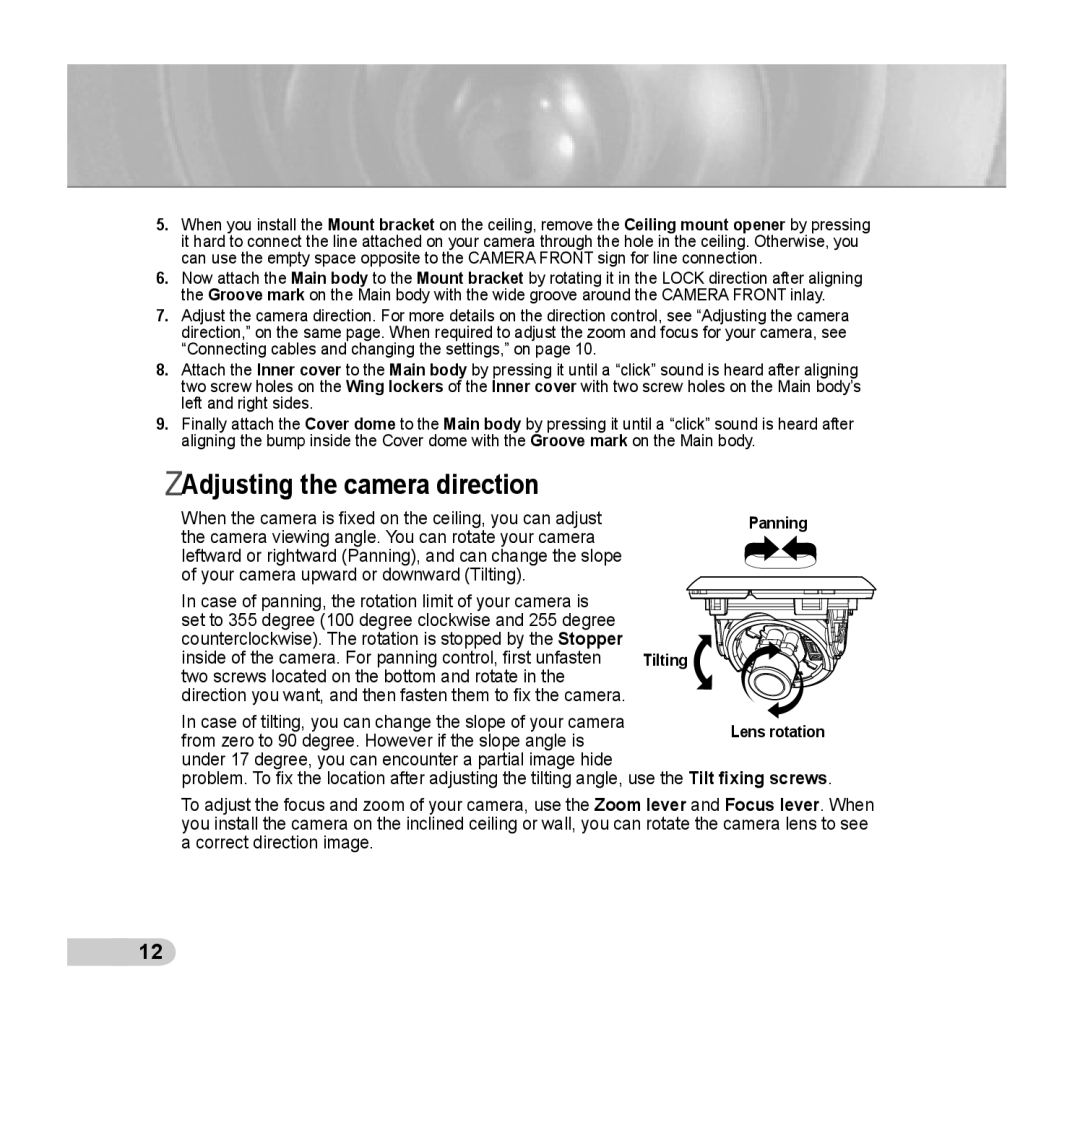
When the camera is fixed on the ceiling, you can adjust | Panning | |
the camera viewing angle. You can rotate your camera |
| |
leftward or rightward (Panning), and can change the slope |
| |
of your camera upward or downward (Tilting). |
| |
In case of panning, the rotation limit of your camera is |
| |
set to 355 degree (100 degree clockwise and 255 degree |
| |
counterclockwise). The rotation is stopped by the Stopper |
| |
inside of the camera. For panning control, first unfasten | Tilting | |
two screws located on the bottom and rotate in the |
| |
direction you want, and then fasten them to fix the camera. |
| |
In case of tilting, you can change the slope of your camera | Lens rotation | |
from zero to 90 degree. However if the slope angle is | ||
| ||
under 17 degree, you can encounter a partial image hide |
|
problem. To fix the location after adjusting the tilting angle, use the Tilt fixing screws.
To adjust the focus and zoom of your camera, use the Zoom lever and Focus lever. When you install the camera on the inclined ceiling or wall, you can rotate the camera lens to see a correct direction image.
![]() 12
12
