VP-X105L/SEO, VP-X110L/XEH, VP-X110L/EUR, VP-X105L/XEH, VP-X110L/COL specifications
The Samsung VP-M110S/XET, VP-X110L/XEF, VP-M110R/XEF, VP-M110B/XEF, and VP-M110S/XEF represent a remarkable range of consumer camcorders designed for video enthusiasts and casual users alike. These models incorporate cutting-edge technology and features, enabling users to capture high-quality footage with ease.One of the main features of these camcorders is their impressive video resolution capabilities. Most models in this lineup support recording in full HD, providing crystal-clear video quality that enhances the viewing experience. The 1080p resolution ensures that details are sharp, making these camcorders ideal for personal projects or family events.
The VP-M110 series also includes advanced optical zoom functionality. Leveraging high-quality lenses, these camcorders allow users to zoom in on distant subjects without losing clarity. Whether capturing sporting events or wildlife, the optical zoom feature ensures that the focus remains precise, enabling users to capture captivating footage from afar.
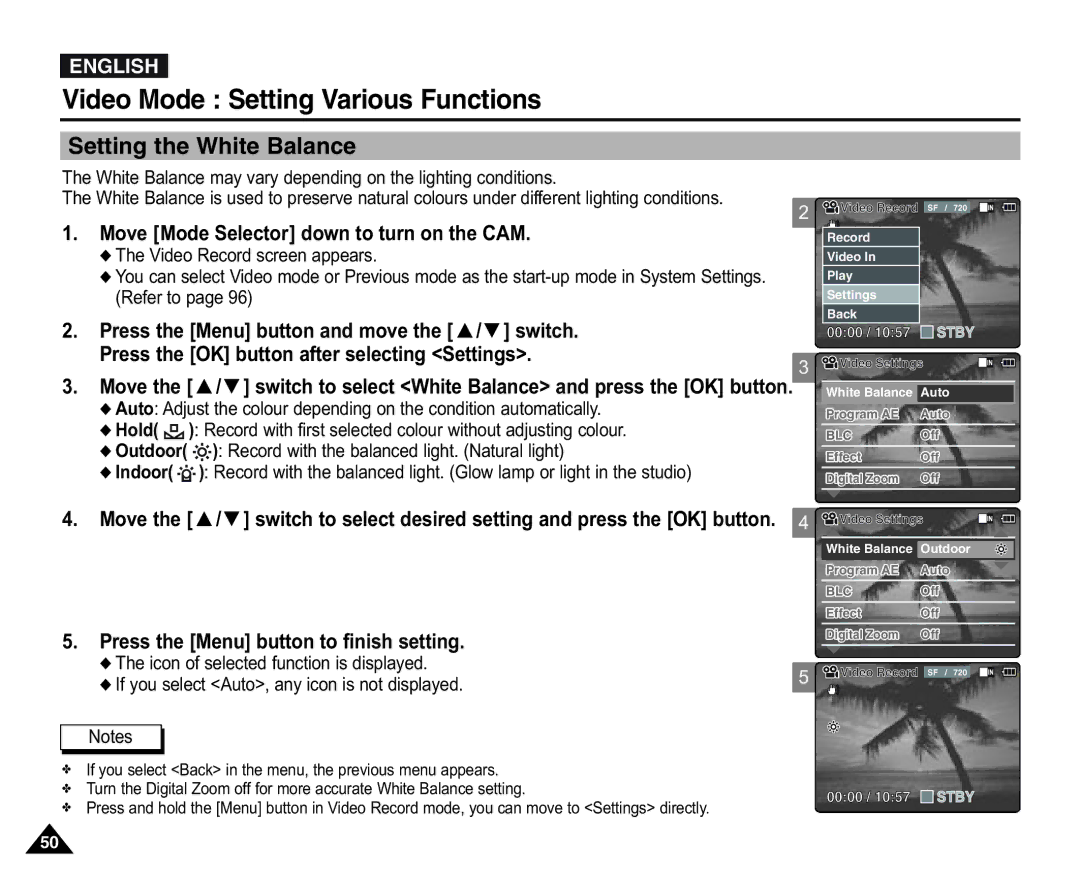
Users will also appreciate the array of manual settings that the VP-M110 series offers. For those who wish to take greater control over their recording experience, these camcorders provide options such as manual focus, exposure settings, and white balance adjustments. This versatility allows videographers to be creative and adapt their shooting style to various environments and lighting conditions.
The VP-X110L/XEF model stands out with its unique design and user-friendly interface. Its lightweight and compact form factor make it portable, catering to users who are always on the go. Moreover, the intuitive touch screen interface simplifies navigation, making it easy for users to adjust settings or review recordings.
In terms of connectivity, these camcorders come equipped with HDMI and USB outputs, allowing for straightforward connection to televisions and computer systems. This feature enhances versatility, enabling users to enjoy instant playback on larger screens or transfer content to editing software with minimal fuss.
Battery life is another critical aspect of these camcorders. With extended recording times, users can capture moments without frequently worrying about battery depletion. Additionally, the ability to charge via standard USB ports increases convenience, making it easier to keep the device ready for action.
Overall, the Samsung VP-M110S/XET, VP-X110L/XEF, VP-M110R/XEF, VP-M110B/XEF, and VP-M110S/XEF are equipped with modern features and technologies that cater to both novice and experienced videographers. With their high-resolution video capabilities, optical zoom, manual controls, and user-friendly interfaces, these camcorders offer an impressive solution for anyone looking to document life's moments beautifully and effectively.

