HOW TO ASSEMBLE
CAUTION: Assemble the cleaner before using.
CAUTION: Moving parts, make sure on/off switch is in off
(0) position before plugging in.
NOTE: Features may vary by model yet all parts assemble the same.
Attach Handle
CAUTION: Do not catch cord under handle.
1
Grooves
2![]()
![]()
![]()
![]()
![]()
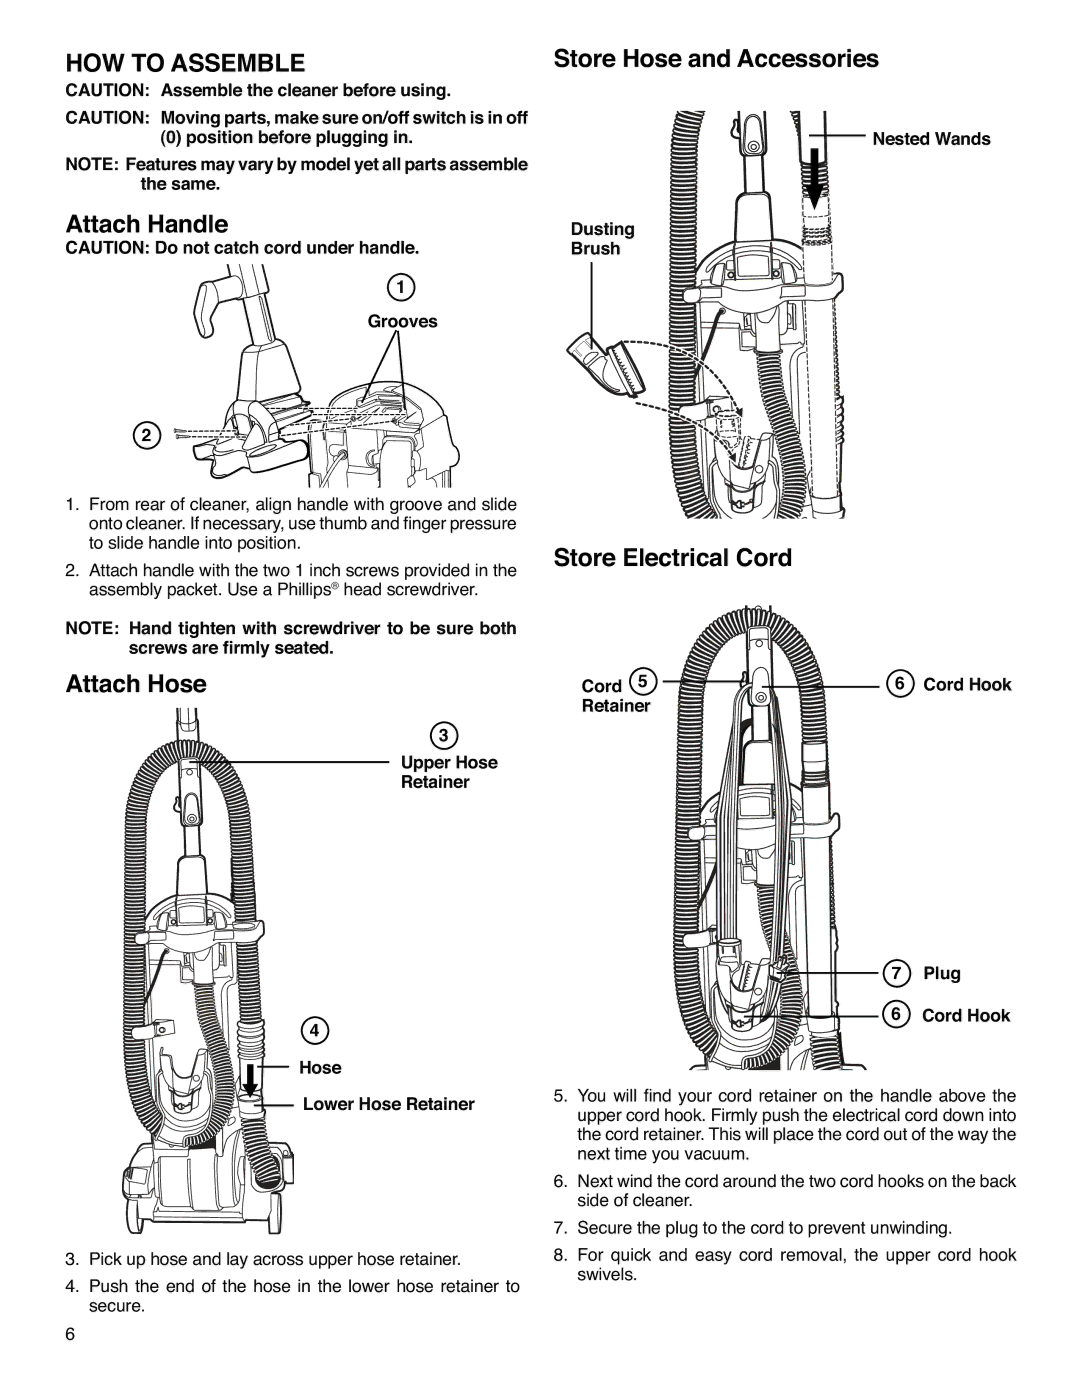
1.Fromrearofcleaner,alignhandlewithgroovea ndslide ontocleaner.Ifnecessary,usethumbandfingerpre ssure toslidehandleintoposition.
2.Attachhandlewiththetwo1inchscrewsprovide dinthe assemblypacket.UseaPhillips ®headscrewdriver.
NOTE: Hand tighten with screwdriver to be sure both screws are firmly seated.
Attach Hose
3
Upper Hose
Retainer
4
![]()
![]() Hose
Hose
 Lower Hose Retainer
3.Pickuphoseandlayacrossupperhoseretainer.
4.Pushtheendofthehoseinthelowerhoseretai nerto secure.
Store Hose and Accessories
![]()
![]()
![]()
![]() Nested Wands
Nested Wands
Dusting
Brush
Store Electrical Cord
Cord 5 
 6 Cord Hook Retainer
| 7 | Plug | |
| 6 | Cord Hook | |
5. | Youwillfindyourcordretaineronthehandleab |
| ovethe |
| uppercordhook.Firmlypushtheelectricalcorddo | wninto | |
| thecordretainer.Thiswillplacethecordoutof |
| thewaythe |
| nexttimeyouvacuum. |
|
|
6. | Nextwindthecordaroundthetwocordhookson |
| theback |
| sideofcleaner. |
|
|
7. | Securetheplugtothecordtopreventunwinding |
| . |
8. | Forquickandeasycordremoval,theuppercord | hook | |
| swivels. |
|
|
6
