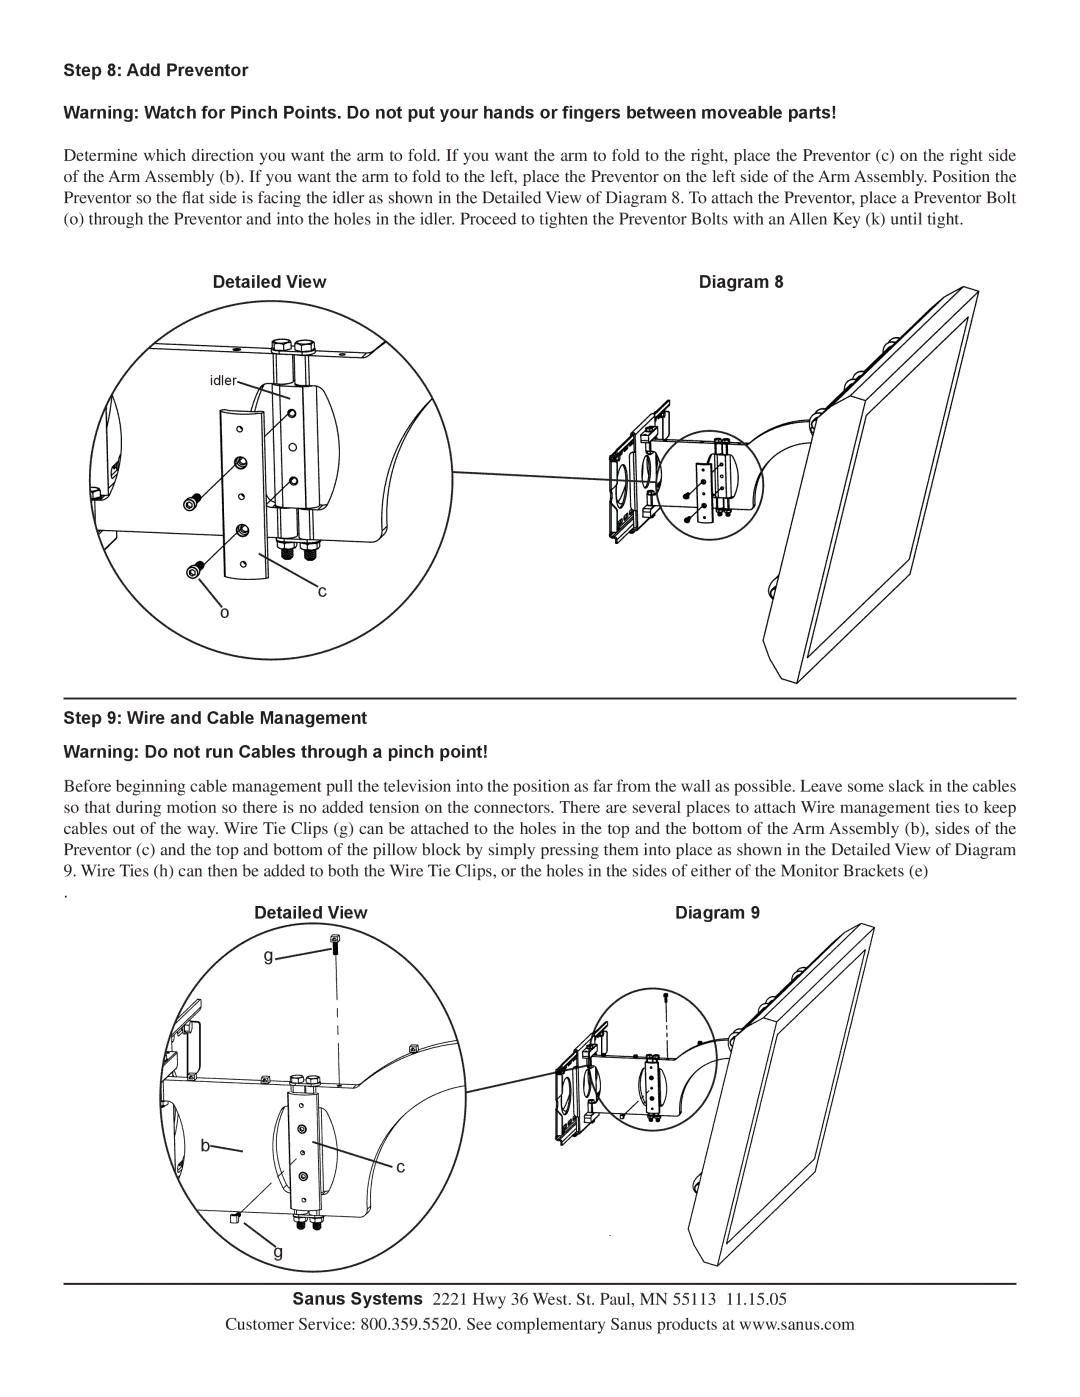
Step 8: Add Preventor
Warning: Watch for Pinch Points. Do not put your hands or fingers between moveable parts!
Determine which direction you want the arm to fold. If you want the arm to fold to the right, place the Preventor (c) on the right side of the Arm Assembly (b). If you want the arm to fold to the left, place the Preventor on the left side of the Arm Assembly. Position the Preventor so the flat side is facing the idler as shown in the Detailed View of Diagram 8. To attach the Preventor, place a Preventor Bolt
(o) through the Preventor and into the holes in the idler. Proceed to tighten the Preventor Bolts with an Allen Key (k) until tight.
Detailed View | Diagram 8 |
idler
c
o
Step 9: Wire and Cable Management
Warning: Do not run Cables through a pinch point!
Before beginning cable management pull the television into the position as far from the wall as possible. Leave some slack in the cables so that during motion so there is no added tension on the connectors. There are several places to attach Wire management ties to keep cables out of the way. Wire Tie Clips (g) can be attached to the holes in the top and the bottom of the Arm Assembly (b), sides of the Preventor (c) and the top and bottom of the pillow block by simply pressing them into place as shown in the Detailed View of Diagram
9.Wire Ties (h) can then be added to both the Wire Tie Clips, or the holes in the sides of either of the Monitor Brackets (e)
.
Detailed View | Diagram 9 |
g![]()
b![]()
c
g
Sanus Systems 2221 Hwy 36 West. St. Paul, MN 55113 11.15.05
Customer Service: 800.359.5520. See complementary Sanus products at www.sanus.com