ENGLISH
Step 9: Hang the Television onto the Wall Plate
![]() CAUTION: Some televisions may require two people to lift. Sanus is not responsible for personal injury or product damage.
CAUTION: Some televisions may require two people to lift. Sanus is not responsible for personal injury or product damage.
![]() CAUTION: The Monitor Brackets must hang on the left and right extension panels of the Wall Plate Assembly, they can not hang directly on the center plate.
CAUTION: The Monitor Brackets must hang on the left and right extension panels of the Wall Plate Assembly, they can not hang directly on the center plate.
NOTE: For the Low Profile Monitor Bracket, make sure the latch is in the open position.
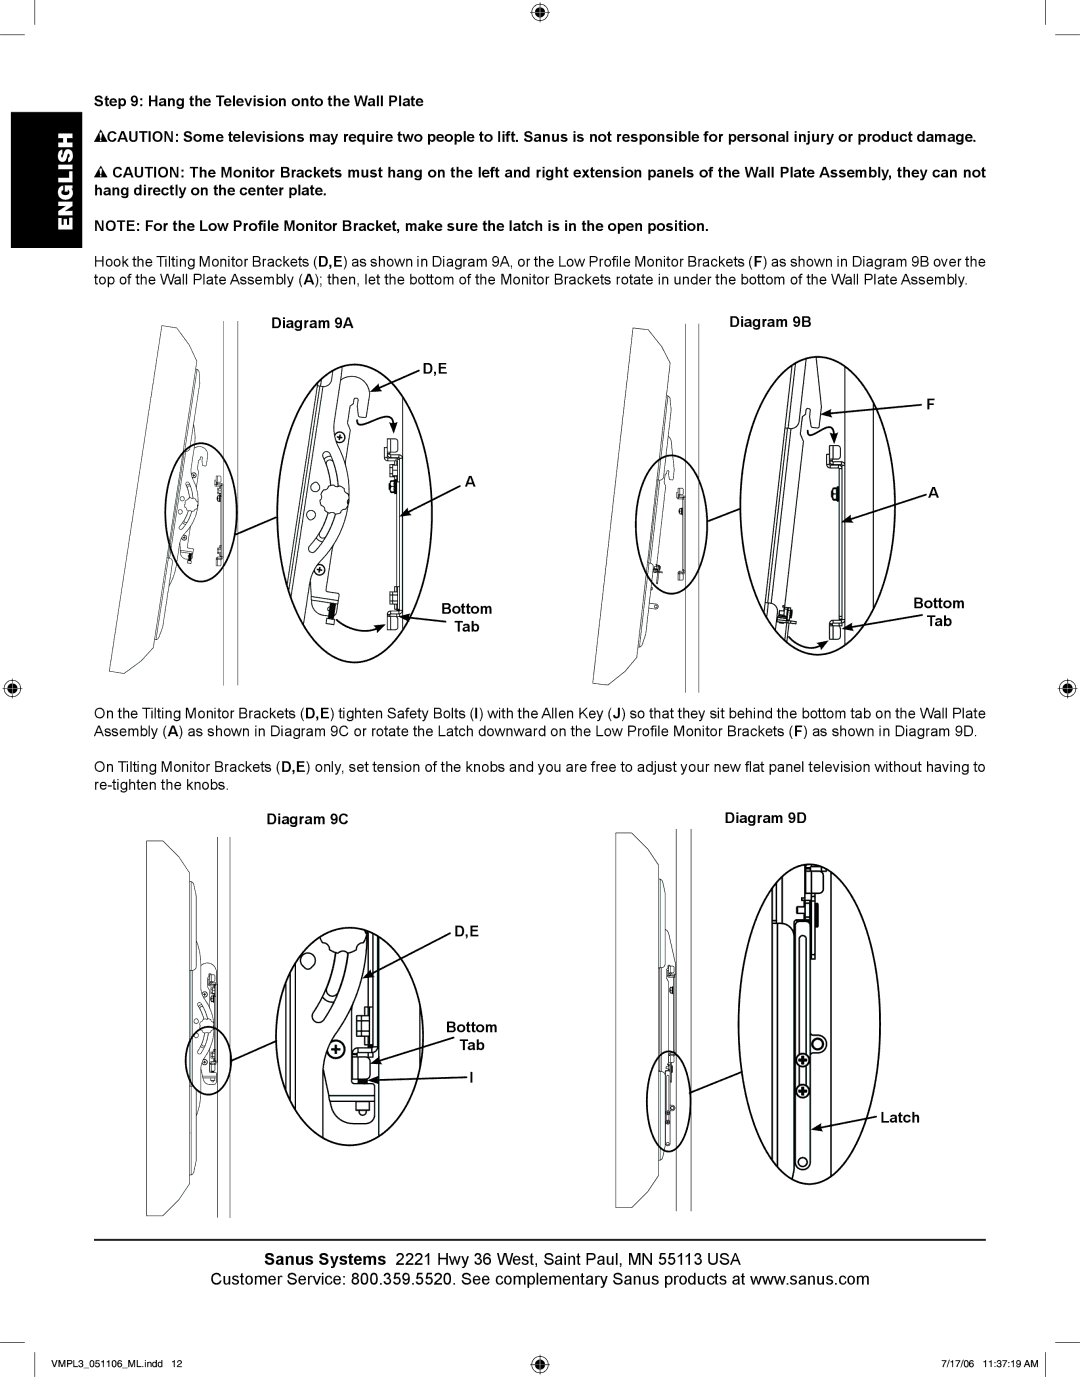
Hook the Tilting Monitor Brackets (D,E) as shown in Diagram 9A, or the Low Profile Monitor Brackets (F) as shown in Diagram 9B over the top of the Wall Plate Assembly (A); then, let the bottom of the Monitor Brackets rotate in under the bottom of the Wall Plate Assembly.
Diagram 9A | Diagram 9B |
D,E
![]() F
F
AA
Bottom | Bottom | |
Tab | ||
Tab | ||
|
On the Tilting Monitor Brackets (D,E) tighten Safety Bolts (I) with the Allen Key (J) so that they sit behind the bottom tab on the Wall Plate Assembly (A) as shown in Diagram 9C or rotate the Latch downward on the Low Profile Monitor Brackets (F) as shown in Diagram 9D.
On Tilting Monitor Brackets (D,E) only, set tension of the knobs and you are free to adjust your new flat panel television without having to
Diagram 9C | Diagram 9D |
D,E
Bottom
 Tab
Tab
![]() I
I
 Latch
Latch
Sanus Systems 2221 Hwy 36 West, Saint Paul, MN 55113 USA
Customer Service: 800.359.5520. See complementary Sanus products at www.sanus.com
VMPL3_051106_ML.indd 12
7/17/06 11:37:19 AM
