ENGLISH
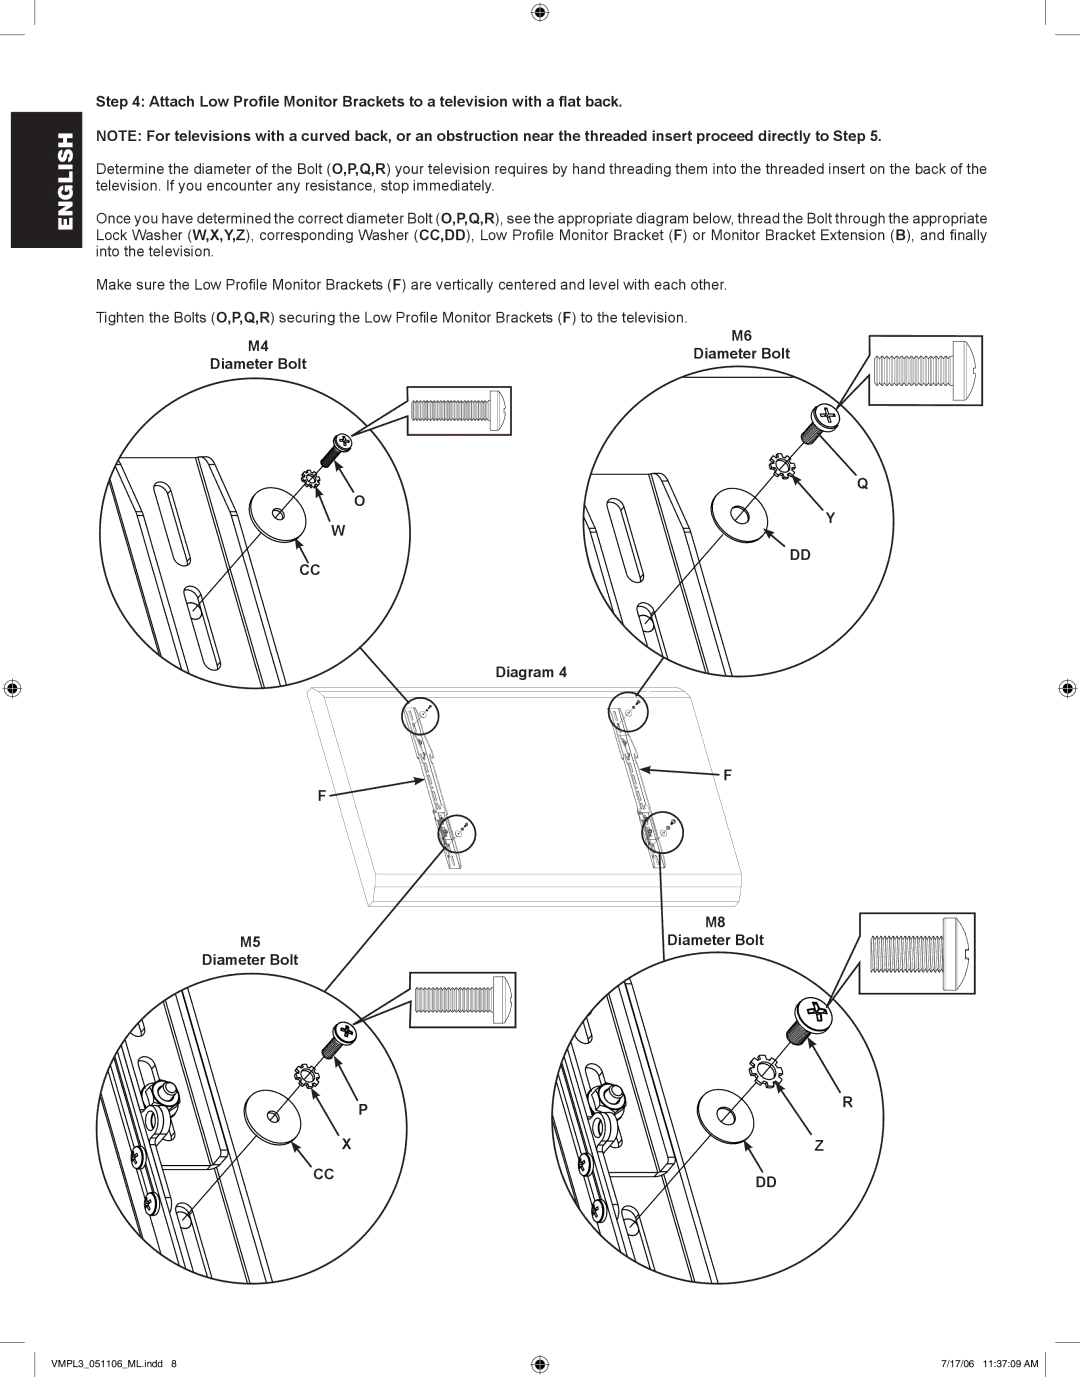
Step 4: Attach Low Profile Monitor Brackets to a television with a flat back.
NOTE: For televisions with a curved back, or an obstruction near the threaded insert proceed directly to Step 5.
Determine the diameter of the Bolt (O,P,Q,R) your television requires by hand threading them into the threaded insert on the back of the television. If you encounter any resistance, stop immediately.
Once you have determined the correct diameter Bolt (O,P,Q,R), see the appropriate diagram below, thread the Bolt through the appropriate Lock Washer (W,X,Y,Z), corresponding Washer (CC,DD), Low Profile Monitor Bracket (F) or Monitor Bracket Extension (B), and finally into the television.
Make sure the Low Profile Monitor Brackets (F) are vertically centered and level with each other.
Tighten the Bolts (O,P,Q,R) securing the Low Profile Monitor Brackets (F) to the television.
M6
M4Diameter Bolt
Diameter Bolt
Q
O
W
Y
DD
CC
Diagram 4
F ![]()
![]() F
F
M8
M5Diameter Bolt Diameter Bolt
| P | R |
|
| |
X |
| Z |
CC |
| DD |
|
|
VMPL3_051106_ML.indd 8
7/17/06 11:37:09 AM