LENS REPLACEMENT PROCEDURE (FOR "C" TYPE )
Perform the steps 1 to 6 for lens replacement.
First set the lens at the fully lower position with lens shift adjustment.
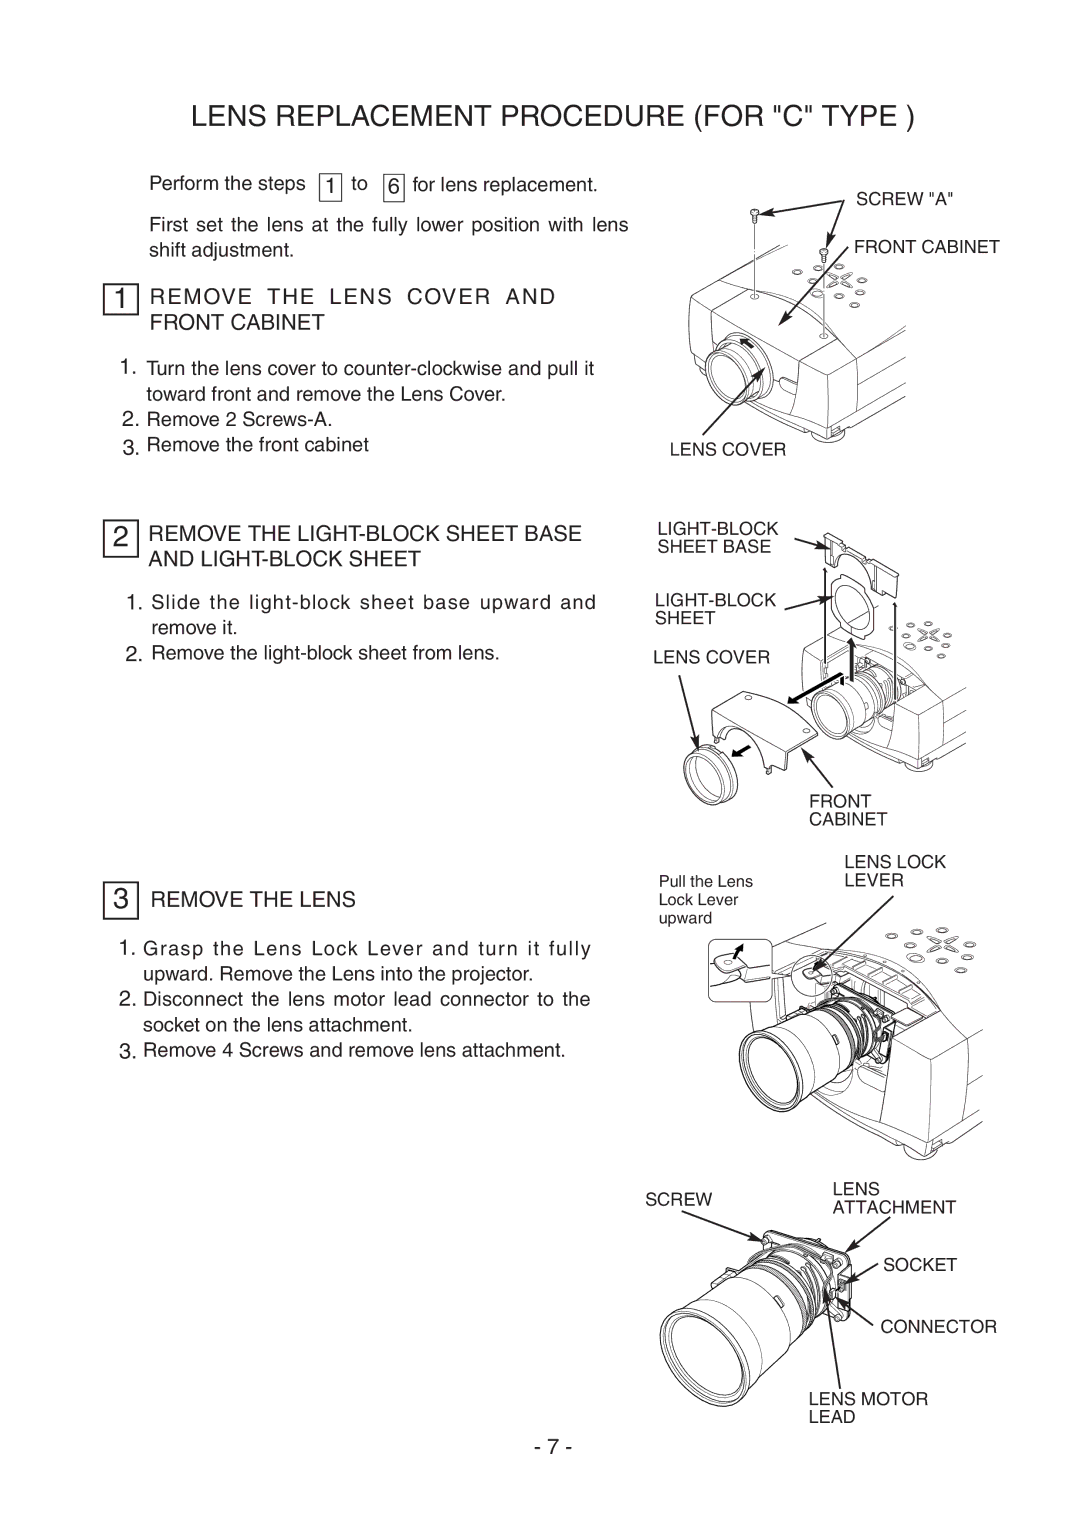
1REMOVE THE LENS COVER AND FRONT CABINET
1.Turn the lens cover to
2.Remove 2
3.Remove the front cabinet
2REMOVE THE LIGHT-BLOCK SHEET BASE AND LIGHT-BLOCK SHEET
1.Slide the
2.Remove the
LENS COVER
SHEET BASE
![]()
SHEET
LENS COVER
SCREW "A"
FRONT CABINET
3REMOVE THE LENS
1.Grasp the Lens Lock Lever and turn it fully upward. Remove the Lens into the projector.
2.Disconnect the lens motor lead connector to the socket on the lens attachment.
3.Remove 4 Screws and remove lens attachment.
Pull the Lens Lock Lever upward
FRONT
CABINET
LENS LOCK
LEVER
LENS
SCREWATTACHMENT
![]()
![]()
![]()
![]() SOCKET
SOCKET
CONNECTOR
LENS MOTOR
LEAD
- 7 -