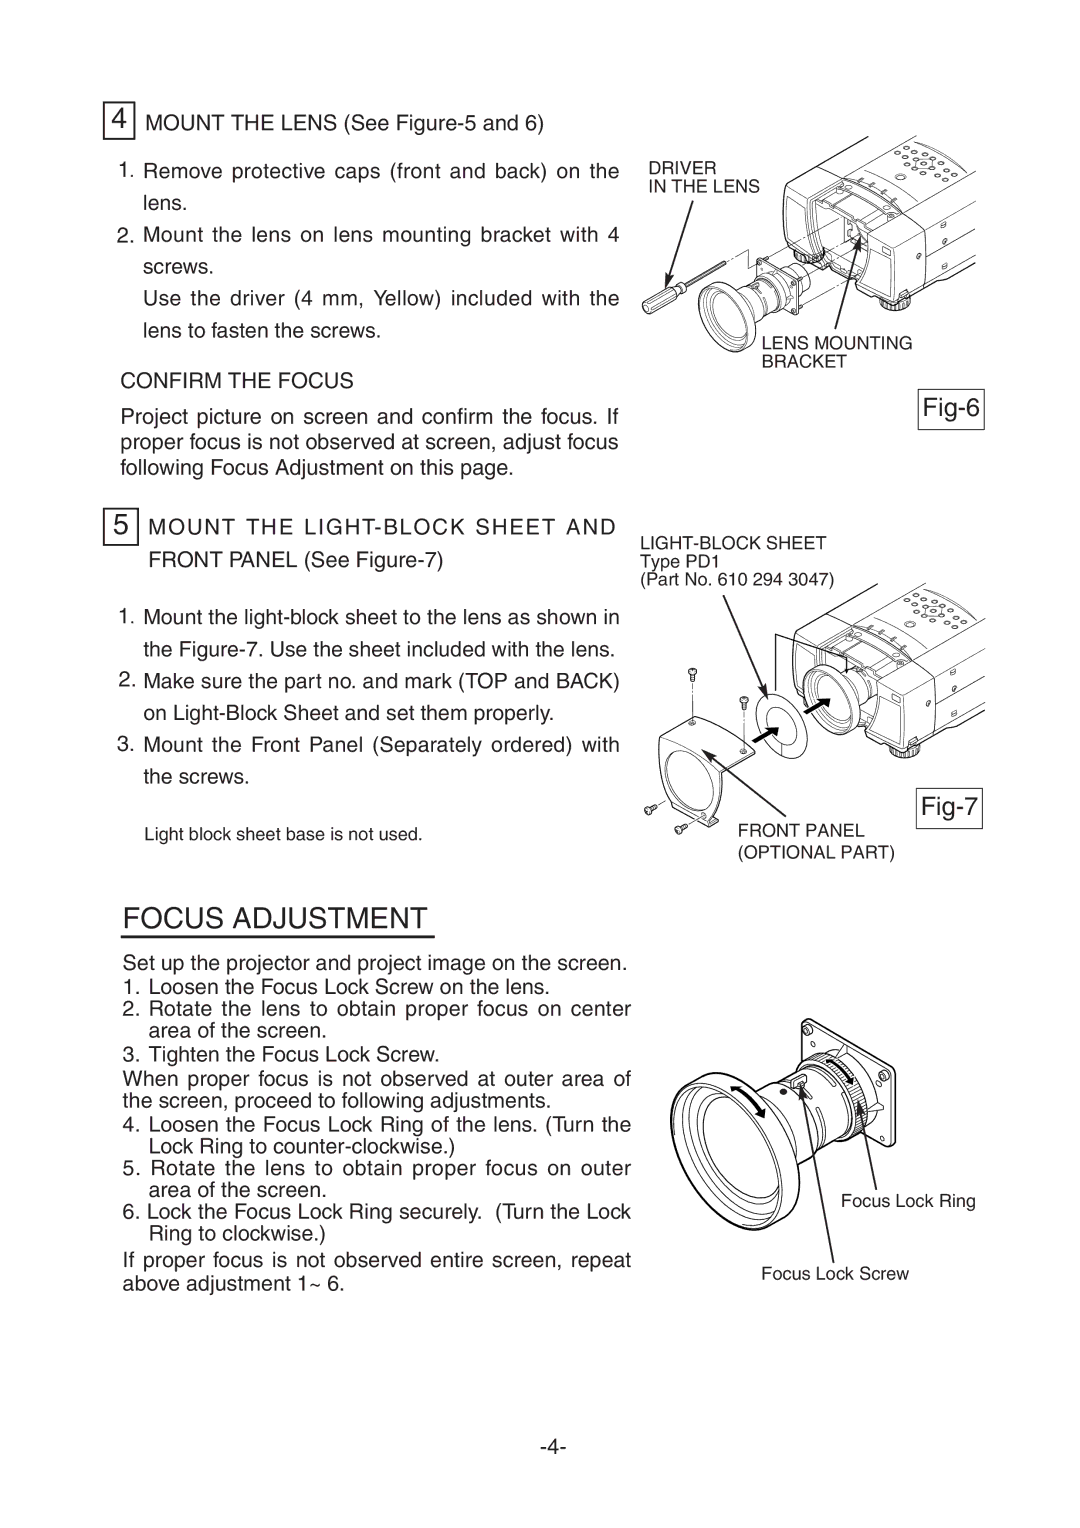
4MOUNT THE LENS (See
1. Remove protective caps (front and back) on the
lens.
2.Mount the lens on lens mounting bracket with 4 screws.
Use the driver (4 mm, Yellow) included with the lens to fasten the screws.
CONFIRM THE FOCUS
Project picture on screen and confirm the focus. If proper focus is not observed at screen, adjust focus following Focus Adjustment on this page.
5MOUNT THE
1. Mount the
2.Make sure the part no. and mark (TOP and BACK) on
3.Mount the Front Panel (Separately ordered) with the screws.
Light block sheet base is not used.
DRIVER
IN THE LENS
LENS MOUNTING
BRACKET
Fig-6
Type PD1
(Part No. 610 294 3047)
Fig-7
FRONT PANEL (OPTIONAL PART)
FOCUS ADJUSTMENT
Set up the projector and project image on the screen.
1.Loosen the Focus Lock Screw on the lens.
2.Rotate the lens to obtain proper focus on center area of the screen.
3.Tighten the Focus Lock Screw.
When proper focus is not observed at outer area of the screen, proceed to following adjustments.
4.Loosen the Focus Lock Ring of the lens. (Turn the Lock Ring to
5.Rotate the lens to obtain proper focus on outer area of the screen.
6.Lock the Focus Lock Ring securely. (Turn the Lock Ring to clockwise.)
If proper focus is not observed entire screen, repeat above adjustment 1~ 6.
Focus Lock Ring
Focus Lock Screw