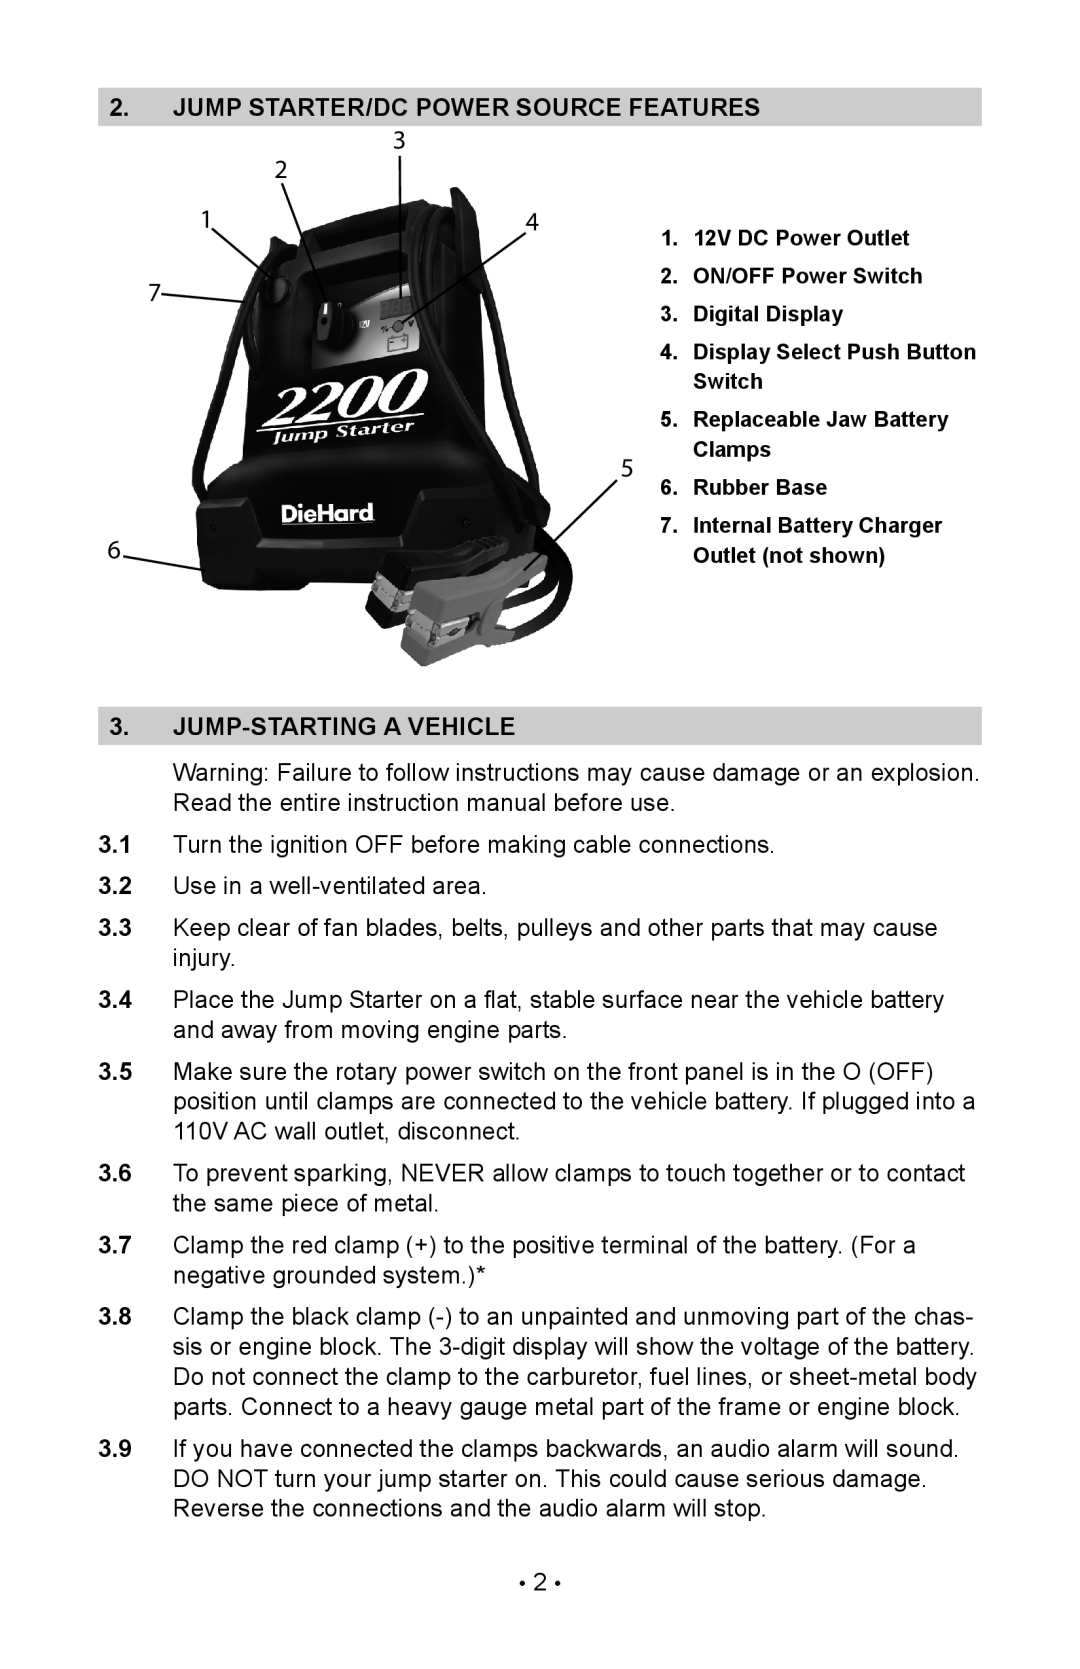
2.jump starter/dc power source features
3
| 2 |
|
|
1 | 4 | 1. | 12V DC Power Outlet |
|
| ||
7 |
| 2. | ON/OFF Power Switch |
| 3. | Digital Display | |
|
| ||
|
| 4. | Display Select Push Button |
|
|
| Switch |
|
| 5. | Replaceable Jaw Battery |
|
| 5 6. | Clamps |
|
| Rubber Base | |
6 |
| 7. | Internal Battery Charger |
|
| Outlet (not shown) |
3.Jump-starting a vehicle
Warning: Failure to follow instructions may cause damage or an explosion. Read the entire instruction manual before use.
3.1Turn the ignition off before making cable connections.
3.2Use in a
3.3Keep clear of fan blades, belts, pulleys and other parts that may cause injury.
3.4Place the Jump Starter on a flat, stable surface near the vehicle battery and away from moving engine parts.
3.5Make sure the rotary power switch on the front panel is in the O (OFF) position until clamps are connected to the vehicle battery. If plugged into a 110V AC wall outlet, disconnect.
3.6To prevent sparking, NEVER allow clamps to touch together or to contact the same piece of metal.
3.7Clamp the red clamp (+) to the positive terminal of the battery. (For a negative grounded system.)*
3.8Clamp the black clamp
3.9If you have connected the clamps backwards, an audio alarm will sound. DO NOT turn your jump starter on. This could cause serious damage. Reverse the connections and the audio alarm will stop.
•2 •
