10.PRODUCT FEATURES
1
4
2
![]() 3
3
5![]()
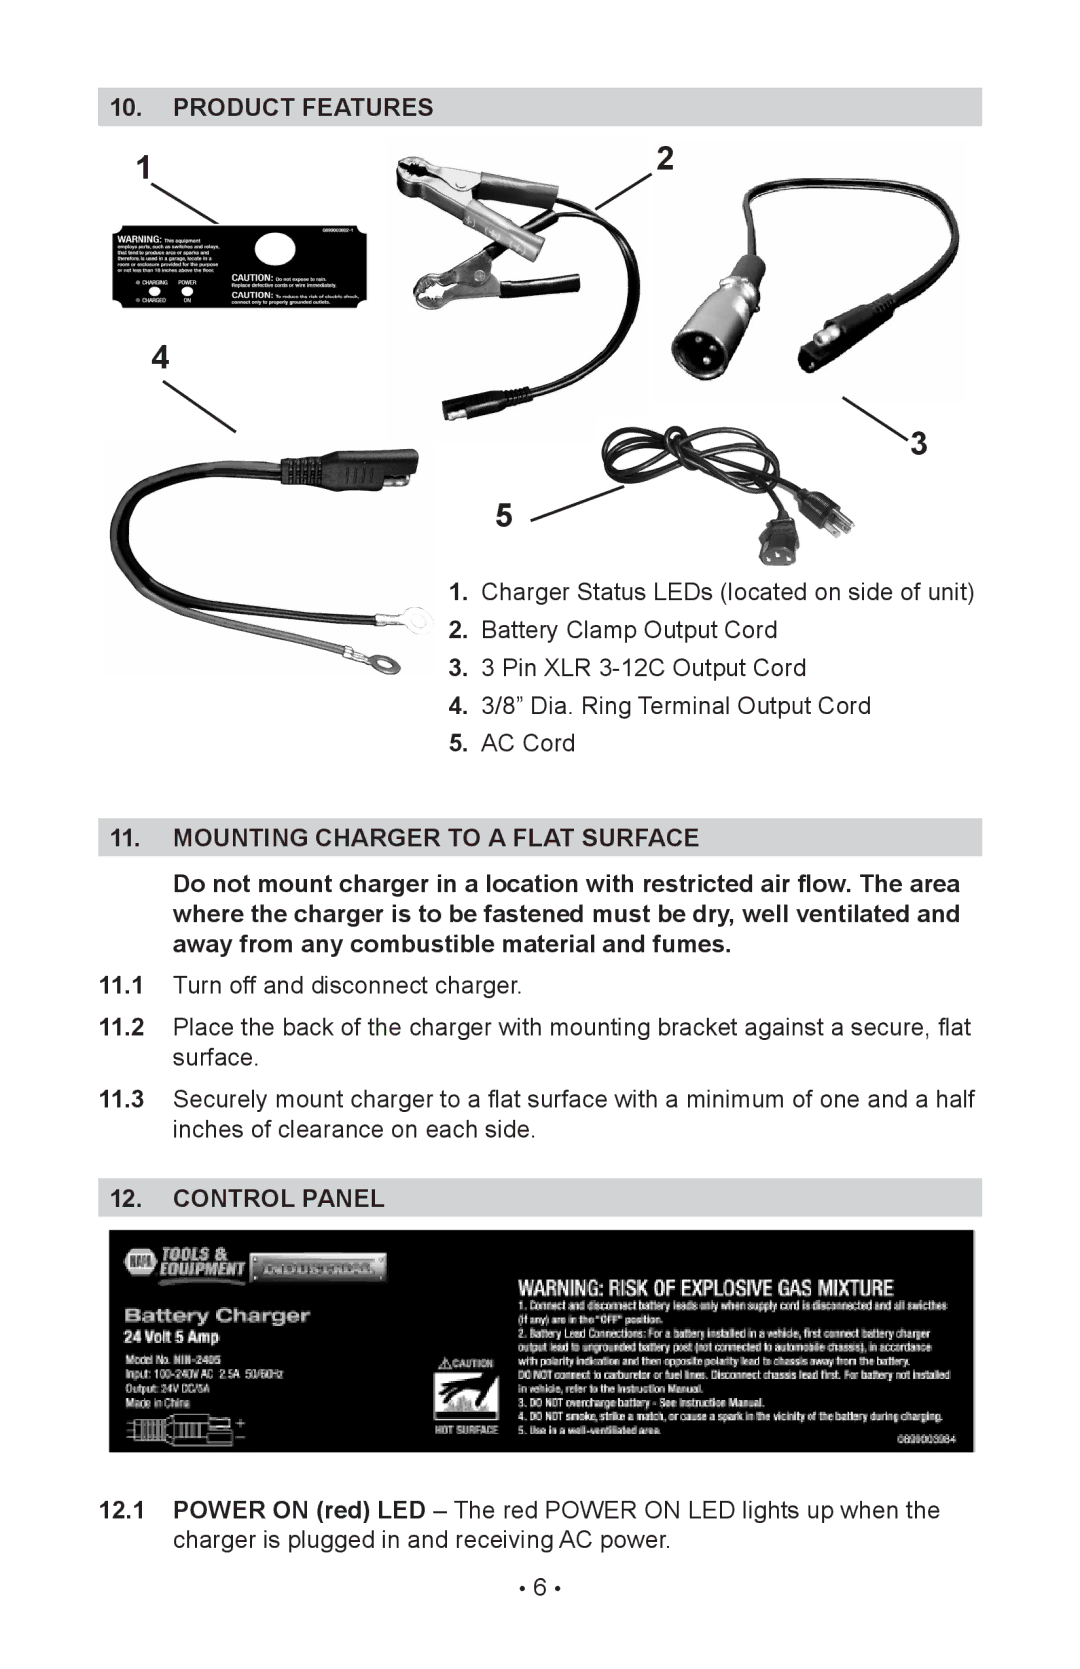
1.Charger Status LEDs (located on side of unit)
2.Battery Clamp Output Cord
3.3 Pin XLR
4.3/8” Dia. Ring Terminal Output Cord
5.AC Cord
11.mounting charger to a flat surface
Do not mount charger in a location with restricted air flow. The area where the charger is to be fastened must be dry, well ventilated and away from any combustible material and fumes.
11.1Turn off and disconnect charger.
11.2Place the back of the charger with mounting bracket against a secure, flat surface.
11.3Securely mount charger to a flat surface with a minimum of one and a half inches of clearance on each side.
12.control panel
12.1POWER ON (red) LED – The red POWER ON LED lights up when the charger is plugged in and receiving AC power.
•6 •
