Contents
Models CU1526, CU2026 and CU3030
Installation and Users Manual for Self Contained Cubers
Table of Contents
CU1526, CU2026, CU3030 User Manual
Installation Product Specifications
Power supply - acceptable voltage ranges
Warranty Information
Product Description & Electrical Requirements
Water purge
Uncrate and Set Up
CU1526, CU2026, CU3030 User Manual Water
Potential for Airborne Contamination
27.5
67.6
26.62
69.9
74.6
CU1526, CU2026, CU3030 User Manual CU3030 Cabinet Layout
60.5
23.82
Page
Follow all applicable codes
Water Supply and Filters
Drain Tubing
Final Check List
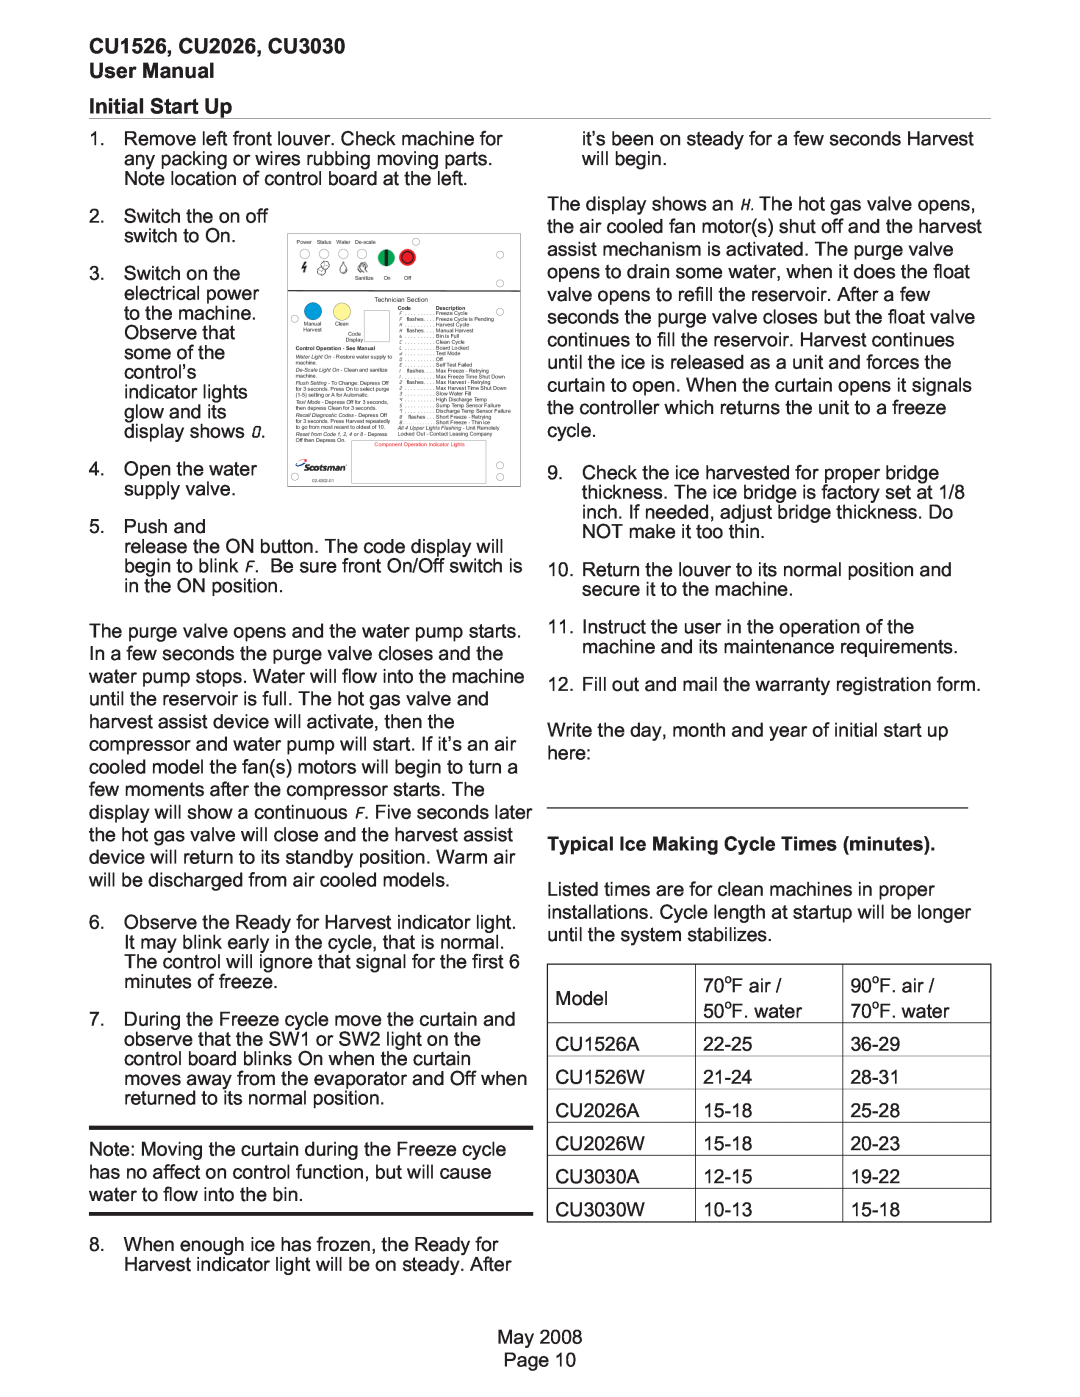
Typical Ice Making Cycle Times minutes
Too Small
Too Big
Just Right
Status
Indicator Lights
Power
CU1526, CU2026, CU3030 User Manual Use and Operation
Noise
Heat
Ice machine scale remover contains acids. Acids can cause burns
Cleaning, Sanitation and Maintenance
Water filters
Air cooled condenser filter
Air cooled condenser
Exterior Panels
To Shut the Machine Off
What to do before calling for service
To Manually Reset the machine
Check the following
17-3234-01
SCOTSMAN ICE SYSTEMS 775 Corporate Woods Parkway, Vernon Hills, IL