WHAT YOU NEED
•
•Drive mounting screws
•An ATA host adapter and interface cable (max. length:
18 inches) with enough connectors for your drives
•An unused drive power cable for your new drive
•A bootable DOS system diskette (Seagate recommends using DOS Version 5.0 or later.)
•If you are mounting this
BEFORE YOU BEGIN
•Make sure your computer is turned off before you open the case.
•Read the handling precautions at the right and inspect the drive to make sure that it is not damaged.
•Save your
HANDLE WITH CARE!
Disc drives are extremely fragile. Do not drop or jar your drive.
Keep the drive in its antistatic bag until you are ready to install it.
Protect your drive from static discharge by making sure you are well grounded before touching the drive. We rec- ommend wearing a grounded wrist strap throughout the installation process. Do not touch the connectors or any part of the printed circuit board.
Always handle the drive by its edges or frame.
Do not apply pressure or attach labels to the circuit board or the top of the drive.
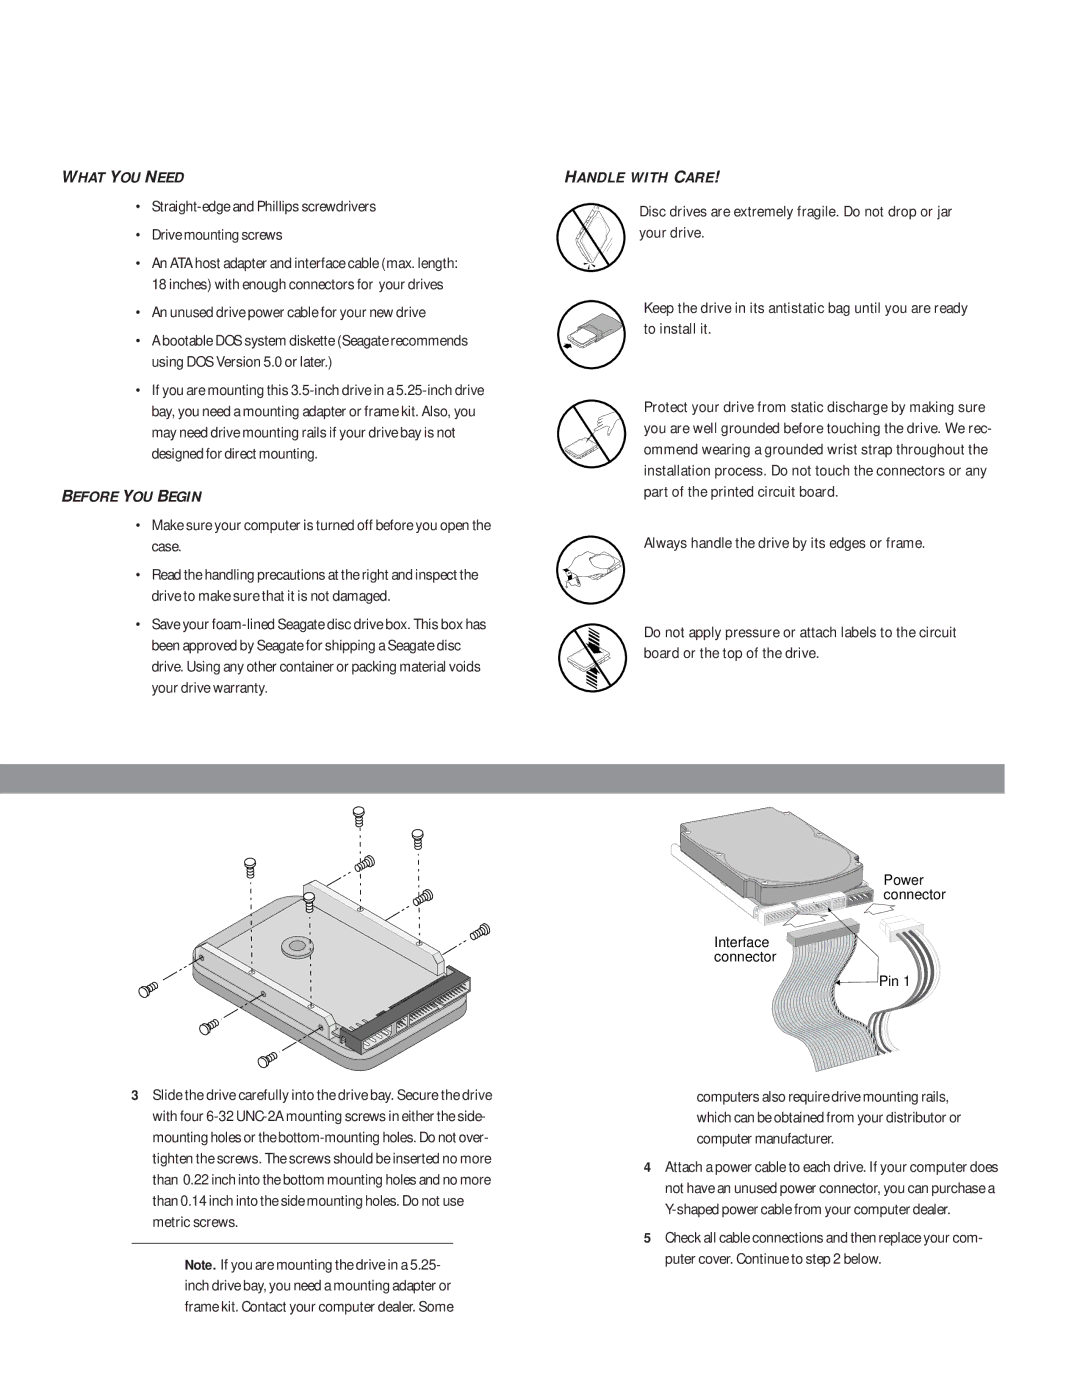
Power connector
Interface connector
Pin 1
3Slide the drive carefully into the drive bay. Secure the drive with four
Note. If you are mounting the drive in a 5.25- inch drive bay, you need a mounting adapter or frame kit. Contact your computer dealer. Some
computers also require drive mounting rails, which can be obtained from your distributor or computer manufacturer.
4Attach a power cable to each drive. If your computer does not have an unused power connector, you can purchase a
5Check all cable connections and then replace your com- puter cover. Continue to step 2 below.