Wet Nozzle
To pick up liquids off a smooth surface, use the
Connect a second extension wand to the first, and connect the
Liquids may be picked up by dragging the nozzle across the surface. The squeegee will dry the surface as you vacuum. Replacement rubber for the squeegee nozzle may be obtained through Sears Parts. If the rubber becomes worn, it may be flipped over for use on the opposite side or replaced. (Replacement service part #822256). To reverse or replace the squeegee:
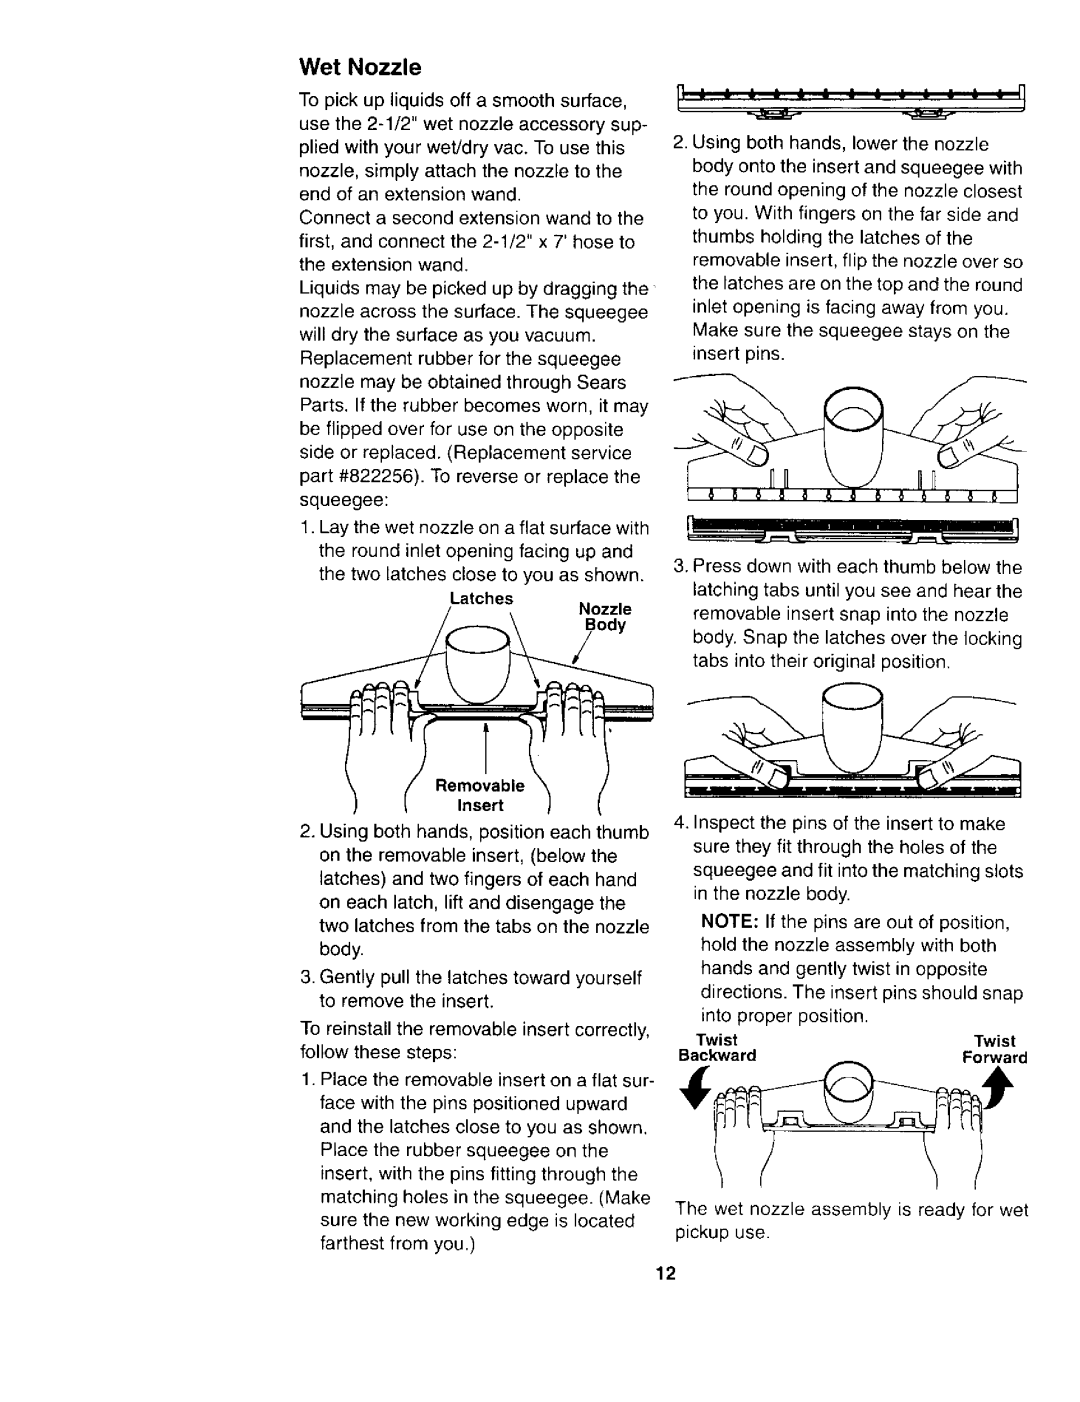
1.Lay the wet nozzle on a flat surface with the round inlet opening facing up and
the two latches close to you as shown.
Latches
Nozzle
3ody
[
2.Using both hands, lower the nozzle body onto the insert and squeegee with the round opening of the nozzle closest to you. With fingers on the far side and thumbs holding the latches of the removable insert, flip the nozzle over so the latches are on the top and the round inlet opening is facing away from you. Make sure the squeegee stays on the insert pins.
3.Press down with each thumb below the latching tabs until you see and hear the
removable insert snap into the nozzle body. Snap the latches ever the locking tabs into their original position.
Removable
Insert
2.Using both hands, position each thumb on the removable insert, (below the latches) and two fingers of each hand on each latch, lift and disengage the two latches from the tabs on the nozzle body.
3.Gently pull the latches toward yourself to remove the insert.
To reinstall the removable insert correctly, follow these steps:
1.Place the removable insert on a flat sur- face with the pins positioned upward and the latches close to you as shown. Place the rubber squeegee on the insert, with the pins fitting through the matching holes in the squeegee. (Make sure the new working edge is located farthest from you.)
4.Inspect the pins of the insert to make sure they fit through the holes of the squeegee and fit into the matching slots in the nozzle body.
NOTE: If the pins are out of position, hold the nozzle assembly with both hands and gently twist in opposite directions. The insert pins should snap into proper position.
TwistTwist
BackwardForward
The wet nozzle assembly is ready for wet
pickup use.
12