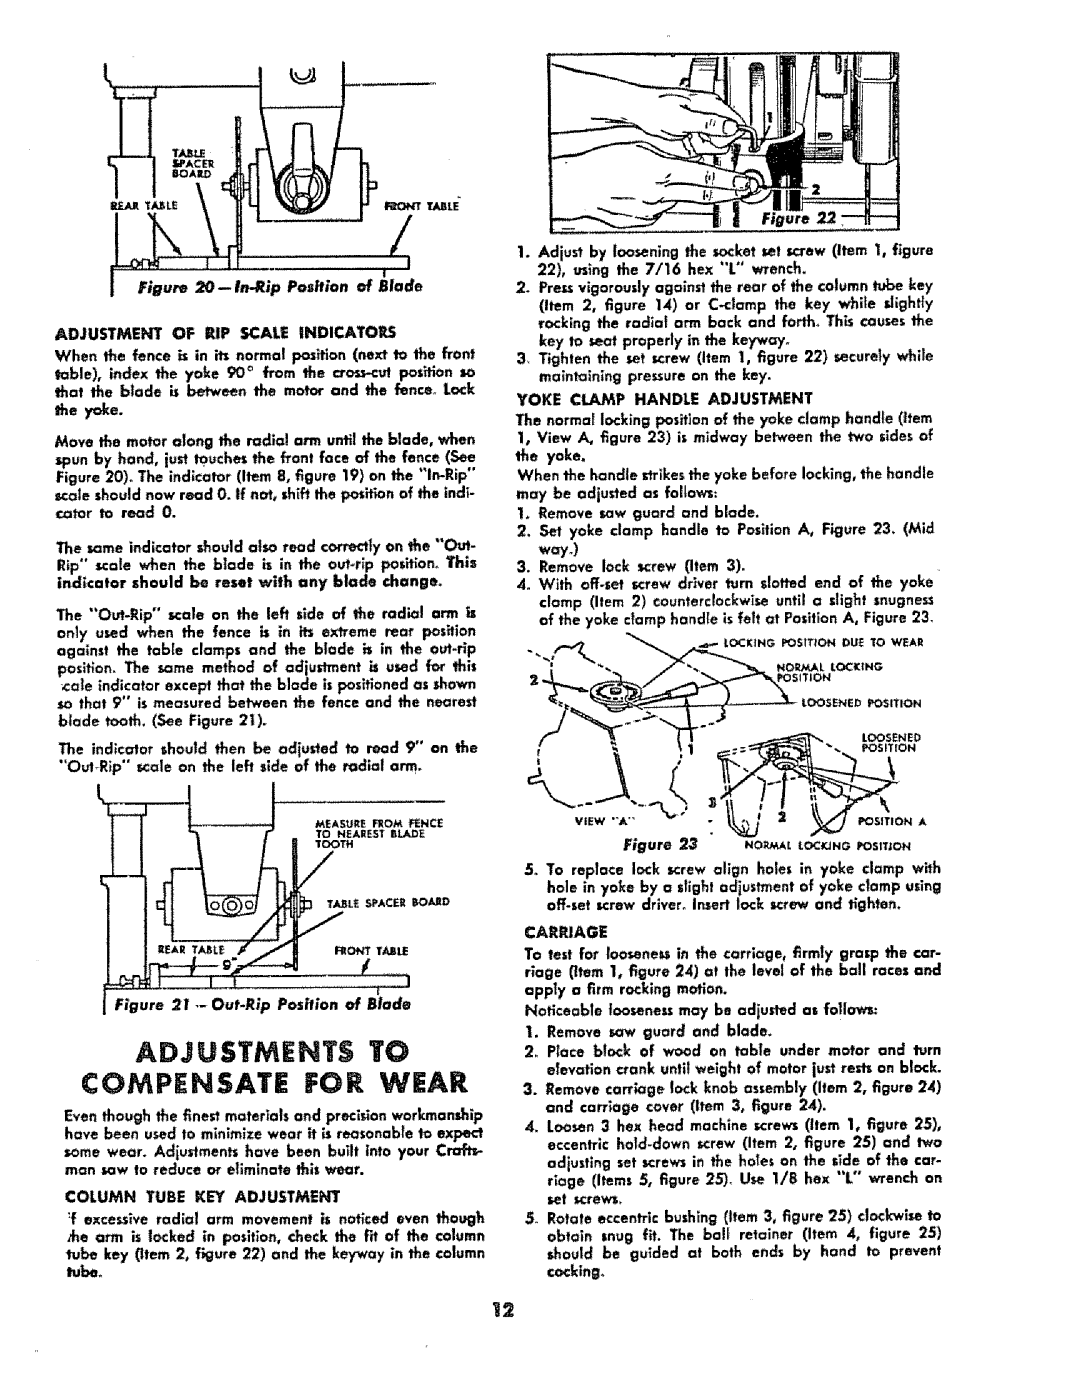
ADJUSTMENTOF RiPSCALEINDICATORS
Whenthefenceisin itsnormalposition(nextto thefront
table),indextheyoke90 ° from the
that the blade is between the motor and the fence° Lock
Move the molar along the radial arm uoti_ the blade, when spun by hand, just _uches the front face of the fence (See Figure 20)° The indicator (Item 8, figure 19) on the
The same indicator should also read correctly on the "'Out- Rip" scale when the blade is in the
The
The indicator should then be adjusted to read 9" an the
MEASURE FROM FENCE
TO NEAREST BI.J_DE
TOOTH
hEAR T,/_ LEg._
I
Figure 21 .-Out-Rip Position of Blade
ADJUSTMEHT$ TO
COMPENSATE FOR WEAR
Even though the finest materials and procidon workmanship have been u_ed to minimize wear it is reasonable to expect
some wear. Adjustments have been built into your Croft_ man sow to reduce or eliminate this wear.
COLUMN TUBE KEY ADJUSTMENT
:f excessive radlat arm movement is noticed even though ,t_e arm is locked in position, check the fit of the column tube key (item 2, figure 22) and the key'wayin the column tuber
Figure
1.Adjust by loosening the socket set screw (item I, figure 22), using the 7/16 hex "t" wrench.
2.Prexs vigorously against the rear of the column tube key (Item 2, figure 14) or
key to seat properly in the keywoTo
3, Tighten the set screw (Item 1, figure 22) securely while maintaining pressure on the key.
YOKE CLAMP HANDLE ADJUSTMENT
The normal locking position of the yoke clamp handle (item 1, View A_ figure 23) is midway between the two sides of the yoke.
When the handle strikesthe yoke before locking, the handle may be adjusted as follows:
1.Remove sow guard and blade.
2.Set yoke clamp handle to Position A, Figure 23. (Mid way.)
3.Remove lock screw (Item 3).
4o With
a___s |
| NOR/€_ L LOCKING |
| G _osmoN ou_ To WEAR | |
|
| 1710N |
|
| |
_ | "" | LOOSENED |
POSitION A
Figure 23 NO_U,_,_OC_NG POSlnON
5o To replace lock screw align holes in yoke clamp with
hole in yoke by a slight odiustment of yoke clamp using
CARRIAGE
To test for looseness in the carriage, firmy grasp the car- riage (Item 1, figure 24) at the levet of the baff races and apply a firm rocking motion.
Noticeable looseness may be adiusted as follows:
1. Remove sow guard and blade.
2o Place block of wood on table under motor and turn elevation crank until weight of motor just rests on block.
3.Remove carriage lock knob assembly (Item 2, figure 24) and carriage cover (Item 3, figure 24).
4.Loosen 3 hex head machine screws (item 1, figure 25), eccentric
adjusting set screws in the holes on the side of the car- riage (Items 5, figure 2S)o Use 1/8 hex "L" wrench on
set screws,
5_ Rotate eccentric bushing (Item 3, figure 25) clockwise to obtain snug fit. The bali retainer (Item 4, figure 25) should be guided at both ends by hand to prevent cocking°
12