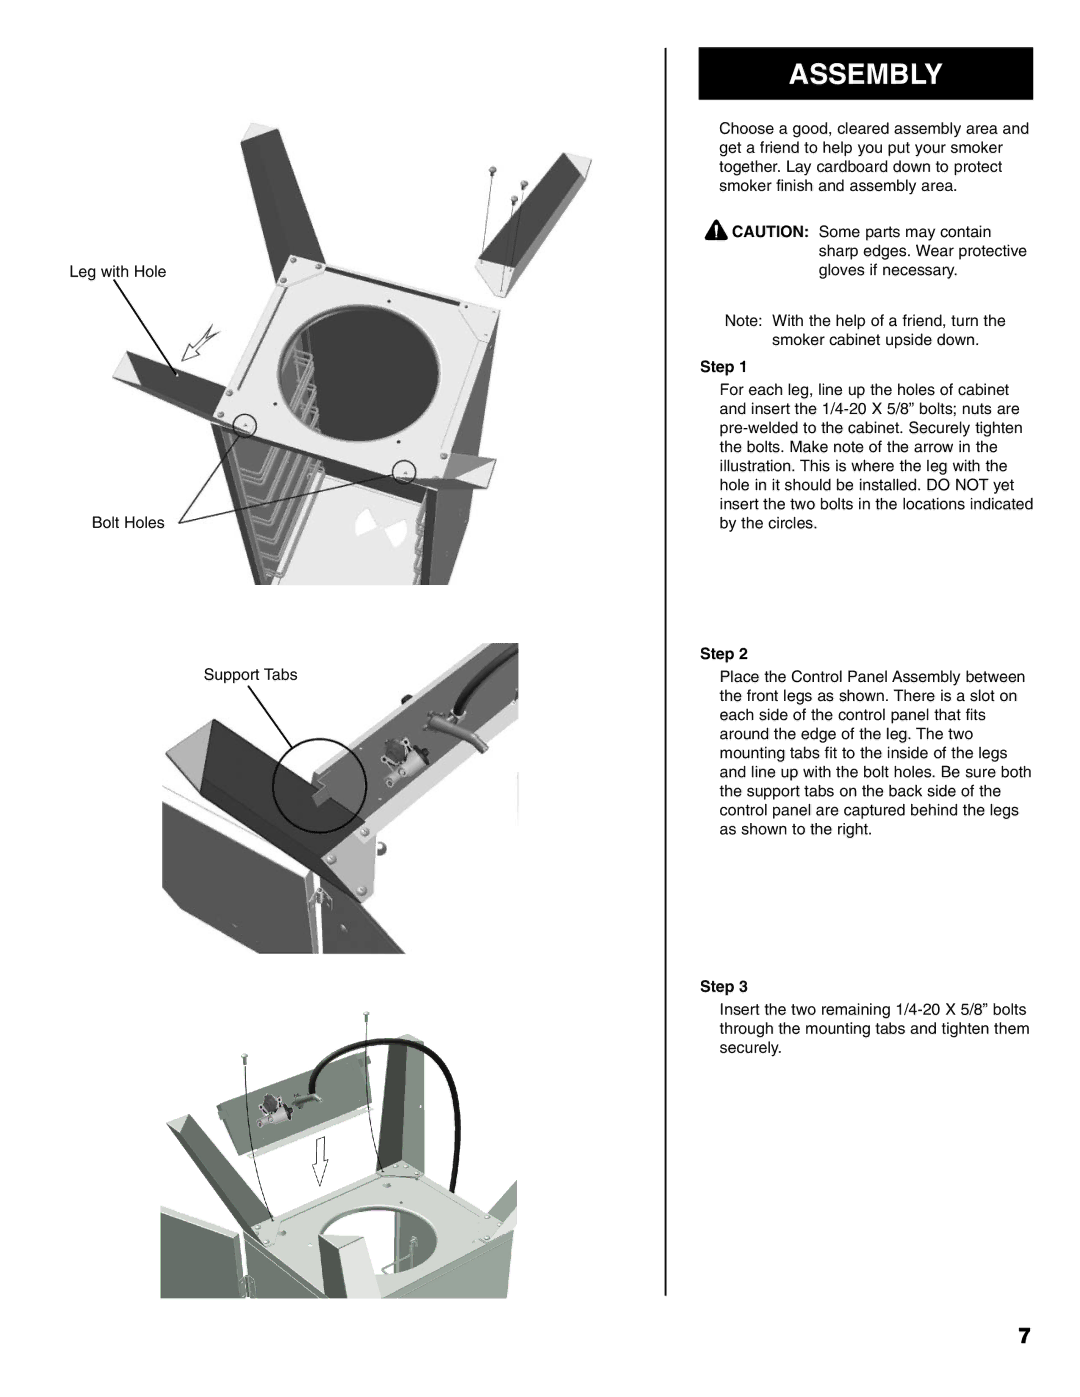
Leg with Hole
Bolt Holes
Support Tabs
ASSEMBLY
Choose a good, cleared assembly area and get a friend to help you put your smoker together. Lay cardboard down to protect smoker finish and assembly area.
![]() CAUTION: Some parts may contain sharp edges. Wear protective gloves if necessary.
CAUTION: Some parts may contain sharp edges. Wear protective gloves if necessary.
Note: With the help of a friend, turn the smoker cabinet upside down.
Step 1
For each leg, line up the holes of cabinet and insert the
Step 2
Place the Control Panel Assembly between the front legs as shown. There is a slot on each side of the control panel that fits around the edge of the leg. The two mounting tabs fit to the inside of the legs and line up with the bolt holes. Be sure both the support tabs on the back side of the control panel are captured behind the legs as shown to the right.
Step 3
Insert the two remaining
7