•If your heat indicator seems to be out of calibration: Remove the heat indicator from the door of the smoker by loosening and removing the mounting nut from the inside. There is a second nut mounted on the back of the heat indicator that can be turned to adjust the heat indicator needle. Set the needle to the current outdoor ambient temperature and
•To clean the inside and outside of the smoker cabinet, simply use a damp cloth.
•If rust is present on the exterior surface of the smoker, clean the area with steel wool or emery cloth and use heavy duty, heat resistant paint.
•NEVER apply additional paint to the interior of the smoker. If rust is present on the interior of the smoker, clean it thoroughly with steel wool or emery cloth and lightly coat the area with cooking oil or cooking spray to help minimize recurring rust.
•When an LP tank is not connected, and to help prevent dirt or other foreign particles from clogging the hose/regulator, hang the end of the hose/regulator from the side handle using the supplied
•To protect your smoker from weather, always keep your smoker covered while not in use.
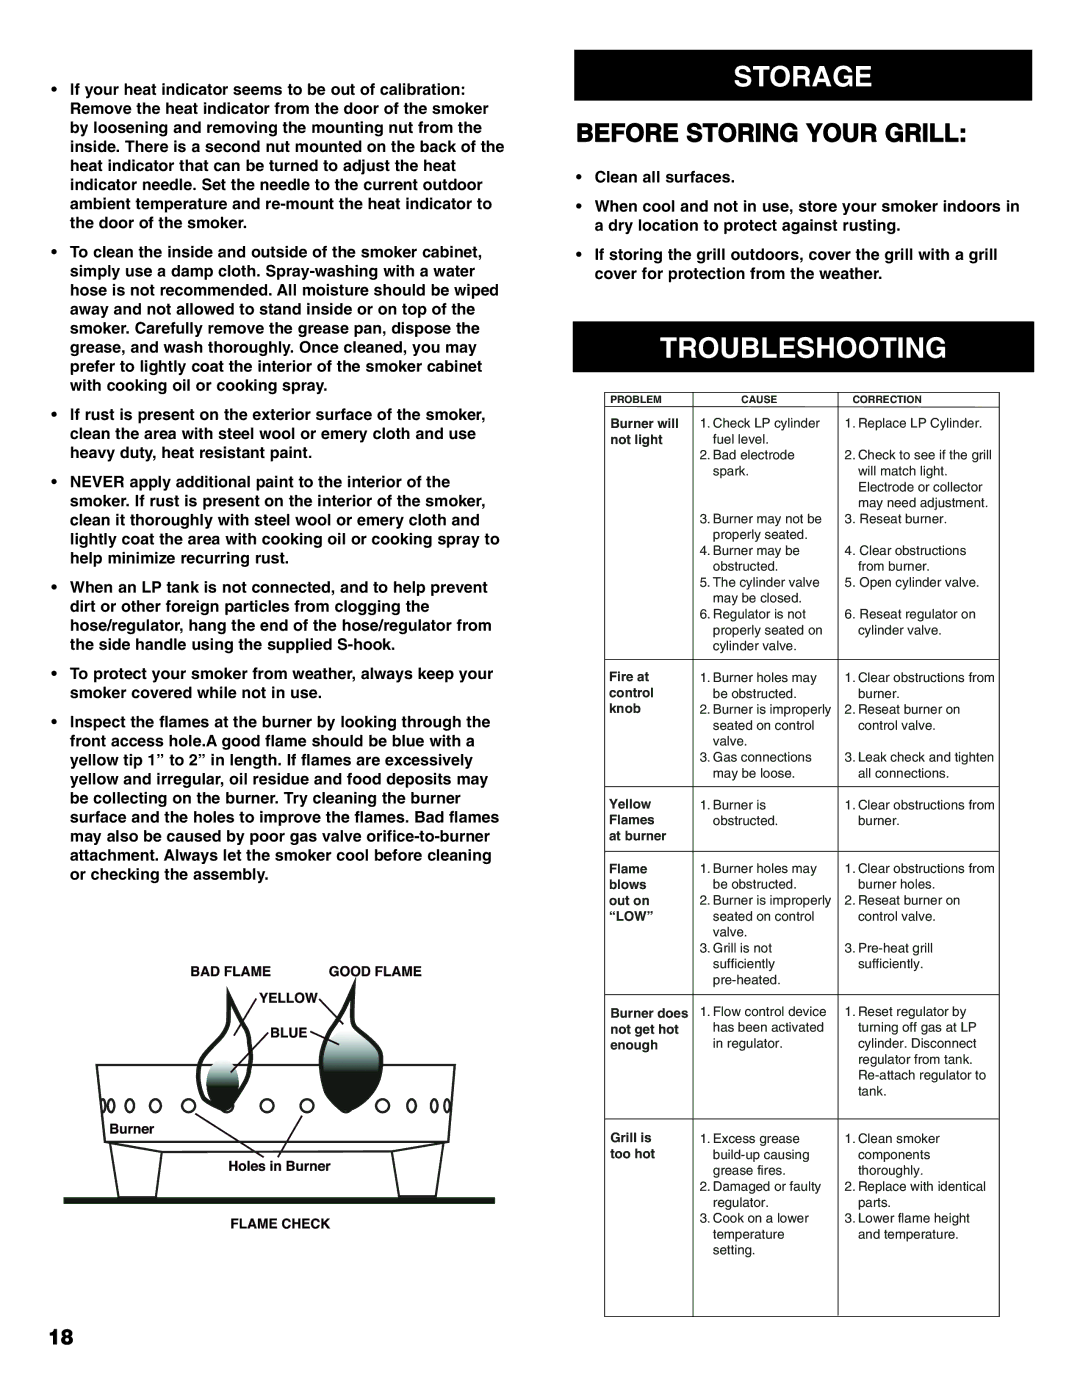
•Inspect the flames at the burner by looking through the front access hole.A good flame should be blue with a yellow tip 1” to 2” in length. If flames are excessively yellow and irregular, oil residue and food deposits may be collecting on the burner. Try cleaning the burner surface and the holes to improve the flames. Bad flames may also be caused by poor gas valve
STORAGE
BEFORE STORING YOUR GRILL:
•Clean all surfaces.
•When cool and not in use, store your smoker indoors in a dry location to protect against rusting.
•If storing the grill outdoors, cover the grill with a grill cover for protection from the weather.
TROUBLESHOOTING
PROBLEM | CAUSE | CORRECTION |
Burner will | 1. Check LP cylinder | 1. Replace LP Cylinder. |
not light | fuel level. |
|
| 2. Bad electrode | 2. Check to see if the grill |
| spark. | will match light. |
|
| Electrode or collector |
|
| may need adjustment. |
| 3. Burner may not be | 3. Reseat burner. |
| properly seated. |
|
| 4. Burner may be | 4. Clear obstructions |
| obstructed. | from burner. |
| 5. The cylinder valve | 5. Open cylinder valve. |
| may be closed. |
|
| 6. Regulator is not | 6. Reseat regulator on |
| properly seated on | cylinder valve. |
| cylinder valve. |
|
|
|
|
Fire at | 1. Burner holes may | 1. Clear obstructions from |
control | be obstructed. | burner. |
knob | 2. Burner is improperly | 2. Reseat burner on |
| seated on control | control valve. |
| valve. |
|
| 3. Gas connections | 3. Leak check and tighten |
| may be loose. | all connections. |
|
|
|
Yellow | 1. Burner is | 1. Clear obstructions from |
Flames | obstructed. | burner. |
at burner |
|
|
|
|
|
Flame | 1. Burner holes may | 1. Clear obstructions from |
blows | be obstructed. | burner holes. |
out on | 2. Burner is improperly | 2. Reseat burner on |
“LOW” | seated on control | control valve. |
| valve. |
|
| 3. Grill is not | 3. |
| sufficiently | sufficiently. |
|
| |
|
|
|
Burner does | 1. Flow control device | 1. Reset regulator by |
not get hot | has been activated | turning off gas at LP |
enough | in regulator. | cylinder. Disconnect |
|
| regulator from tank. |
|
| |
|
| tank. |
|
|
|
Grill is | 1. Excess grease | 1. Clean smoker |
too hot | components | |
| grease fires. | thoroughly. |
| 2. Damaged or faulty | 2. Replace with identical |
| regulator. | parts. |
| 3. Cook on a lower | 3. Lower flame height |
| temperature | and temperature. |
| setting. |
|
|
|
|
18