TABLE

OFCONTENTS


SECTION

1.

KNOW YOUR

MACHINE


Attaching

the

Presser

Foot

27


Changing

Needle

...........................


28


Locate

and Identify

the

Parts


...............

3_4


To

Disengage

the

Upper

Knife

29


Identify

the

Accessories

.....................


4


To

Engage the

Upper

Knife

29


Types

of

Needle

Plates

.......................

30


Changing

the

Needle

Plate

30

SECT! ON

2.

PREPARE


YOUR

MACHINE

FOR SEWING


Thread

and Needle

Chart

31


Rolled Hemming, Picot Edging and


Plug

in

the

Machine

and

Switch

on the Power ....

5


Narrow

Hemming


........................


32_34


Foot

Control

Use ....

......................

5


Decorative

Overedging


..................

35


How

to

Turn

Hand Wheel


6


Pin

Tucking


36


Opemng

and

Closing

the

Side

Cover

6


Opening

and

Closing

the

Looper

Cover

6


The

Position

of Thread

Guide

Bar

7

SECTION

4.

CARE

FOR YOUR

MACHINE


Attaching


the

Spool

Cap and

Net

7


Raising

or

Lowering

the

Presser

Foot

8


Cleaning

Upper

Knife

Area

37


Threading

the

Machine

.....................


9_17


Cleaning

the Feed

Dog

.....................

37


e

Threading

the

Lower

Looper

...............

t0_11


Replacing

the

Light

Bulb

38


e

Threading

the

Upper

Looper

.............

12"13


Oiling

the

Machine

..........................


39


e

Threading

the

Needle

on

the

Right

14_15


Replacing

the

Upper

Knife

40


e

Threading

the

Needle

on

the

Left

t6_17


SECTION

5.

PERFORMANCE


PROBLEMS

CHART

SECTION

3.

LEARN

THE

STITCHES


What

to Do When

........................


4t


Starting

Sewing

........................


18


Finishing

Sewing

...........................


!8

PARTS LIST

........................................


42


Sewing

Continuously

........................


18


Securing Ends

...........................


19_20

INDEX


43


Thread

Tension

(4 threads)

...................


21"_23


Threading

the

Machine

(3 threads)

24

Specification

of the Machine

..............................


44


Thread

Tension

(3 threads)


24_25


Adjustment

of

Stitch

Length


...................

26


Adjustment

of

Foot

Pressure


...................

26


Removing

the

Presser Foot


27


Page 3
Image 3
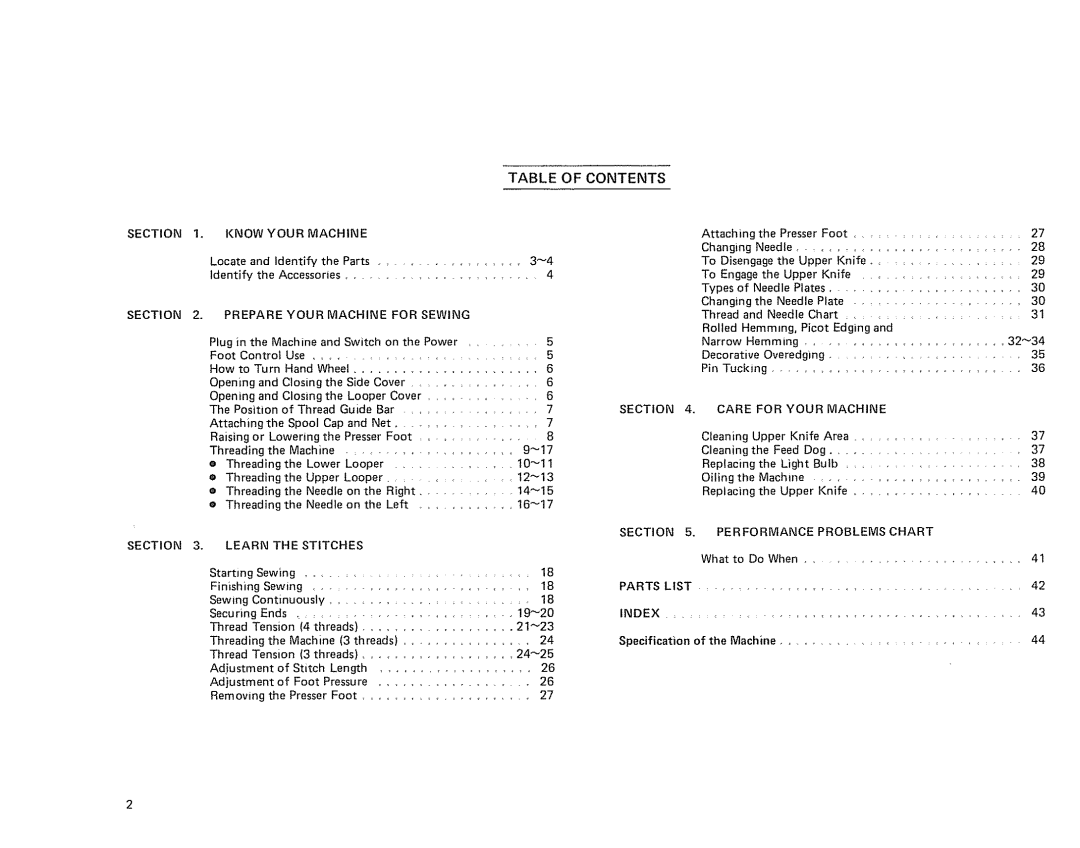
Sears 385. 564180 owner manual Ofcontents

385. 564180 specifications

The Sears 385.564180 is a versatile sewing machine that has become a popular choice for both novice and experienced sewers. Known for its reliability and user-friendly design, this model seamlessly blends functionality with advanced technology, making it a valuable addition to any sewing room.

One of the standout features of the Sears 385.564180 is its variety of stitch options. With over 50 different built-in stitches, users can craft anything from basic hems to intricate decorative patterns. The machine includes utility stitches, stretch stitches, and even specialty stitches for quilting and embroidery, providing ample creative opportunities for users to explore. This variety allows sewers to tailor their projects to specific needs, whether they are making garments, home décor items, or crafting gifts.

The machine also incorporates an automatic buttonhole feature, simplifying the process of creating professional-looking buttonholes. This is particularly beneficial for beginners who may find this task challenging. The buttonhole foot automatically sizes the buttonhole to match the chosen button, ensuring accurate and consistent results every time.

One of the technological highlights of the Sears 385.564180 is its computerized functionalities. With an LCD display and easy-to-use navigation, users can quickly select stitches and adjust settings, such as stitch length and width, at the touch of a button. This advanced interface enhances the sewing experience, allowing for greater precision and control over each project.

The machine features a drop-in bobbin system, which is easy to thread and monitor. This design reduces the chances of thread jams and misalignment, allowing users to focus on their creative endeavors rather than troubleshooting common sewing issues. Additionally, the machine boasts an adjustable presser foot, making it easier to handle various fabric thicknesses, from lightweight cotton to heavier canvas or denim.

Another notable characteristic of the Sears 385.564180 is its portability. Weighing in at a manageable size, this sewing machine is easy to transport, whether for sewing classes or quilting retreats. This feature, combined with its sturdy construction, ensures that it can withstand regular use while maintaining performance.

In summary, the Sears 385.564180 sewing machine combines an array of features, innovative technologies, and user-friendly characteristics. With a blend of traditional sewing capability and modern technological advancements, it stands as an ideal choice for anyone looking to expand their crafting skills and produce high-quality, professional results in their sewing projects.