389997 | 11/3/03 2:49 PM Page 7 |
ASSEMBLY / ADJUSTMENT SET-UP
operate, check the power supply.
INSTALLING BLADES
2
BEFORE INSTALLING BLADES, TURN OFF AND UNPLUG TOOL.
Your jig saw uses the Quick Clamp™ blade changing system. To install a blade, lift the Quick Clamp™ lever (Figure 1). Ensure the blade teeth are facing forward and insert the saw blade shank fully into the blade clamp. Release the lever and the blade will be
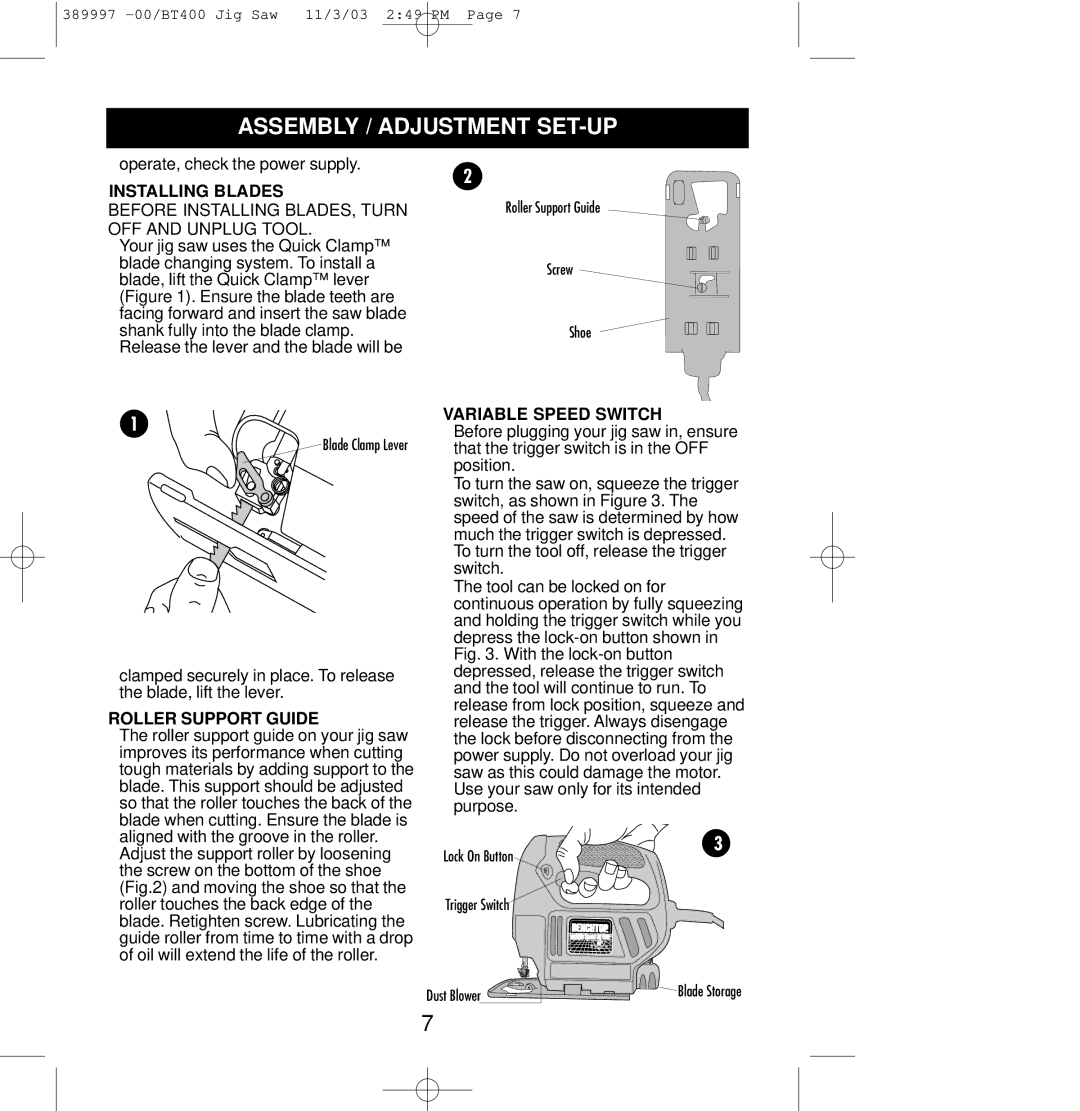
Roller Support Guide
Screw
Shoe
1
Blade Clamp Lever
clamped securely in place. To release the blade, lift the lever.
ROLLER SUPPORT GUIDE
The roller support guide on your jig saw improves its performance when cutting tough materials by adding support to the blade. This support should be adjusted so that the roller touches the back of the blade when cutting. Ensure the blade is
VARIABLE SPEED SWITCH
Before plugging your jig saw in, ensure that the trigger switch is in the OFF position.
To turn the saw on, squeeze the trigger switch, as shown in Figure 3. The speed of the saw is determined by how much the trigger switch is depressed. To turn the tool off, release the trigger switch.
The tool can be locked on for continuous operation by fully squeezing and holding the trigger switch while you depress the
aligned with the groove in the roller. Adjust the support roller by loosening the screw on the bottom of the shoe (Fig.2) and moving the shoe so that the roller touches the back edge of the blade. Retighten screw. Lubricating the guide roller from time to time with a drop of oil will extend the life of the roller.
Lock On Button
Trigger Switch
3
Dust Blower | Blade Storage |
7
