Switching the phantom powering on/off – PHANTO
The
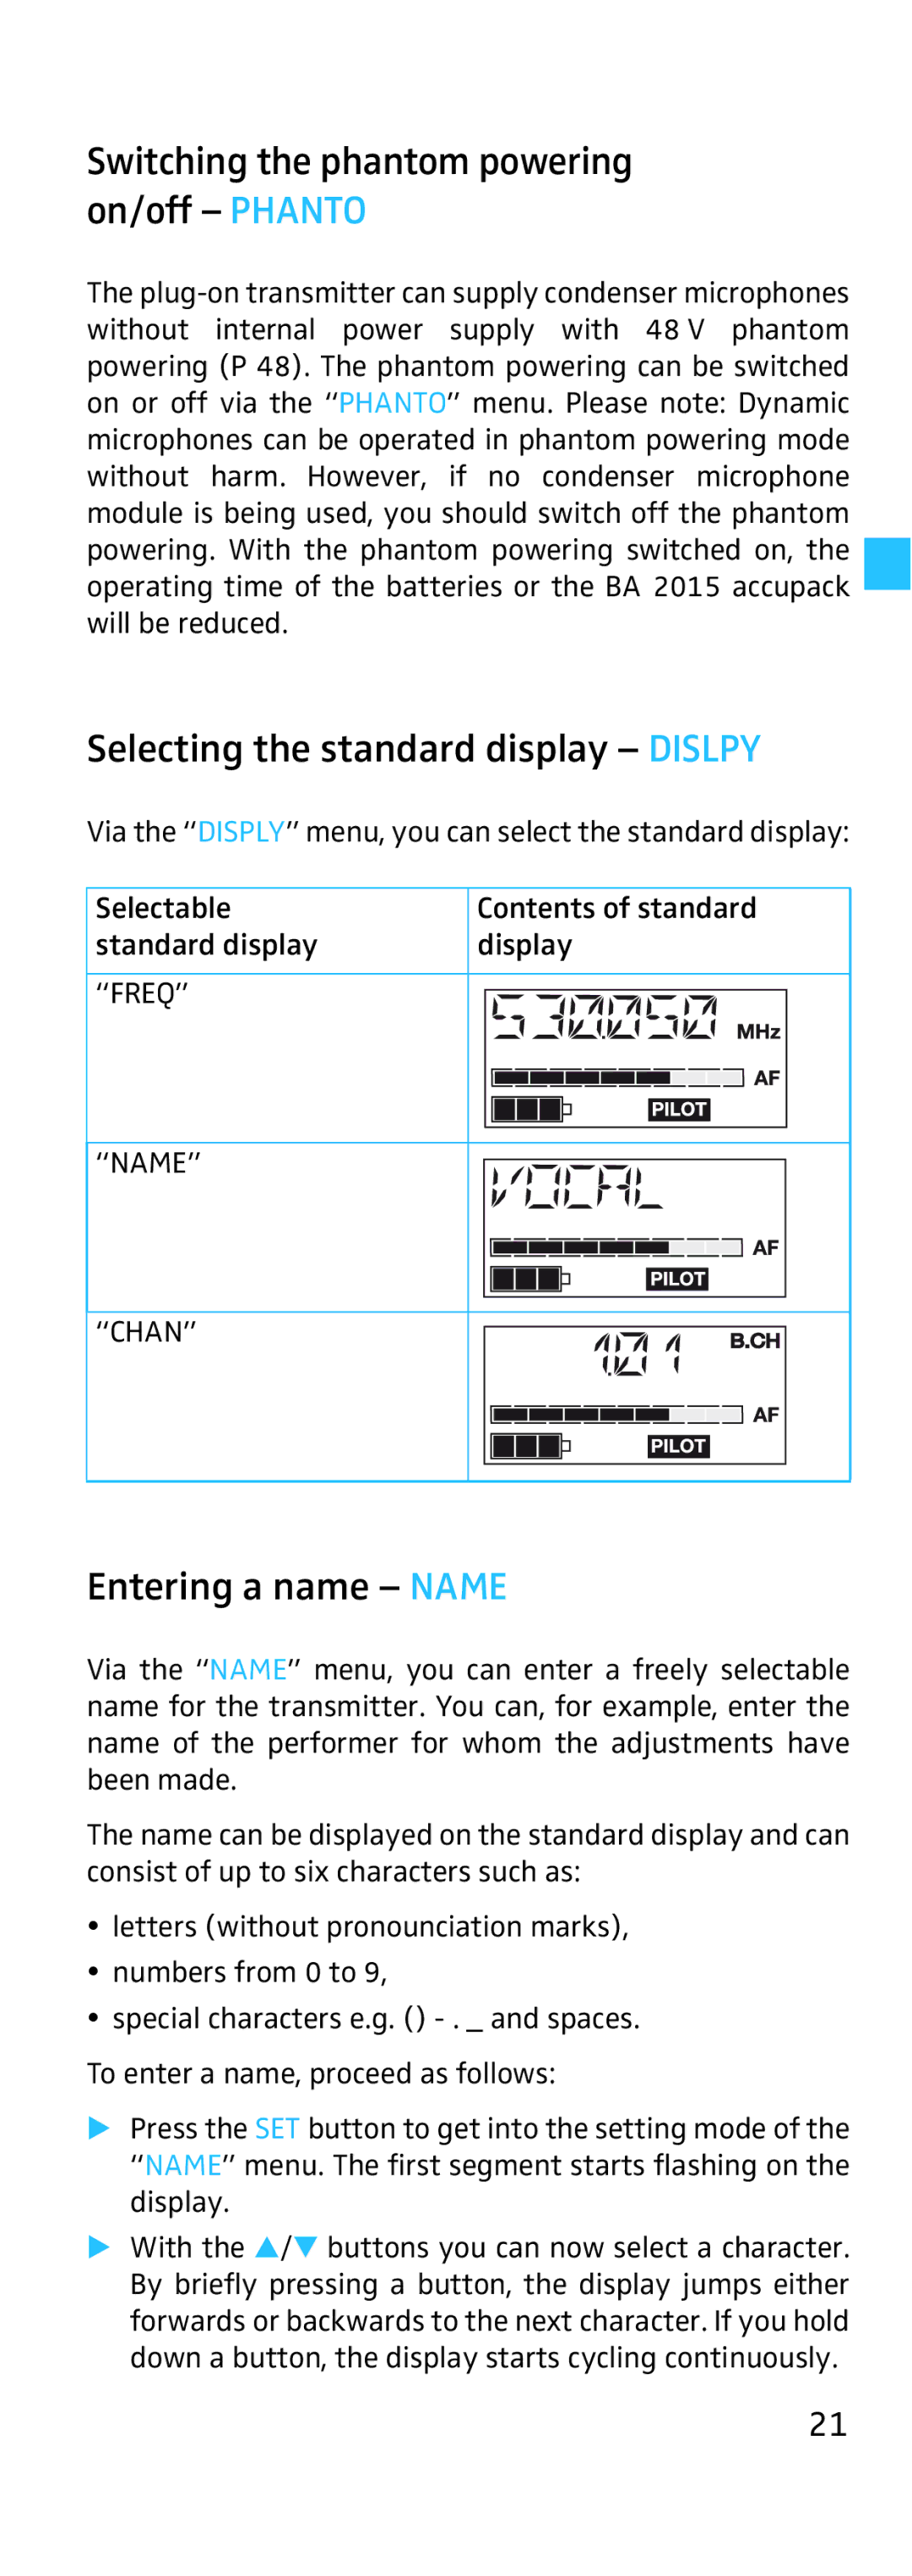
Selecting the standard display – DISLPY
Via the “DISPLY” menu, you can select the standard display:
Selectable | Contents of standard | ||||||||
standard display | display | ||||||||
|
|
|
|
|
|
|
|
|
|
“FREQ” |
|
|
|
|
|
|
|
|
|
|
|
|
|
|
|
|
|
| |
|
|
|
|
|
|
|
|
|
|
|
|
|
|
|
|
|
|
|
|
|
|
|
|
|
|
|
|
|
|
|
|
|
|
|
|
|
|
|
|
|
|
|
|
|
|
|
|
|
|
|
|
|
|
|
|
|
|
|
|
“NAME”
“CHAN”
Entering a name – NAME
Via the “NAME” menu, you can enter a freely selectable name for the transmitter. You can, for example, enter the name of the performer for whom the adjustments have been made.
The name can be displayed on the standard display and can consist of up to six characters such as:
yletters (without pronounciation marks),
ynumbers from 0 to 9,
yspecial characters e.g. ()
To enter a name, proceed as follows:
Press the SET button to get into the setting mode of the “NAME” menu. The first segment starts flashing on the display.
With the / buttons you can now select a character. By briefly pressing a button, the display jumps either forwards or backwards to the next character. If you hold down a button, the display starts cycling continuously.
21
