OTRAS PRECAUCIONES IMPORTANTES
TROUBLESHOOTING |
1.No apoye la plancha en la base.
2.Nunca utilice ni apoye la plancha en una superficie inestable.
3.Mientras la plancha esté caliente, nunca la coloque en una superficie sin protección, aun cuando descanse sobre el talón de apoyo.
4.¡ADVERTENCIA! PARA EVITAR DESCARGAS ELÉCTRICAS O LESIONES, antes de llenar la plancha con agua, asegúrese de que el enchufe esté desconectado del tomacorriente.
5.PRECAUCIÓN: Nunca llene la plancha con acondicionador para telas, almidones ni ninguna otra solución, ya que éstas dañarán el mecanismo del vapor. No use agua contaminada.
6.¡ADVERTENCIA! PARA EVITAR INCENDIOS, nunca deje la plancha desatendida mientras esté conectada.
7.¡ADVERTENCIA! PARA EVITAR DESCARGAS ELÉCTRICAS, nunca sumerja la plancha en
agua u otro líquido.
8.¡ADVERTENCIA! PARA EVITAR DESCARGAS ELÉCTRICAS, nunca use la plancha en un lugar donde pueda caerse o sumergirse en agua o cualquier otro líquido. Si la plancha cae en agua o cualquier otro líquido, desconéctela inmediatamente. NO introduzca la mano en el agua o líquido para recuperarla.
9.PRECAUCIÓN: Nunca utilice esponjas de alambre, limpiadores abrasivos o químicos o solventes para limpiar el exterior o la base de la plancha. Si lo hace, arañará y/o dañará la superficie.
10.¡ADVERTENCIA! No apunte la plancha hacia el rostro, hacia usted mismo ni hacia ninguna otra persona mientras utiliza o ajusta el vapor. Se pueden producir quemaduras o lesiones graves.
11.Siempre guarde la plancha sobre el hierro en posición vertical, no s obre la base. Si la guarda boca bajo, incluso la menor cantidad de humedad hará que la base se corroa y manche.
12.¡PELIGRO! Nunca utilice la plancha si está dañada o ha sufrido caídas. El uso de la plancha cuando está dañada puede crear riesgos de incendio, escargas eléctricas, lesiones o incluso la muerte.
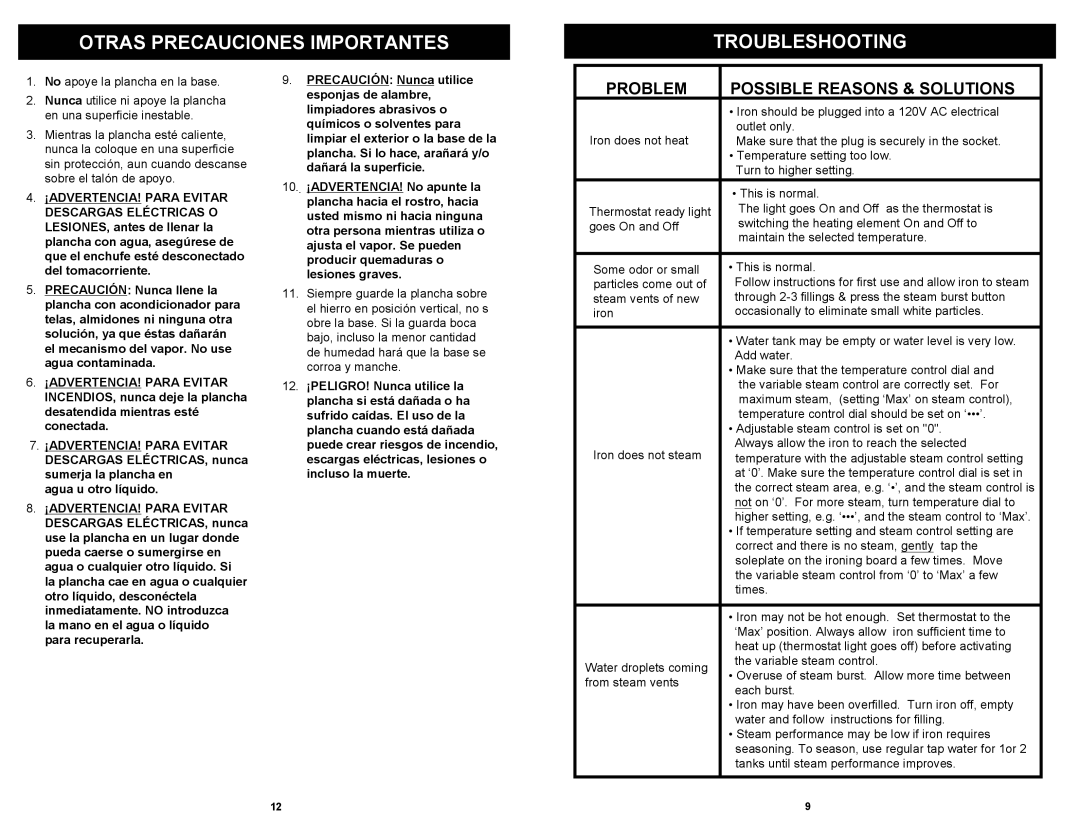
PROBLEM | POSSIBLE REASONS & SOLUTIONS | |
| • Iron should be plugged into a 120V AC electrical | |
Iron does not heat | outlet only. | |
Make sure that the plug is securely in the socket. | ||
| • Temperature setting too low. | |
| Turn to higher setting. | |
| • This is normal. | |
Thermostat ready light | The light goes On and Off as the thermostat is | |
goes On and Off | switching the heating element On and Off to | |
| maintain the selected temperature. | |
|
| |
Some odor or small | • This is normal. | |
particles come out of | Follow instructions for first use and allow iron to steam | |
steam vents of new | through | |
iron | occasionally to eliminate small white particles. | |
|
| |
| • Water tank may be empty or water level is very low. | |
| Add water. | |
| • Make sure that the temperature control dial and | |
| the variable steam control are correctly set. For | |
| maximum steam, (setting ‘Max’ on steam control), | |
| temperature control dial should be set on ‘•••’. | |
| • Adjustable steam control is set on "0". | |
Iron does not steam | Always allow the iron to reach the selected | |
temperature with the adjustable steam control setting | ||
| at ‘0’. Make sure the temperature control dial is set in | |
| the correct steam area, e.g. ‘•’, and the steam control is | |
| not on ‘0’. For more steam, turn temperature dial to | |
| higher setting, e.g. ‘•••’, and the steam control to ‘Max’. | |
| • If temperature setting and steam control setting are | |
| correct and there is no steam, gently tap the | |
| soleplate on the ironing board a few times. Move | |
| the variable steam control from ‘0’ to ‘Max’ a few | |
| times. | |
|
| |
| • Iron may not be hot enough. Set thermostat to the | |
| ‘Max’ position. Always allow iron sufficient time to | |
| heat up (thermostat light goes off) before activating | |
Water droplets coming | the variable steam control. | |
• Overuse of steam burst. Allow more time between | ||
from steam vents | ||
each burst. | ||
| ||
| • Iron may have been overfilled. Turn iron off, empty | |
| water and follow instructions for filling. | |
| • Steam performance may be low if iron requires | |
| seasoning. To season, use regular tap water for 1or 2 | |
| tanks until steam performance improves. | |
|
|
12
9 |
