Screen Format
•The format of the picture can be adjusted to either of the two screen formats.
(This function allows you to view 16:9 pictures recorded on DVD or by camcorders that are once saved using the 4:3 aspect ratio to be played back in the original
VOLUME (k)/(l)
CHANNEL UP (a)/ DOWN (s)
MENU
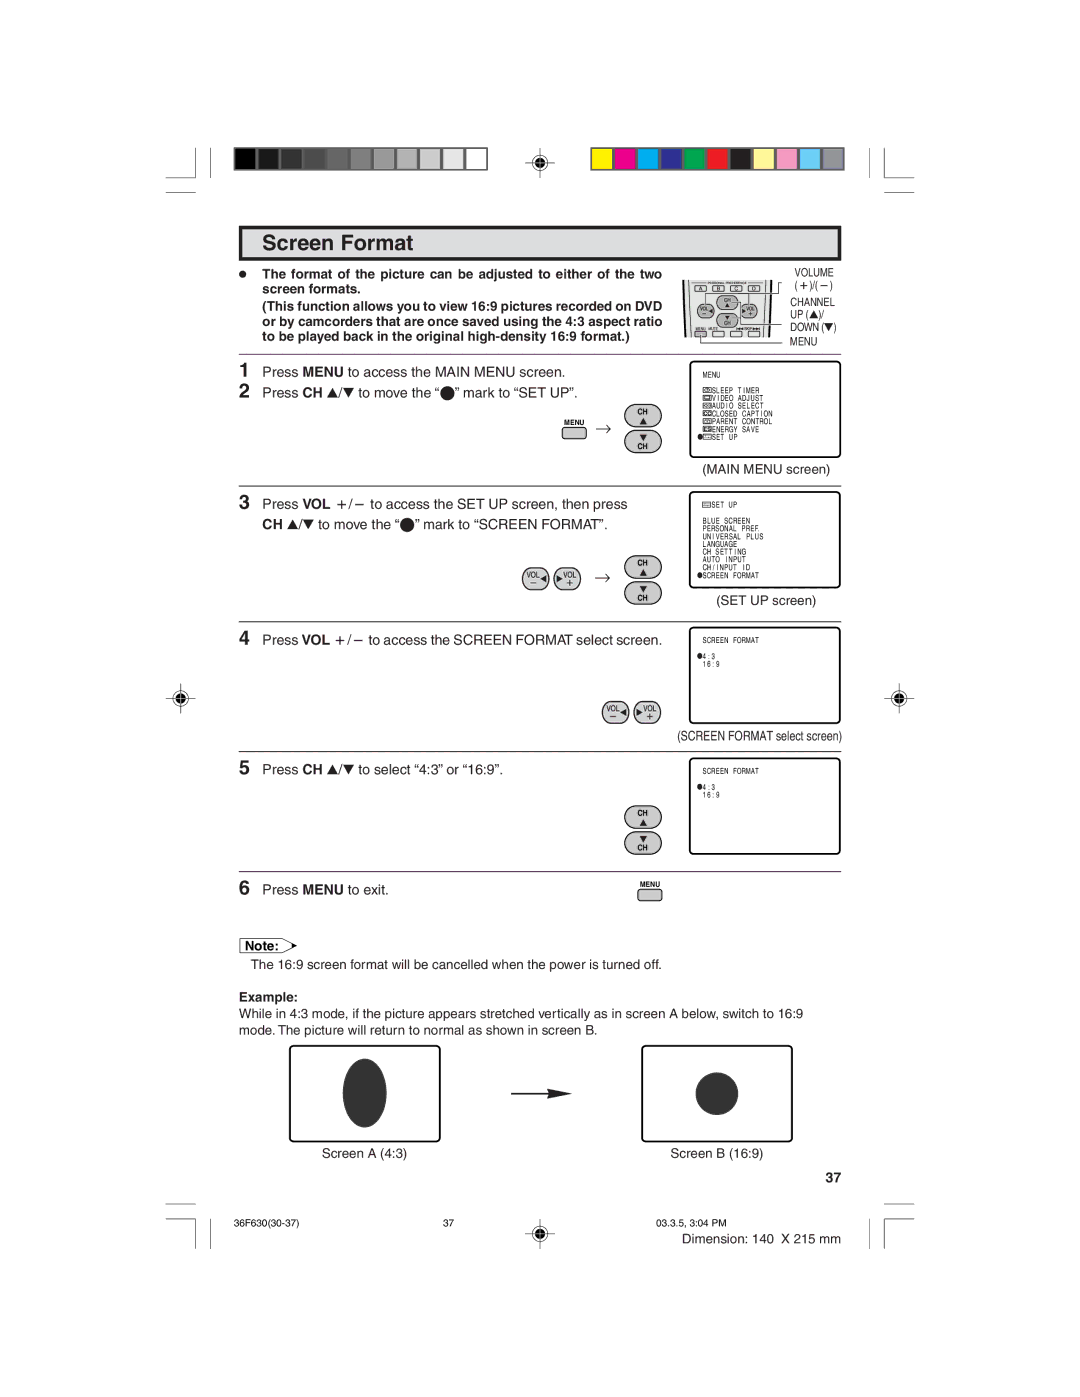
1Press MENU to access the MAIN MENU screen.
2Press CH a/s to move the “E” mark to “SET UP”.
CH
MENU →
CH
MENU |
|
SL EEP | T I MER |
V I DEO | ADJ UST |
AUD I O | SEL ECT |
CCCLOSED CAP T I ON ![]() PARENT CONTROL ES ENERGY SAVE
PARENT CONTROL ES ENERGY SAVE
![]()
![]()
![]() SE T UP
SE T UP
(MAIN MENU screen)
3Press VOL k/l to access the SET UP screen, then press CH a/s to move the “E” mark to “SCREEN FORMAT”.
→
CH
CH
SE T | UP |
|
BL UE | SCREEN | |
PERSONAL | PREF. | |
UN I VERSAL | PL US | |
L ANGUAGE CH SET T I NG AUTO I NPUT
CH / I NPUT I D
![]() SCREEN FORMAT
SCREEN FORMAT
(SET UP screen)
4Press VOL k/l to access the SCREEN FORMAT select screen.
SCREEN FORMAT
![]() 4 : 3 1 6 : 9
4 : 3 1 6 : 9
(SCREEN FORMAT select screen)
5Press CH a/s to select “4:3” or “16:9”.
SCREEN FORMAT
![]() 4 : 3 1 6 : 9
4 : 3 1 6 : 9
CH
CH
6Press MENU to exit.
Note:
MENU
The 16:9 screen format will be cancelled when the power is turned off.
Example:
While in 4:3 mode, if the picture appears stretched vertically as in screen A below, switch to 16:9 mode. The picture will return to normal as shown in screen B.
| Screen A (4:3) | Screen B (16:9) |
|
| 37 |
37 | 03.3.5, 3:04 PM |
Dimension: 140 X 215 mm