Specifications
General
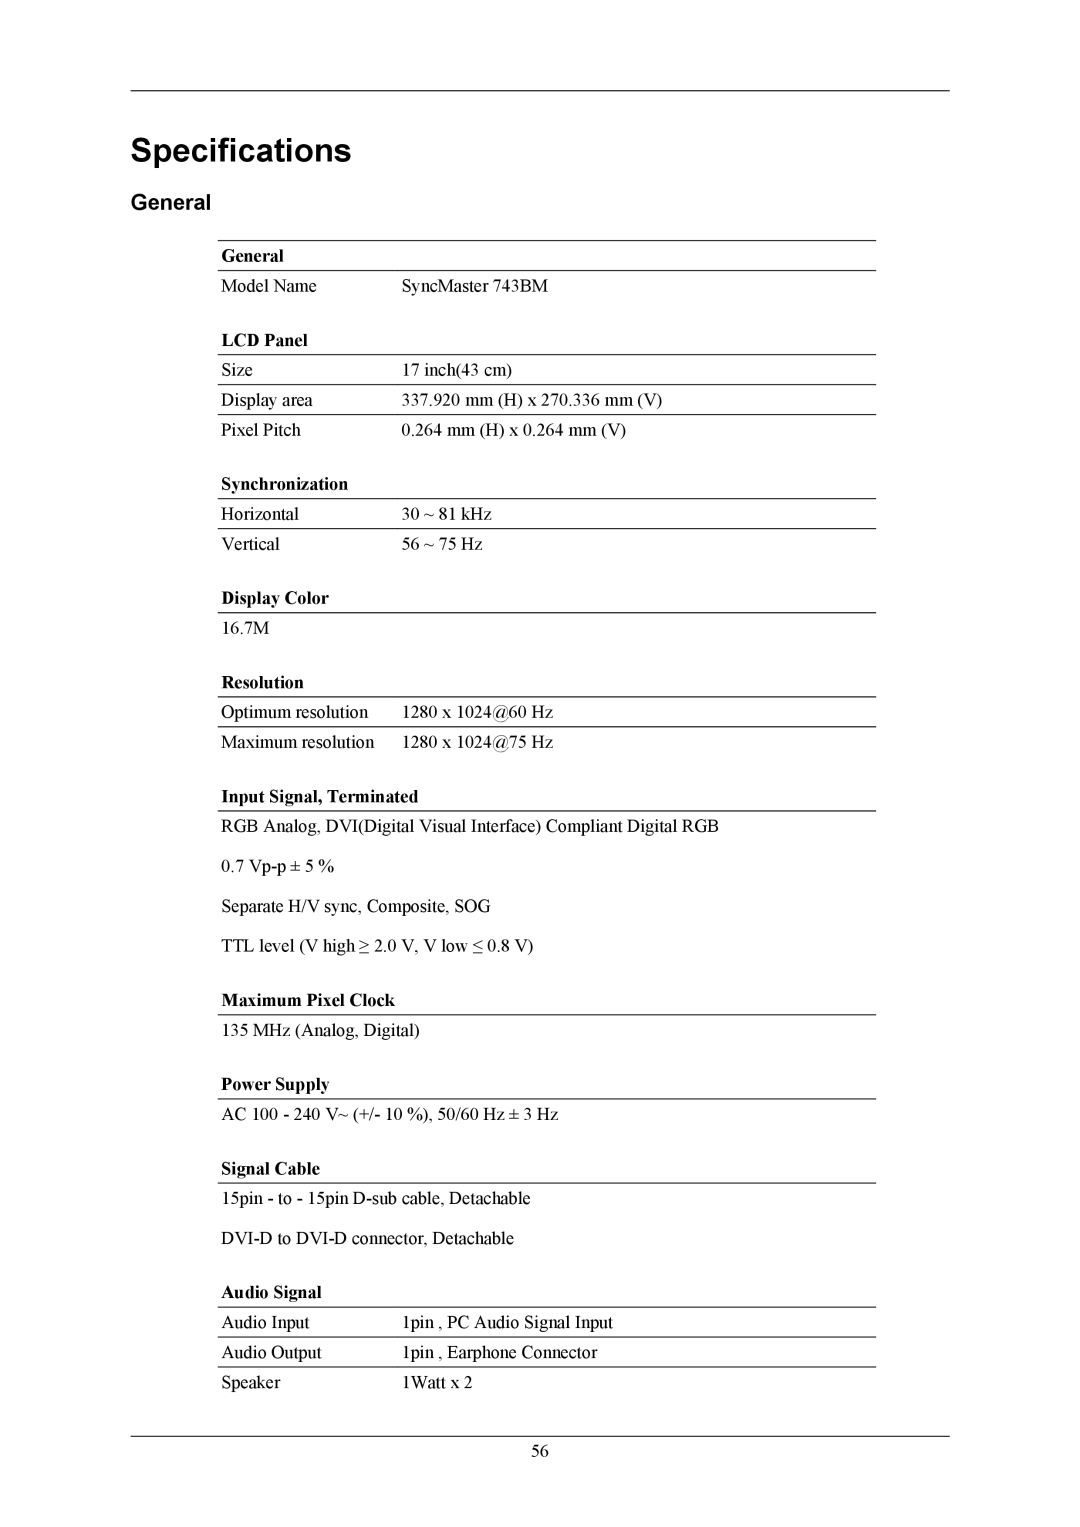
General
Model Name | SyncMaster 743BM |
LCD Panel |
|
|
|
Size | 17 inch(43 cm) |
|
|
Display area | 337.920 mm (H) x 270.336 mm (V) |
|
|
Pixel Pitch | 0.264 mm (H) x 0.264 mm (V) |
Synchronization |
|
|
|
Horizontal | 30 ~ 81 kHz |
|
|
Vertical | 56 ~ 75 Hz |
Display Color |
|
|
|
16.7M |
|
Resolution |
|
|
|
Optimum resolution | 1280 x 1024@60 Hz |
|
|
Maximum resolution | 1280 x 1024@75 Hz |
Input Signal, Terminated
RGB Analog, DVI(Digital Visual Interface) Compliant Digital RGB
0.7
Separate H/V sync, Composite, SOG
TTL level (V high ≥ 2.0 V, V low ≤ 0.8 V)
Maximum Pixel Clock
135 MHz (Analog, Digital)
Power Supply
AC 100 - 240 V~ (+/- 10 %), 50/60 Hz ± 3 Hz
Signal Cable
15pin - to - 15pin
Audio Signal
Audio Input | 1pin , PC Audio Signal Input |
Audio Output | 1pin , Earphone Connector |
|
|
Speaker | 1Watt x 2 |
56