BD-HP25U
Safety Information
Additional Safety Information
Introduction
Important Safety Instructions
Precautions on viewing stereoscopic 3D images
Precautions when cleaning this product
Precautions on using Wireless LAN
Optional accessories Selecting equipment to connect
Playing back video/picture/music content
Adjust settings to suit your preference
Getting Started
Contents
Contents
Settings pp
Streaming content pp
What to do first
What would you like to do with this Player?
Disc Type Recording Contents Format Size
About Media Types
Blu-ray Disc
Media Format
Discs that Cannot Be Used with This Player
About Media Types
About the Jpeg file format
About the MP3 file format
About Disc Contents
Icons Used on BD/DVD Video Disc Cases
Disc Precautions
Important Information
License and Copyright
Major Components
Main Unit Front Main Unit Rear
Remote Control Unit
Major Components
Keylock function
Connecting to a TV/projector
After connecting
Connection
Projector TV
Connecting to an amplifier/AV receiver
Hdmi connection
Digital audio connection
Amplifier/AV receiver
Wired connection LAN cable
Broadband Internet Connection
Internet Modem Broadband router
Wireless connection wireless LAN
Optional accessories
Perform the communication settings. Pages
Wireless Modem Internet Router
Loading the Batteries in the Remote Control
Connecting the Power Cord
Remote control
Before Starting Playback
Turning the Power On
Turning the power on
Indicators on the Player
Entering standby
Language Setting
Operating a Sharp TV Using the Remote Control
Changing the on-screen display language
TV function control
Using Aquos Link
Controlling the Blu-ray disc player using Aquos Link
Using 3D
Control Panel
Major functions of each button icon
Control Panel
Video/Picture/Music Playback
Loading a Disc
BD/DVD Video Playback
To stop playback
Using the disc menu
Displaying the disc information
BD/DVD Menus
Start playback by selecting a title from the top menu
Using the pop-up menu
Enjoying Bonusview or BD-LIVE
Press POP-UP Menu during playback
Rear
Virtual Package
To remove the secondary video, press PinP again
DVD-R/-RW VR format / BD-RE/-R
Playback by selecting a title
Bdav format Playback
About Title List
Sorting the titles
Playback from the beginning or resume playback
Operation procedure for the Functions menu
Audio CD Playback
Playback from the beginning
Playback by selecting a track
Audio Data MP3 File Playback
List of available buttons during playback
Press a/b to select Music, then press d or
Press a/b to select a folder or file
Displaying Still Images Jpeg files
Operational buttons during still image display
Press a/b to select Picture, then press d or
Press Enter to display the selected file
Accessing Dlna servers
Before accessing Dlna servers
Playback by selecting a file list
About a home network
When playing back a DVD
Playback Functions
Fast Forward/Reverse Search
Pause/Frame Advance Playback
Repeat Playback of a Title or Chapter Repeat Playback
Partial Repeat Playback Repeat Playback of a Specified Part
Playback Functions
Press Function
Switching Subtitles
Switching the Angle
Stereo is displayed. Audio cannot be switched
Displaying the Audio Information
Settings During Playback
Function control operation procedure
Function Control
Settings During Playback
Functions which can be set
Press a/b to select Settings, then press d or Enter
Settings
Common operations
Press a/b to select Aquos LINK, then press d or Enter
Basic Operation for Playback Setting
When setting the password for the first time
Audio Video Settings
Hdmi Video Out
Secondary Audio
Audio Out
Smart Settings
Playback Setting
On Screen Language
Version
System
Communication Setup
When selecting Cable
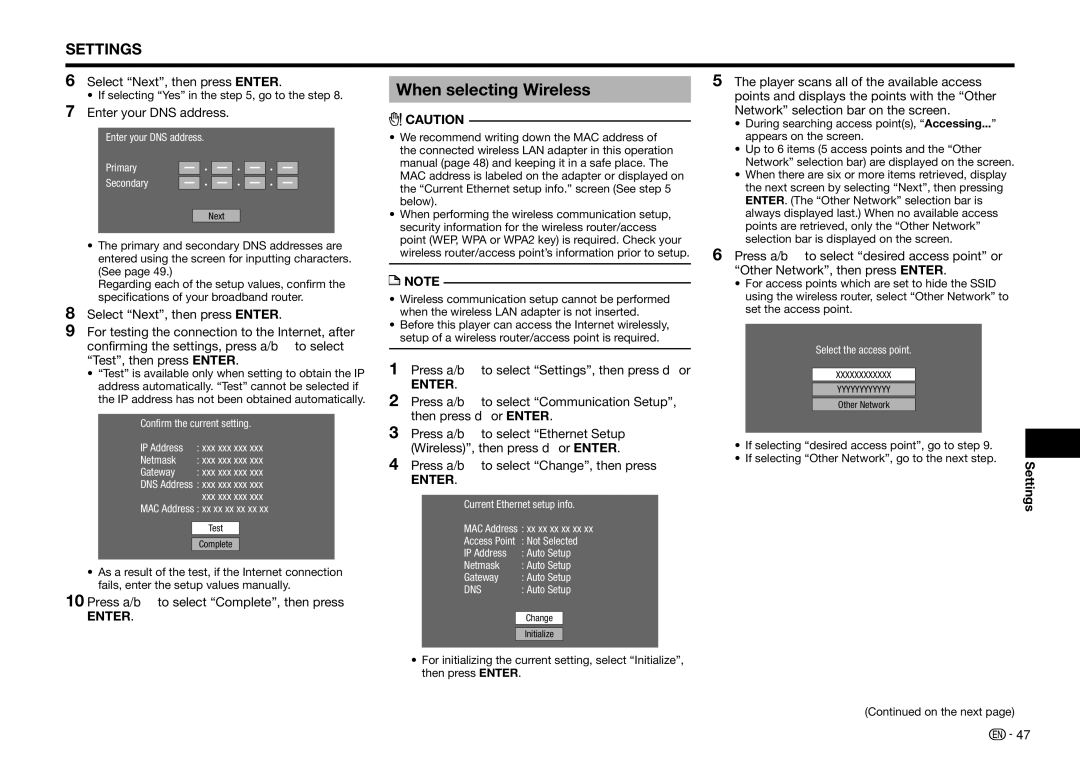
When selecting Wireless
Information on MAC addresses
Operation procedure for inputting characters manually
Input character list
Repeat to 5 to finish inputting all the required characters
Before using the USB memory device
USB Memory Management
Press a/b to select Erase or Format, then press Enter
Press a/b to select Yes, then press Enter
Software Update Settings
Auto Update from Network
Update process
Setup
Manual Update from Network
Manual Update from USB memory device
Press Power to turn off the player
To check for the availability of a software update
Enter the 4-digit number using
Front
Press Enter to start checking data in the USB memory device
During the data checking, Checking blinks
About Output of Next Generation Audio Formats
Remove the USB memory device
Next generation Maximum number
Audio formats Channels
Playing back video on demand streaming content
Playing back YouTube content
Instantly Watching Movies from Netflix
Playing back
Playing back streaming content
Troubleshooting Vudu
Enjoying Movies and Internet Application with Vudu
Operational buttons during playback
Troubleshooting
Power
Basic Operation
Playback
Troubleshooting Playback
Picture
Troubleshooting Sound
When the wired Internet connection is made
When the wireless Internet connection is made
Network
To Reset this Player
Troubleshooting Other
On-screen Error Messages
Error message Possible Error Suggested Solution
Specifications
Specifications are subject to change without notice
General
Input/Output
Glossary
Infrastructure mode
Glossary DTS-HD Master Audio Essential
DVD upscaling
DVD video pages 9
Glossary Pan Scan PS 43
Parental control
Subtitles pages
Time number
Network Service Disclaimer
About Software License
Information on the Software License for This Product
Software License Notice
Warranty Period for this Product
Warranty Coverage if any Where to Obtain Service
What to do to Obtain Service
Additional Items Excluded from
Limited Warranty
Congratulations on your purchase
Sharp Plaza, Mahwah, New Jersey

