OPERATING INSTRUCTIONS
INSTRUCTIONS D’UTILISATION
4.Tilt the bag forward as shown in Fig. 7.
Accessory Caddy
Located on the extension tube, the accessory caddy allows you to store your accessories within your reach. No more hunting for the dusting brush or crevice tool, the accessory caddy keeps your vacuum accessories at your fingertips. (Fig. 9)
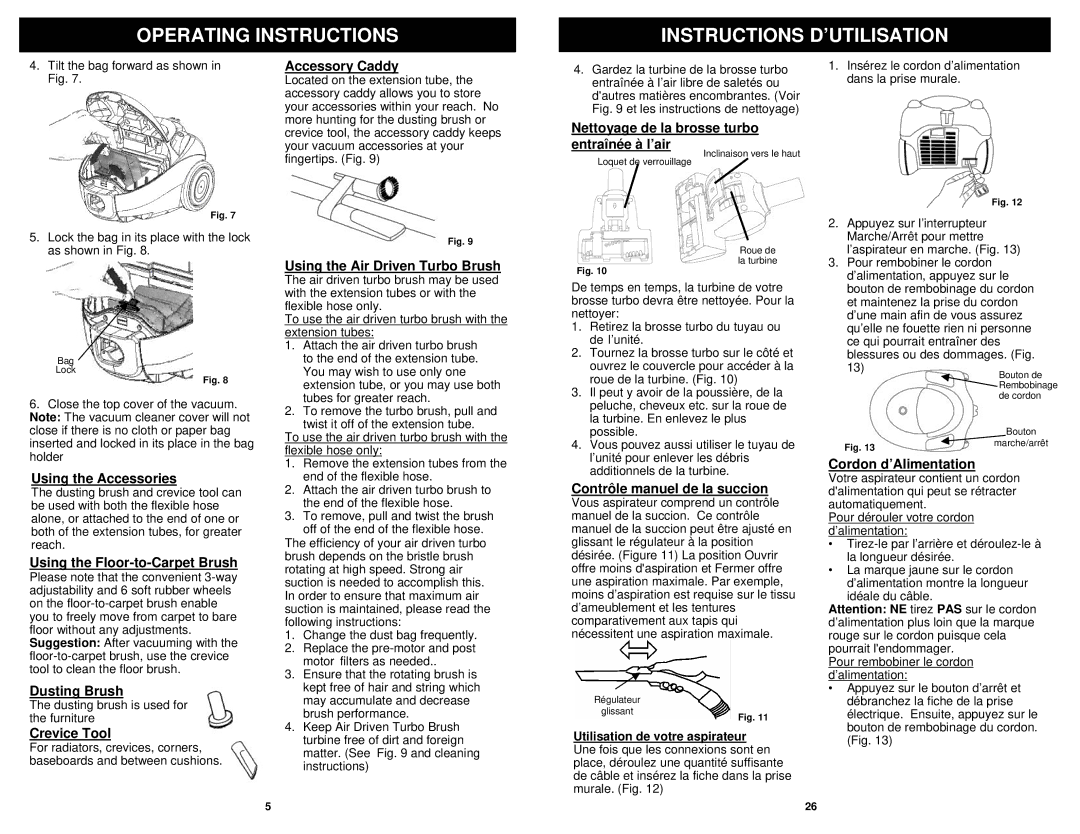
4.Gardez la turbine de la brosse turbo entraînée à l’air libre de saletés ou d'autres matières encombrantes. (Voir Fig. 9 et les instructions de nettoyage)
Nettoyage de la brosse turbo entraînée à l’air
Loquet de verrouillage
Fig. 7
5.Lock the bag in its place with the lock as shown in Fig. 8.
Bag
Lock
Fig. 8
6.Close the top cover of the vacuum. Note: The vacuum cleaner cover will not close if there is no cloth or paper bag inserted and locked in its place in the bag holder
Using the Accessories
The dusting brush and crevice tool can be used with both the flexible hose alone, or attached to the end of one or both of the extension tubes, for greater reach.
Using the Floor-to-Carpet Brush
Please note that the convenient
Dusting Brush
The dusting brush is used for the furniture
Crevice Tool
For radiators, crevices, corners, baseboards and between cushions.
Fig. 9
Using the Air Driven Turbo Brush
The air driven turbo brush may be used with the extension tubes or with the flexible hose only.
To use the air driven turbo brush with the extension tubes:
1.Attach the air driven turbo brush to the end of the extension tube. You may wish to use only one extension tube, or you may use both tubes for greater reach.
2.To remove the turbo brush, pull and
twist it off of the extension tube.
To use the air driven turbo brush with the flexible hose only:
1.Remove the extension tubes from the end of the flexible hose.
2.Attach the air driven turbo brush to the end of the flexible hose.
3.To remove, pull and twist the brush off of the end of the flexible hose.
The efficiency of your air driven turbo brush depends on the bristle brush rotating at high speed. Strong air suction is needed to accomplish this. In order to ensure that maximum air suction is maintained, please read the following instructions:
1.Change the dust bag frequently.
2.Replace the
3.Ensure that the rotating brush is kept free of hair and string which may accumulate and decrease brush performance.
4.Keep Air Driven Turbo Brush turbine free of dirt and foreign matter. (See Fig. 9 and cleaning instructions)
Fig. 10
De temps en temps, la turbine de votre brosse turbo devra être nettoyée. Pour la nettoyer:
1.Retirez la brosse turbo du tuyau ou de l’unité.
2.Tournez la brosse turbo sur le côté et ouvrez le couvercle pour accéder à la roue de la turbine. (Fig. 10)
3.Il peut y avoir de la poussière, de la peluche, cheveux etc. sur la roue de la turbine. En enlevez le plus possible.
4.Vous pouvez aussi utiliser le tuyau de l’unité pour enlever les débris additionnels de la turbine.
Contrôle manuel de la succion
Vous aspirateur comprend un contrôle manuel de la succion. Ce contrôle manuel de la succion peut être ajusté en glissant le régulateur à la position désirée. (Figure 11) La position Ouvrir offre moins d'aspiration et Fermer offre une aspiration maximale. Par exemple, moins d’aspiration est requise sur le tissu d’ameublement et les tentures comparativement aux tapis qui nécessitent une aspiration maximale.
Régulateur |
|
glissant | Fig. 11 |
|
Utilisation de votre aspirateur Une fois que les connexions sont en place, déroulez une quantité suffisante de câble et insérez la fiche dans la prise murale. (Fig. 12)
Votre aspirateur contient un cordon d'alimentation qui peut se rétracter automatiquement.
Pour dérouler votre cordon d’alimentation:
•
•La marque jaune sur le cordon d’alimentation montre la longueur
idéale du câble.
Attention: NE tirez PAS sur le cordon d’alimentation plus loin que la marque rouge sur le cordon puisque cela pourrait l'endommager.
Pour rembobiner le cordon d’alimentation:
•Appuyez sur le bouton d’arrêt et débranchez la fiche de la prise électrique. Ensuite, appuyez sur le bouton de rembobinage du cordon. (Fig. 13)
5
26