Main
Page
Dear SHARP customer Contents
OPERATION MANUAL
Introduction
Contents Watching TV (Continued)
Teletext function
Important Safety Precautions
Supplied accessories
Make sure the following accessories are provided with the product.
Trademarks
Preparation
2
Attaching the stand
Part names
TV (Front/Side)
TV (Rear)
Regarding the headphone jack
Page
Before turning on the power
CAUTION
19A35X_en_b.indd 1019A35X_en_b.indd 10 2008-2-29 10:07:022008-2-29 10:07:02
DVD player
Connecting a VCR, game console or camcorder
Page
Preparation
Cautions regarding the remote control unit
Inserting the batteries
Using the remote control unit
Turning on the power
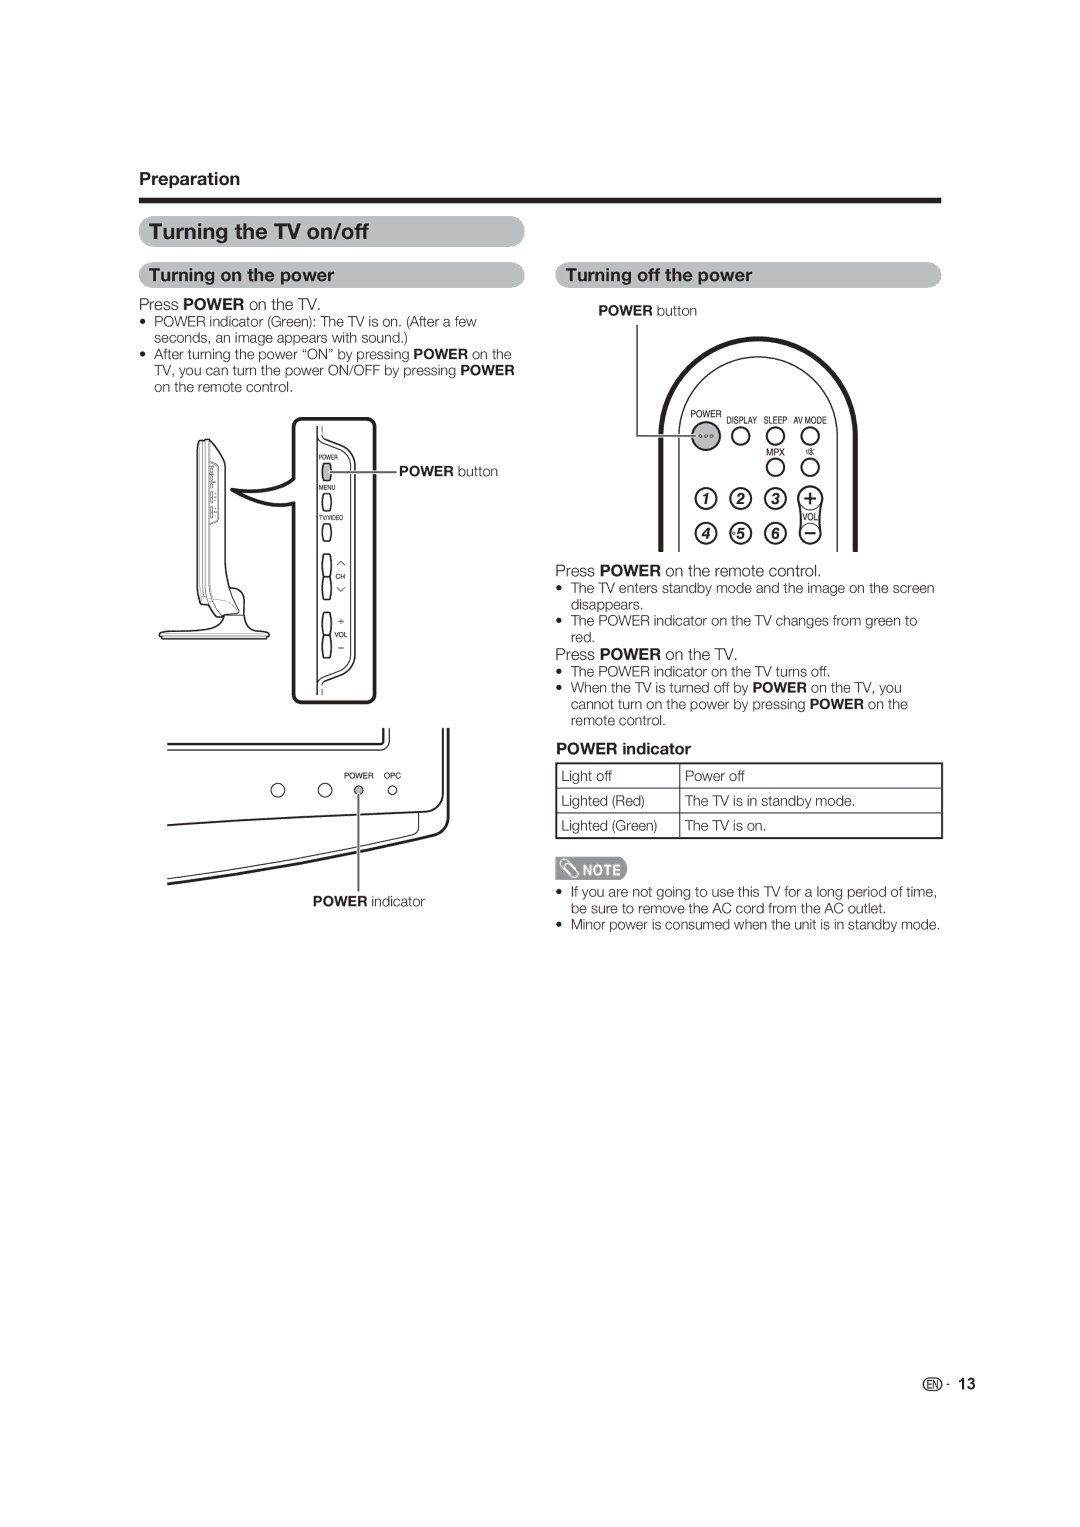
Press POWER on the TV.
Turning off the power
POWER indicator
About Menu operations
TV control panel buttons Remote control buttons TV/VIDEO ENTER CH ra CH sb VOL kd VOL lc
Basic Menu operations
What is Menu?
TV/AV input mode menu items
List of TV/AV menu items to help you with operations
PC input mode menu items
List of PC menu items to help you with operations
6
Watching TV
Setting channels automatically
20
12
Menu language settings
Selecting programmes Adjusting the volume
Setting channels to your preference
Auto search
Manual setting for each channel
Manual setting for each channel (continued)
Sorting programmes
Manual setting for each channel (continued)
Erasing programmes
Labelling programmes
Useful viewing functions
Freezing the image
Muting the audio temporarily
Outputting only audio
Switching the analogue audio format
Password setting for the child lock (For TV input mode)
Auto power-off at a designated time
Auto power-off when there are no operations performed
Auto power-off after the end of broadcast
Energy conservation settings
Power Management
Page
Selecting the picture size manually
WIDE MODE Normal Zoom 14:9 Panorama Full Cinema 16:9 Cinema 14:9
Press AV MODE.
Press AV MODE again before the mode displayed on the screen disappears.
Selecting a preset AV MODE
Using AV MODE on the remote control unit
Press MENU and the MENU screen displays.
Press c/d to select Picture.
Press a/b to select the desired menu item. Press ENTER to proceed if necessary.
w OPC (Optical Picture Control) setting
Picture adjustment
w Colour Temp. (Colour Temperature)
w C.M.S. (Colour Management System)
Advanced picture settings
w 3D-Y/C
w Film Mode
Other picture settings
DNR (Digital Noise Reduction)
Adjusting the image position
Rotating the image
Audio adjustment
Settings when using external devices
Settings when using HDMI output devices
Selecting input source
Labelling input sources
TV INPUT1 INPUT2 DVD
Colour system settings
Connecting a PC
Displaying a PC image on the screen
Use the PC terminals to connect a PC.
TV INPUT1 INPUT2 INPUT3 INPUT4
Signal names for 15-pin mini D-sub connector
Selecting the picture size
Press WIDE.
Press WIDE or a/b to select a desired item on the menu.
You can select the picture size as illustrated below.
WIDE MODE Normal Full
Adjusting the PC image automatically Adjusting the PC image manually
Selecting the input resolution
Input resolution settings
PC Control of the TV
Commands Commands not indicated here are not guaranteed to operate.
19A35X_en_g.indd 4219A35X_en_g.indd 42 2008-2-29 10:10:092008-2-29 10:10:09
If an underbar (_) appears in the parameter column, enter a space.
PC compatibility chart
Teletext function
About Teletext
Page
Teletext function
Teletext language setting
Troubleshooting
Appendix
Cautions regarding use in high and low temperature environments
Reset
Speci cations
Dimensional drawings