Setting up the PC

Setting up the PC

To use the touch panel, the touch panel driver must be installed from the supplied CD-ROM and the touch panel must be connected to your PC.

Installing the touch panel driver

The touch panel driver is a program that enables you to use the touch panel to operate the PC that is connected to the touch panel.

Installing the touch panel driverCaution

This can only be done by a user with administrator authority.

If an older version of the touch panel driver is installed, remove (uninstall) the old version before installing the touch panel driver. (See page 8.)

If you are using a USB hub, use a self-powered hub (a hub capable of supplying a 500 mA current). The touch panel will not operate correctly if a bus-powered USB hub is used.

Do not touch the touch panel when connecting the USB cable.

If you touch the touch panel, this may be detected as an element failure in the infrared transmitter/receiver and malfunctioning will result. In this case, disconnect and then reconnect the USB cable.

1.Start your PC.

2.Exit all applications that are running.

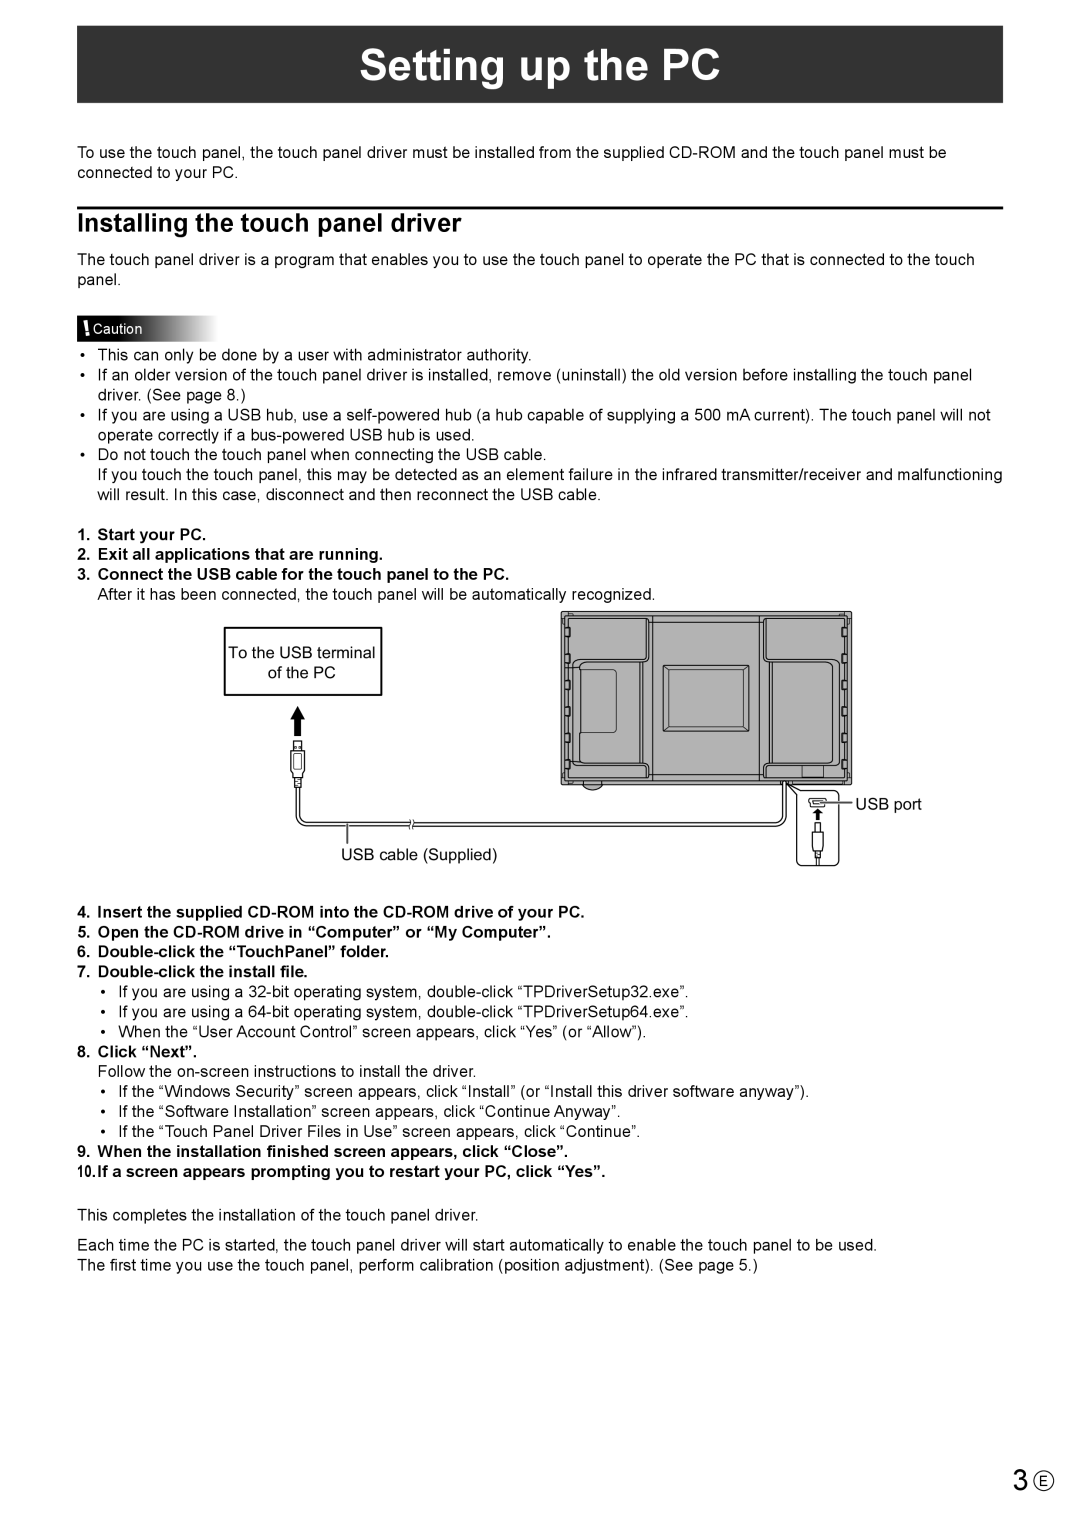
3.Connect the USB cable for the touch panel to the PC.

After it has been connected, the touch panel will be automatically recognized.

To the USB terminal

of the PC

Manual background USB port

USB cable (Supplied)

4.Insert the supplied CD-ROM into the CD-ROM drive of your PC.

5.Open the CD-ROM drive in “Computer” or “My Computer”.

6.Double-click the “TouchPanel” folder.

7.Double-click the install file.

If you are using a 32-bit operating system, double-click “TPDriverSetup32.exe”.

If you are using a 64-bit operating system, double-click “TPDriverSetup64.exe”.

When the “User Account Control” screen appears, click “Yes” (or “Allow”).

8.Click “Next”.

Follow the on-screen instructions to install the driver.

If the “Windows Security” screen appears, click “Install” (or “Install this driver software anyway”).

If the “Software Installation” screen appears, click “Continue Anyway”.

If the “Touch Panel Driver Files in Use” screen appears, click “Continue”.

9.When the installation finished screen appears, click “Close”.

10.If a screen appears prompting you to restart your PC, click “Yes”.

This completes the installation of the touch panel driver.

Each time the PC is started, the touch panel driver will start automatically to enable the touch panel to be used. The first time you use the touch panel, perform calibration (position adjustment). (See page 5.)

3 E

Page 3
Image 3
Sharp PN-L702B operation manual Setting up the PC, Installing the touch panel driver

PN-L702B specifications

The Sharp PN-L802B, PN-L602B, PN-L702B, and PNL802B and PNL602B are a series of cutting-edge interactive displays that focus on enhancing collaboration and communication in various settings, including educational institutions, corporate environments, and creative studios. These models are designed to transform the way users engage with content, enabling seamless collaboration and improving overall productivity.

One of the standout features of the Sharp PN-L series is its large-sized display technology, with models such as the PN-L802B boasting an impressive 80-inch diagonal screen and the PN-L602B offering a 60-inch option. These expansive screens provide vivid visuals with 4K Ultra HD resolution, delivering stunning clarity and detail that captivates viewers. The enhanced brightness and wide viewing angles ensure that content is easily viewable from various positions in the room.

Touch technology is another defining characteristic of the Sharp PN-L series. The displays utilize advanced infrared touch technology, allowing for up to 10 points of simultaneous touch. This multi-touch capability enables multiple users to interact with the display at the same time, fostering a dynamic and interactive experience for collaboration and brainstorming sessions. The seamless touch responsiveness enhances user engagement, making it easier to navigate content and annotate directly on the screen.

The models also come equipped with Sharp's powerful software solutions, such as the easy-to-use Sharp Pen Software, which allows users to write and draw directly on the screen, making annotations and modifications in real-time. Additionally, the displays support various connectivity options, including HDMI, USB-C, and wireless sharing, facilitating easy integration with other devices and systems.

Moreover, the PN-L series is designed with a focus on durability and ease of use. The anti-glare surface reduces reflections and distractions, while the ergonomic design ensures that the displays can be easily installed at convenient heights for user interaction. Enhanced security features are also built in, safeguarding content and user data.

In summary, the Sharp PN-L802B, PN-L602B, PN-L702B, PNL802B, and PNL602B bring together large-scale interactive technology, rich visuals, and collaborative features that set a new standard for interactive displays. Their versatility and advanced capabilities make them an ideal choice for any environment where teamwork and communication are pivotal.