BEFORE OPERATING
Getting Started
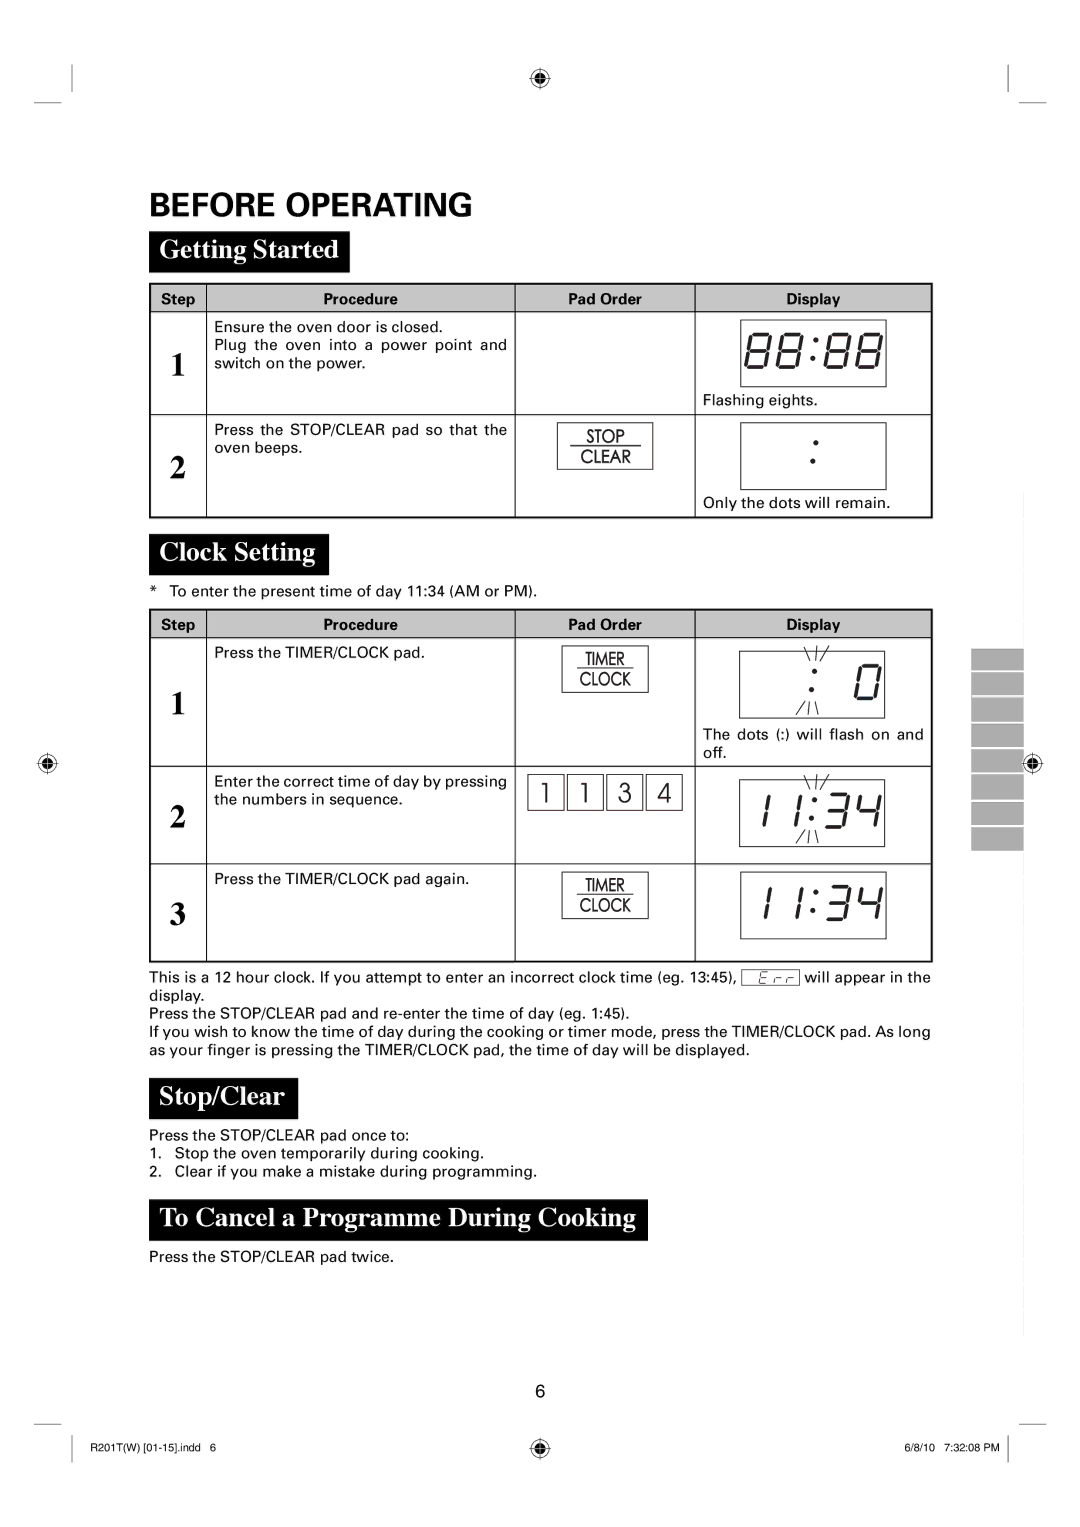
Step | Procedure | Pad Order |
| Display | |
| Ensure the oven door is closed. |
|
|
|
|
|
|
|
|
| |
1 | Plug the oven into a power point and |
|
|
|
|
switch on the power. |
|
|
|
| |
|
|
|
|
|
|
|
|
| Flashing eights. | ||
Press the STOP/CLEAR pad so that the oven beeps.
2
Only the dots will remain.
Clock Setting
* To enter the present time of day 11:34 (AM or PM).
Step | Procedure | Pad Order | Display |
1
2
3
Press the TIMER/CLOCK pad.
The dots (:) will flash on and off.
Enter the correct time of day by pressing the numbers in sequence.
Press the TIMER/CLOCK pad again.
This is a 12 hour clock. If you attempt to enter an incorrect clock time (eg. 13:45), |
| will appear in the |
display.
Press the STOP/CLEAR pad and
If you wish to know the time of day during the cooking or timer mode, press the TIMER/CLOCK pad. As long as your finger is pressing the TIMER/CLOCK pad, the time of day will be displayed.
Stop/Clear
Press the STOP/CLEAR pad once to:
1.Stop the oven temporarily during cooking.
2.Clear if you make a mistake during programming.
To Cancel a Programme During Cooking
Press the STOP/CLEAR pad twice.
6
R201T(W)
6/8/10 7:32:08 PM