XG-MB55X, XR-20X, XR-10S, XR-10X, XR-20S specifications
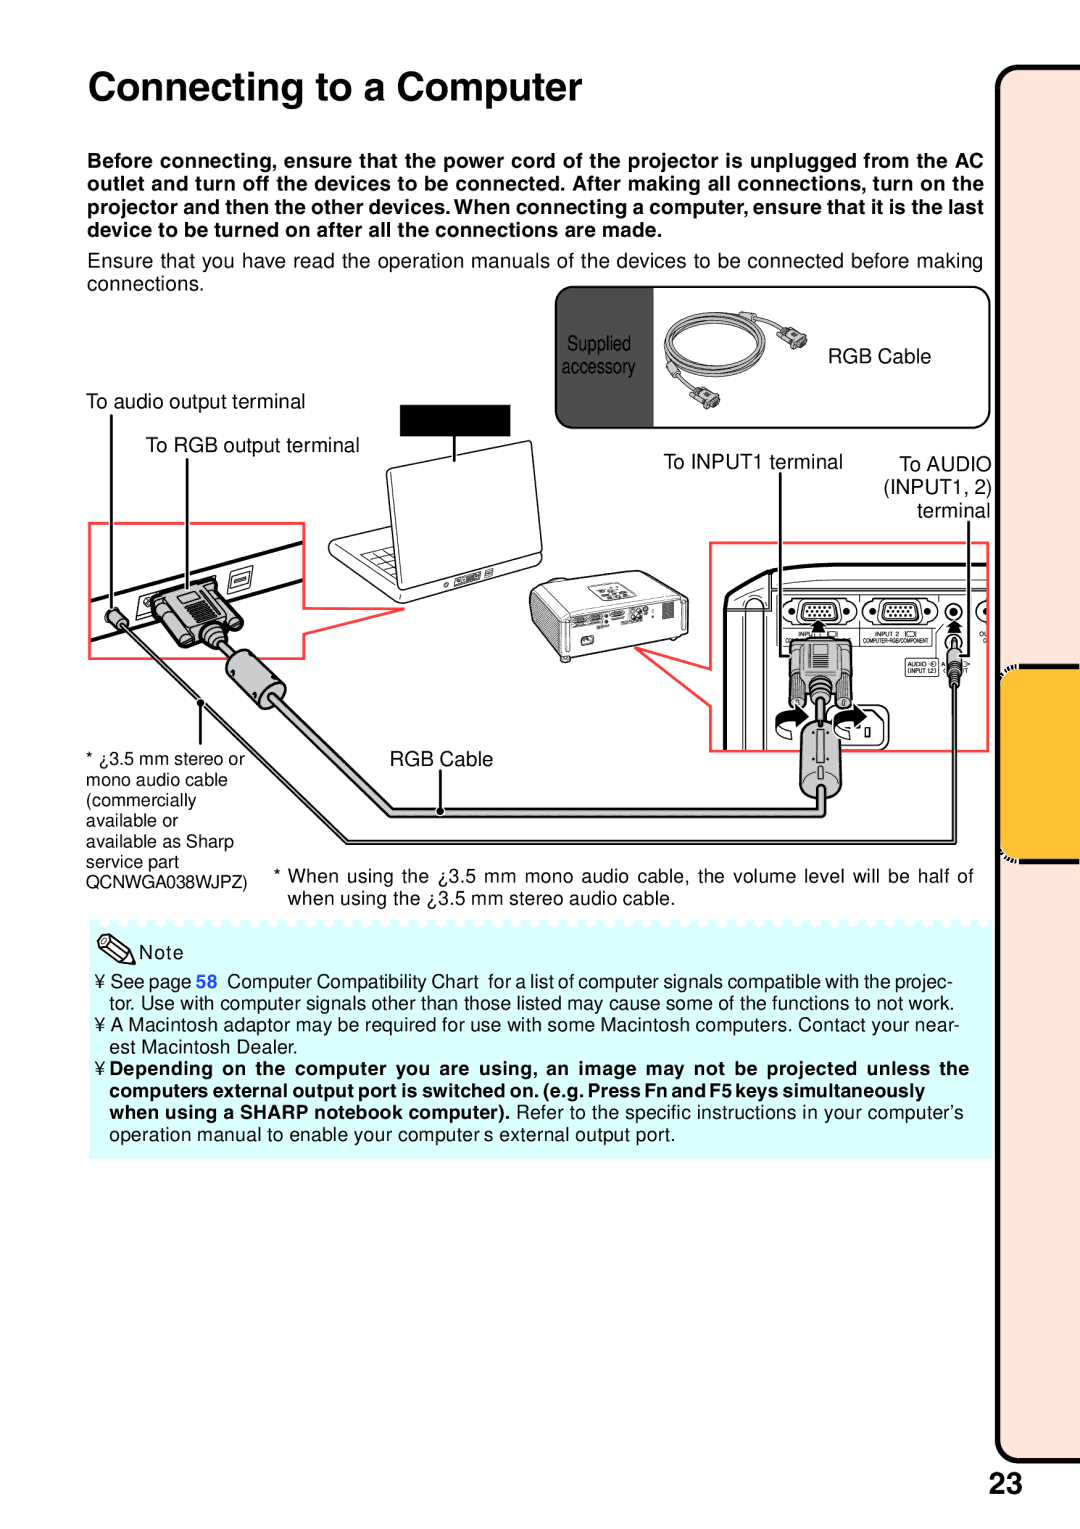
The Sharp XR-10X, XR-20S, XR-10S, XR-20X, and XG-MB55X are a series of advanced projectors that have garnered attention for their impressive features and technologies. These projectors cater to various needs, from educational settings to corporate environments and even home theaters.The Sharp XR-10X and XR-10S are part of the compact and lightweight range, ideal for portability. With their impressive brightness levels reaching up to 2200 lumens, they offer clear and vibrant images even in well-lit rooms. Both models utilize DLP technology, which results in high contrast ratios and rich color reproduction. The XR-10S includes enhanced connectivity options, featuring multiple inputs such as HDMI, VGA, and composite, making it adaptable to various devices.
The XR-20S and XR-20X take performance up a notch, boasting a higher brightness of up to 3000 lumens. This makes them suitable for larger rooms and professional presentations. Their additional features include built-in speakers, enabling users to deliver audio without needing external equipment. The XR-20X also comes equipped with advanced image processing technologies, ensuring sharper and clearer visuals, along with an expanded color gamut.
The XG-MB55X stands out as a higher-end model, designed for more sophisticated environments. It offers exceptional resolution and advanced imaging technologies such as 3D compatibility, making it perfect for immersive presentations and cinematic experiences. Its high brightness capability, along with a robust lamp life, ensures reliability and reduced maintenance costs.
One of the key characteristics shared across these models is their user-friendly interface and intuitive controls, allowing for quick setup and adjustment. Each projector features keystone correction and zoom capabilities, which facilitate flexible placement and enhance installation ease.
In addition, the projectors are designed with energy efficiency in mind, promoting lower power consumption without sacrificing performance. Their lightweight design also ensures mobility, making them ideal for users who frequently move between locations.
Overall, the Sharp XR-10X, XR-20S, XR-10S, XR-20X, and XG-MB55X projectors provide excellent image quality, versatile connectivity, and user-friendly features, making them suitable for a wide range of applications. Whether for educational purposes, business presentations, or home entertainment, these projectors deliver outstanding performance and reliability.

