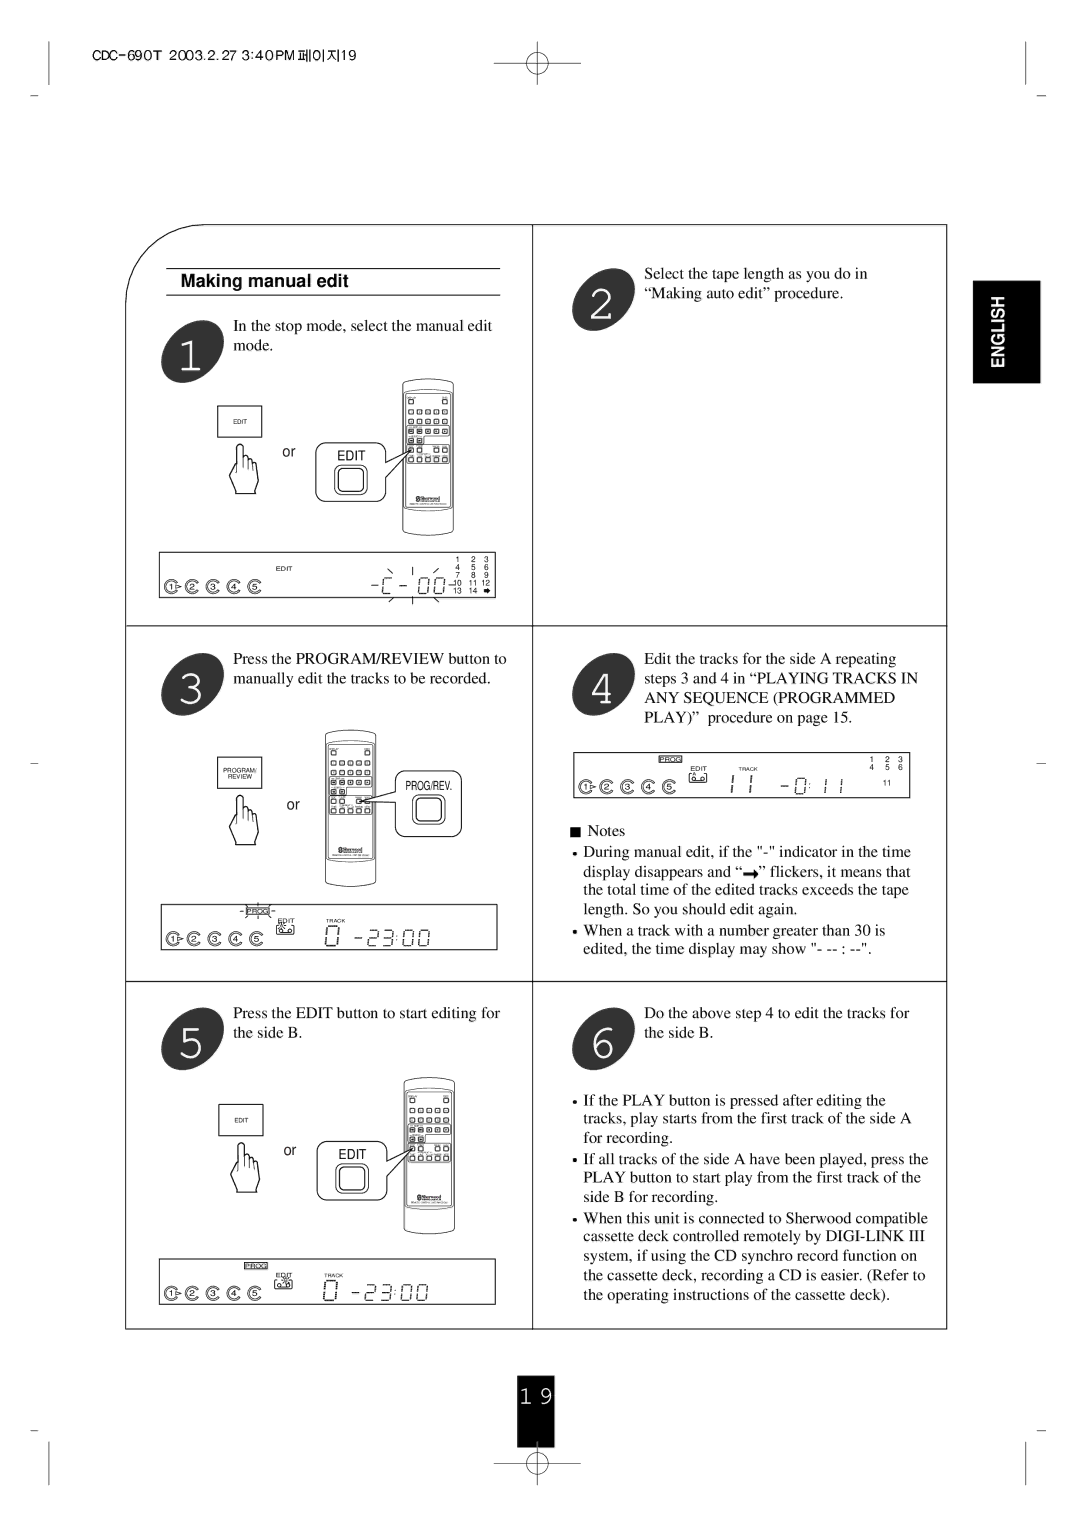
Making manual edit
In the stop mode, select the manual edit
1 mode.
|
|
|
|
|
| DISPLAY |
|
|
| DISC |
|
|
|
|
|
|
|
| 1 | 2 | 3 | 4 | 5 |
|
|
|
|
| EDIT |
|
| 6 | 7 | 8 | 9 | 0 |
|
|
|
|
|
|
|
| SKIP |
|
|
|
|
| |
|
|
|
|
|
| SEARCH |
|
|
|
|
| |
|
|
|
| or |
| EDIT | T.SIZE |
| PROG/REV. DEL/REV. |
|
| |
|
|
|
| EDIT |
| REPEAT |
|
|
|
| ||
|
|
|
| TIME | 1/ALL |
|
| |||||
|
|
|
|
|
| REMOTE CONTROL UNIT |
|
| ||||
|
|
|
|
|
|
|
|
|
| 1 | 2 | 3 |
|
|
|
| EDIT |
|
|
|
|
| 4 | 5 | 6 |
|
|
|
|
|
|
|
|
|
| 7 | 8 | 9 |
1 | 2 | 3 | 4 | 5 |
|
|
|
|
| 10 | 11 12 | |
|
|
|
|
| 13 | 14 |
| |||||
|
|
|
|
|
|
|
|
|
|
| ||
Press the PROGRAM/REVIEW button to
3 manually edit the tracks to be recorded.
DISPLAYDISC
Select the tape length as you do in
2 “Making auto edit” procedure.
Edit the tracks for the side A repeating
4 steps 3 and 4 in “PLAYING TRACKS IN ANY SEQUENCE (PROGRAMMED PLAY)” procedure on page 15.
ENGLISH
| 1 | 2 | 3 | 4 | 5 |
PROGRAM/ | 6 | 7 | 8 | 9 | 0 |
REVIEW |
| SKIP |
|
| PROG/REV. |
| SEARCH |
|
| ||
or | EDIT T.SIZE |
| PROG/REV. DEL/REV. | ||
| REPEAT |
|
| ||
| TIME 1/ALL | ||||
| REMOTE CONTROL UNIT | ||||
PROG |
|
|
|
|
|
EDIT | TRACK |
|
|
| |
A |
|
|
|
|
|
1 2 3 4 5 |
|
|
|
| : |
PROG |
| 1 | 2 | 3 |
EDIT | TRACK | 4 | 5 | 6 |
A |
|
|
|
|
1 2 3 4 5 |
| : | 11 |
|
![]() Notes
Notes
![]() During manual edit, if the
During manual edit, if the ![]() ” flickers, it means that the total time of the edited tracks exceeds the tape length. So you should edit again.
” flickers, it means that the total time of the edited tracks exceeds the tape length. So you should edit again.
![]() When a track with a number greater than 30 is edited, the time display may show "-
When a track with a number greater than 30 is edited, the time display may show "-
Press the EDIT button to start editing for
5 the side B.
|
| DISPLAY |
|
|
| DISC |
|
| 1 | 2 | 3 | 4 | 5 |
EDIT |
| 6 | 7 | 8 | 9 | 0 |
|
| SKIP |
|
|
| |
|
| SEARCH |
|
|
| |
or |
| EDIT | T.SIZE |
| PROG/REV. DEL/REV. | |
EDIT |
| REPEAT |
|
| ||
TIME | 1/ALL | |||||
REMOTE CONTROL UNIT
PROG
EDIT | TRACK |
B |
|
1 2 3 4 5 | : |
Do the above step 4 to edit the tracks for
6 the side B.
![]() If the PLAY button is pressed after editing the tracks, play starts from the first track of the side A for recording.
If the PLAY button is pressed after editing the tracks, play starts from the first track of the side A for recording.
![]() If all tracks of the side A have been played, press the PLAY button to start play from the first track of the side B for recording.
If all tracks of the side A have been played, press the PLAY button to start play from the first track of the side B for recording.
![]() When this unit is connected to Sherwood compatible cassette deck controlled remotely by
When this unit is connected to Sherwood compatible cassette deck controlled remotely by
1 9
